Installing a Chisel
Chisels come with or without collars. Figure 1 shows installation of a chisel without a collar (the included chisel is without a collar). Figure 2 shows installation of a chisel with a collar.
Note: If the Chisel doesn’t slide in easily, apply some grease on the loading end of the Chisel.
Without a Collar:
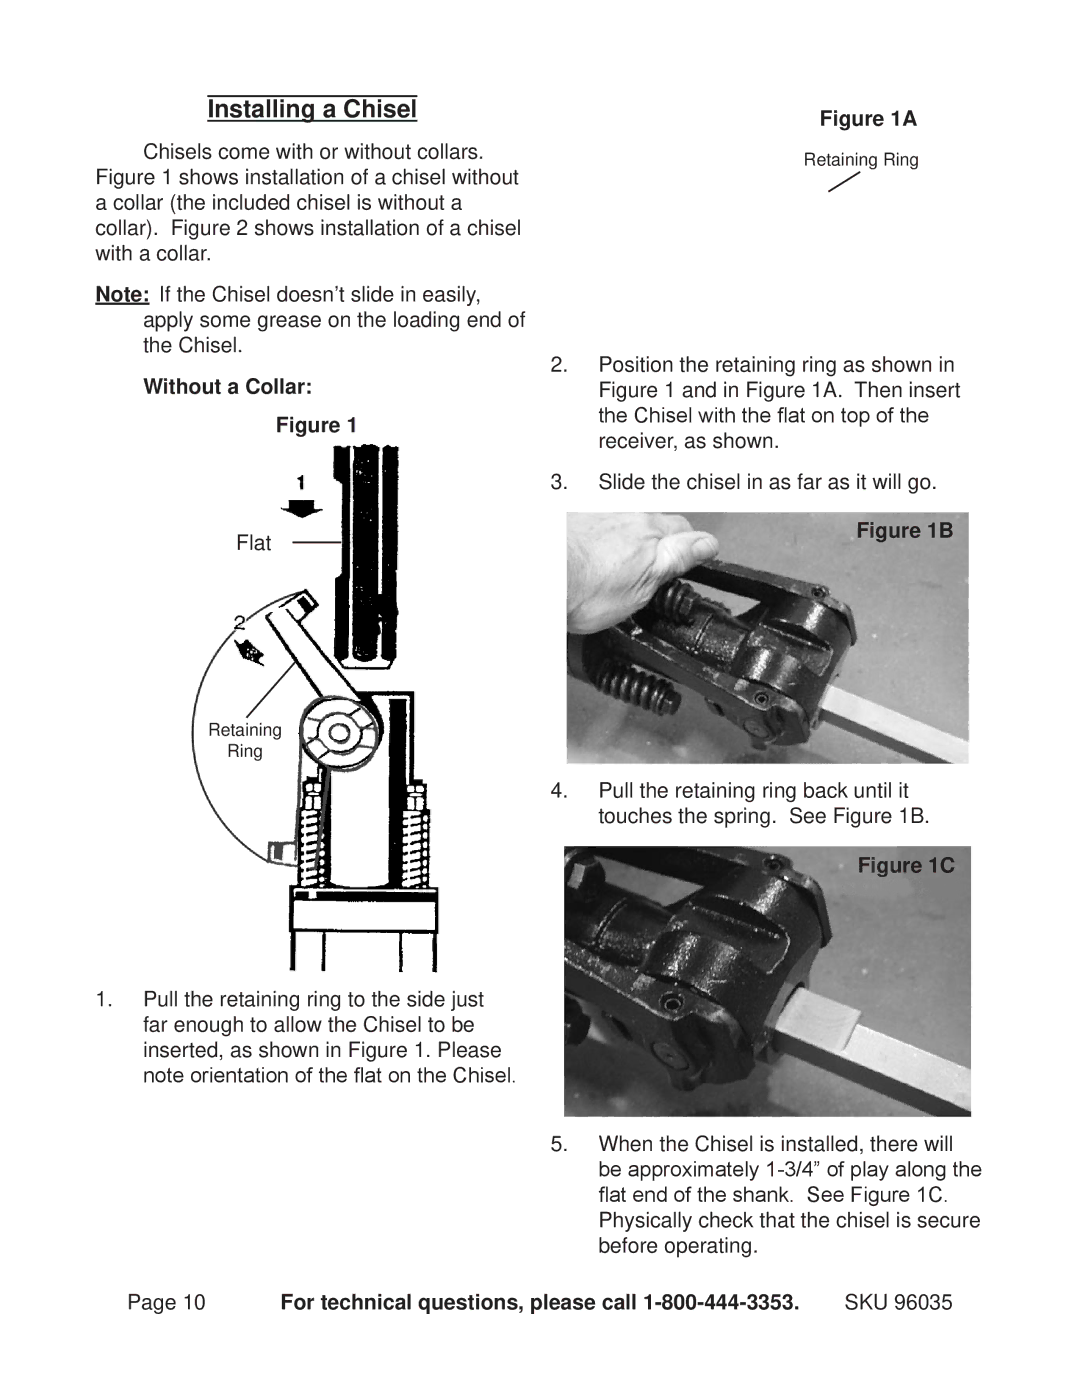
Figure 1
Flat
Figure 1A
Retaining Ring
2.Position the retaining ring as shown in Figure 1 and in Figure 1A. Then insert the Chisel with the flat on top of the receiver, as shown.
3.Slide the chisel in as far as it will go.
Figure 1B
Retaining
Ring
1.Pull the retaining ring to the side just far enough to allow the Chisel to be inserted, as shown in Figure 1. Please note orientation of the flat on the Chisel.
4.Pull the retaining ring back until it touches the spring. See Figure 1B.
Figure 1C
5.When the Chisel is installed, there will be approximately
Physically check that the chisel is secure before operating.
Page 10 | For technical questions, please call | SKU 96035 |