Installation Instructions
4
(E)
1
2
3
(D)
(F)
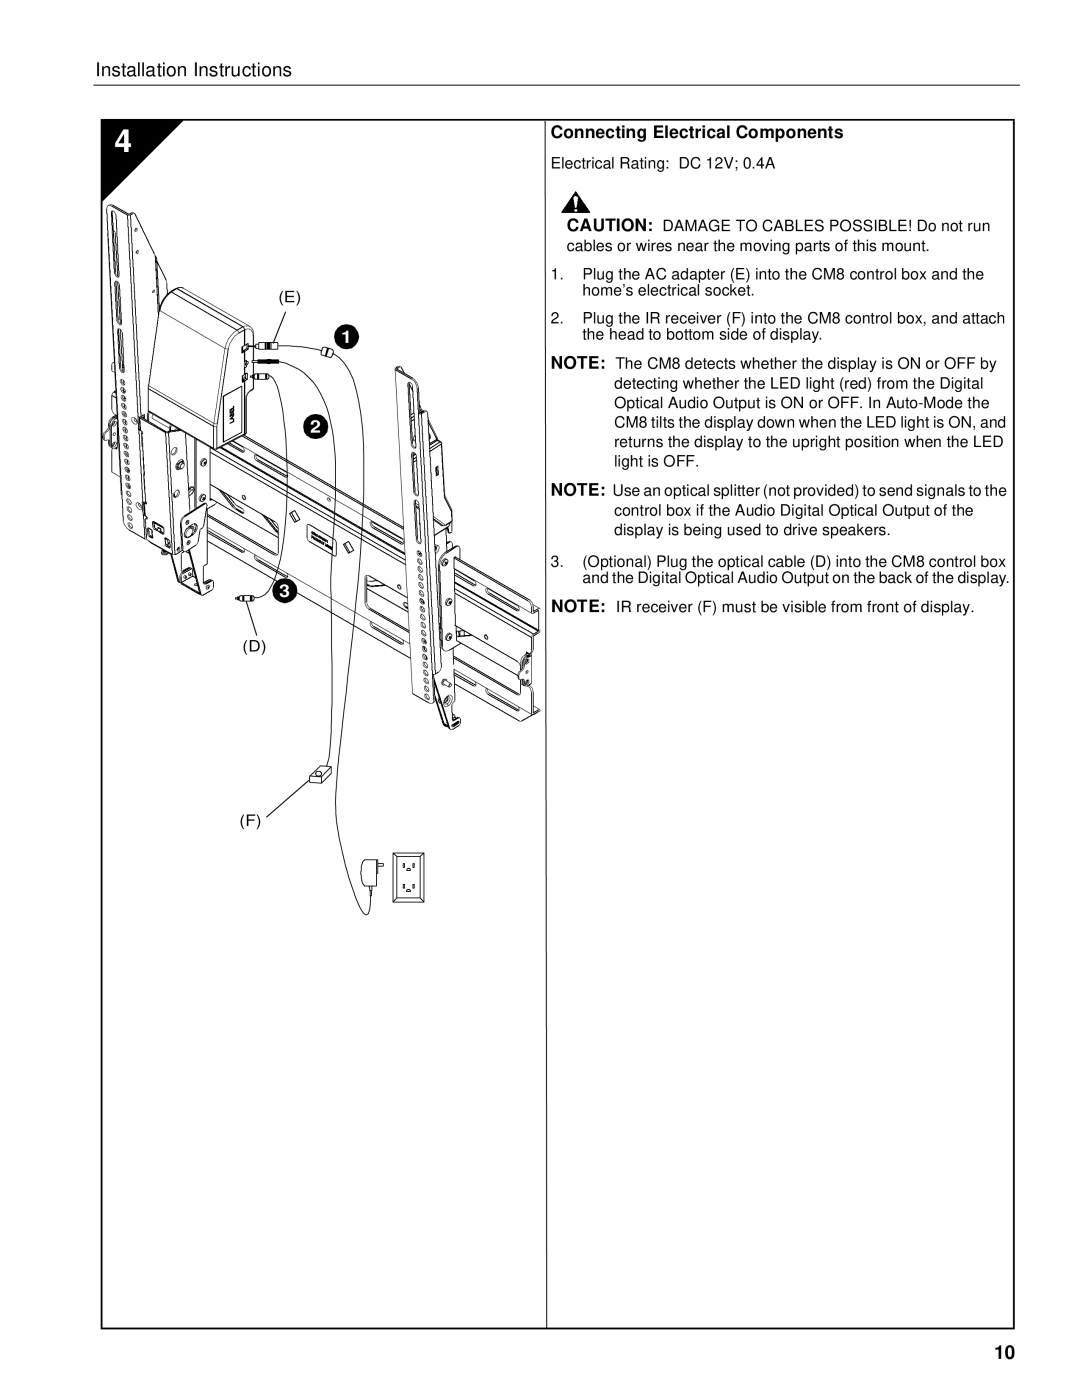
Connecting Electrical Components
Electrical Rating: DC 12V; 0.4A
CAUTION: DAMAGE TO CABLES POSSIBLE! Do not run cables or wires near the moving parts of this mount.
1.Plug the AC adapter (E) into the CM8 control box and the home’s electrical socket.
2.Plug the IR receiver (F) into the CM8 control box, and attach the head to bottom side of display.
NOTE: The CM8 detects whether the display is ON or OFF by detecting whether the LED light (red) from the Digital Optical Audio Output is ON or OFF. In
NOTE: Use an optical splitter (not provided) to send signals to the control box if the Audio Digital Optical Output of the display is being used to drive speakers.
3.(Optional) Plug the optical cable (D) into the CM8 control box and the Digital Optical Audio Output on the back of the display.
NOTE: IR receiver (F) must be visible from front of display.
10