Installation Instructions
1
1a3
x 4
3/16" (5mm)
(B)
5
x
2
5
(H1) x 4
4 | (H2) x 4 |
|
3
INSTALLATION
WARNING: IMPROPER INSTALLATION CAN LEAD TO MOUNT FALLING CAUSING SEVERE PERSONAL INJURY OR DAMAGE TO EQUIPMENT! It is the installers responsibility to make certain the structure to which the mount is being attached is capable of supporting five times the weight of the CM8 and all attached equipment not to exceed 150 lbs (68 kg).
NOTE: Instructions are included for installing the CM8 in a wood stud wall or a solid concrete wall application. Proceed to the appropriate section for further information.
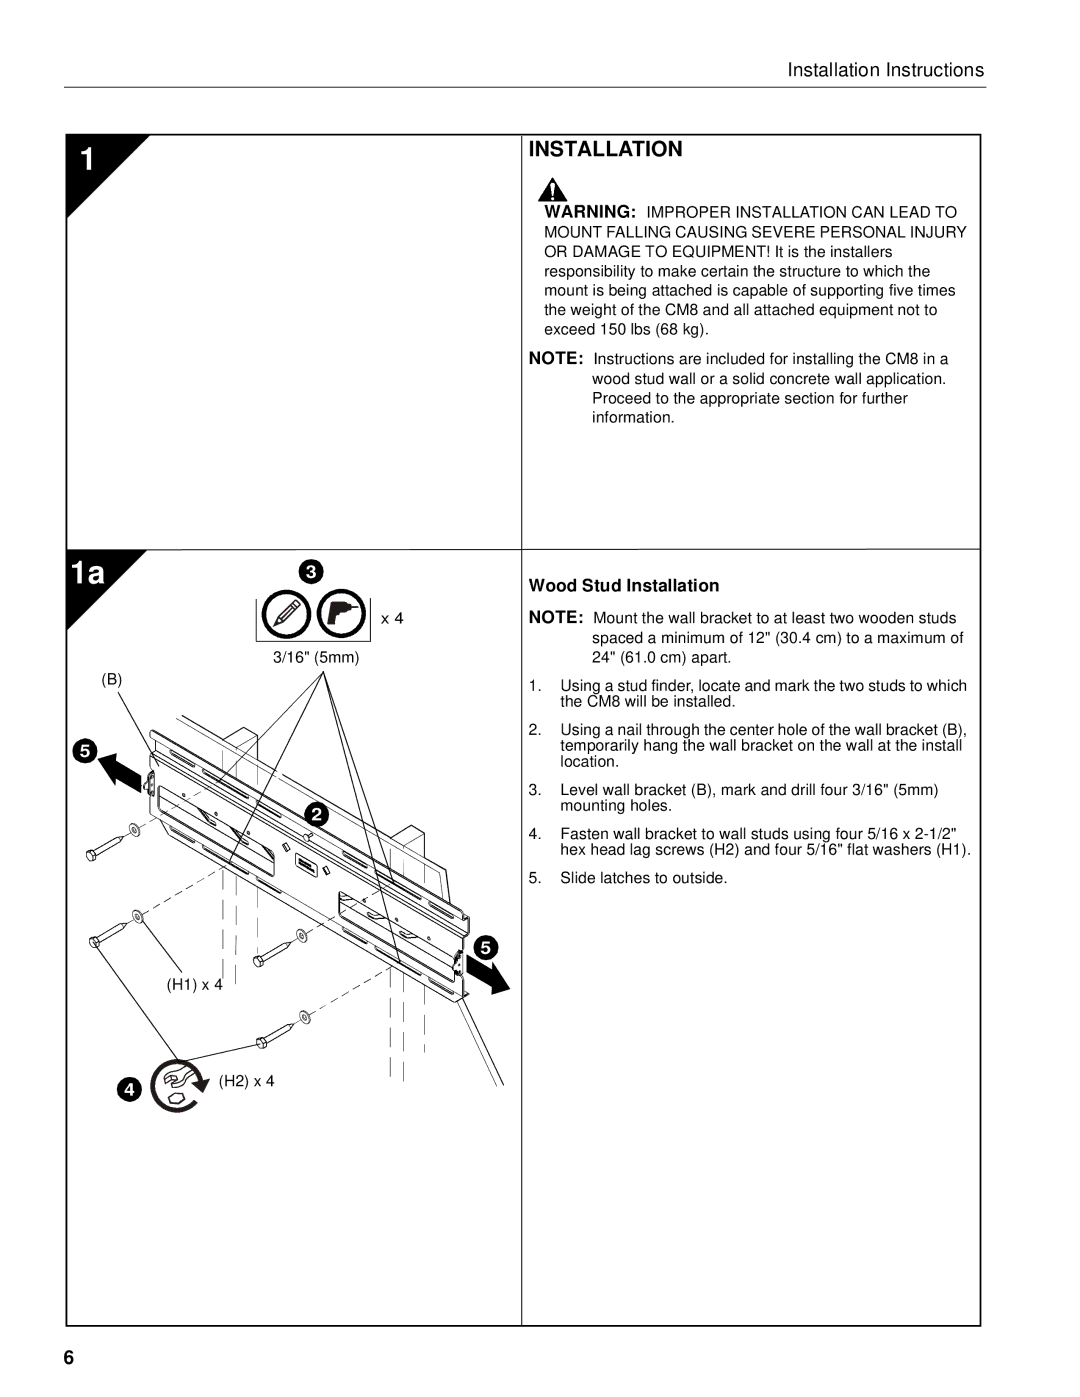
Wood Stud Installation
NOTE: Mount the wall bracket to at least two wooden studs spaced a minimum of 12" (30.4 cm) to a maximum of 24" (61.0 cm) apart.
1.Using a stud finder, locate and mark the two studs to which the CM8 will be installed.
2.Using a nail through the center hole of the wall bracket (B), temporarily hang the wall bracket on the wall at the install location.
3.Level wall bracket (B), mark and drill four 3/16" (5mm) mounting holes.
4.Fasten wall bracket to wall studs using four 5/16 x
5.Slide latches to outside.
6
