Part Names and Functions
Remote Control
e w q
r
t
!2
y![]()
![]()
![]() !1 u
!1 u![]()
!0
i![]()
![]()
![]()
![]() o
o
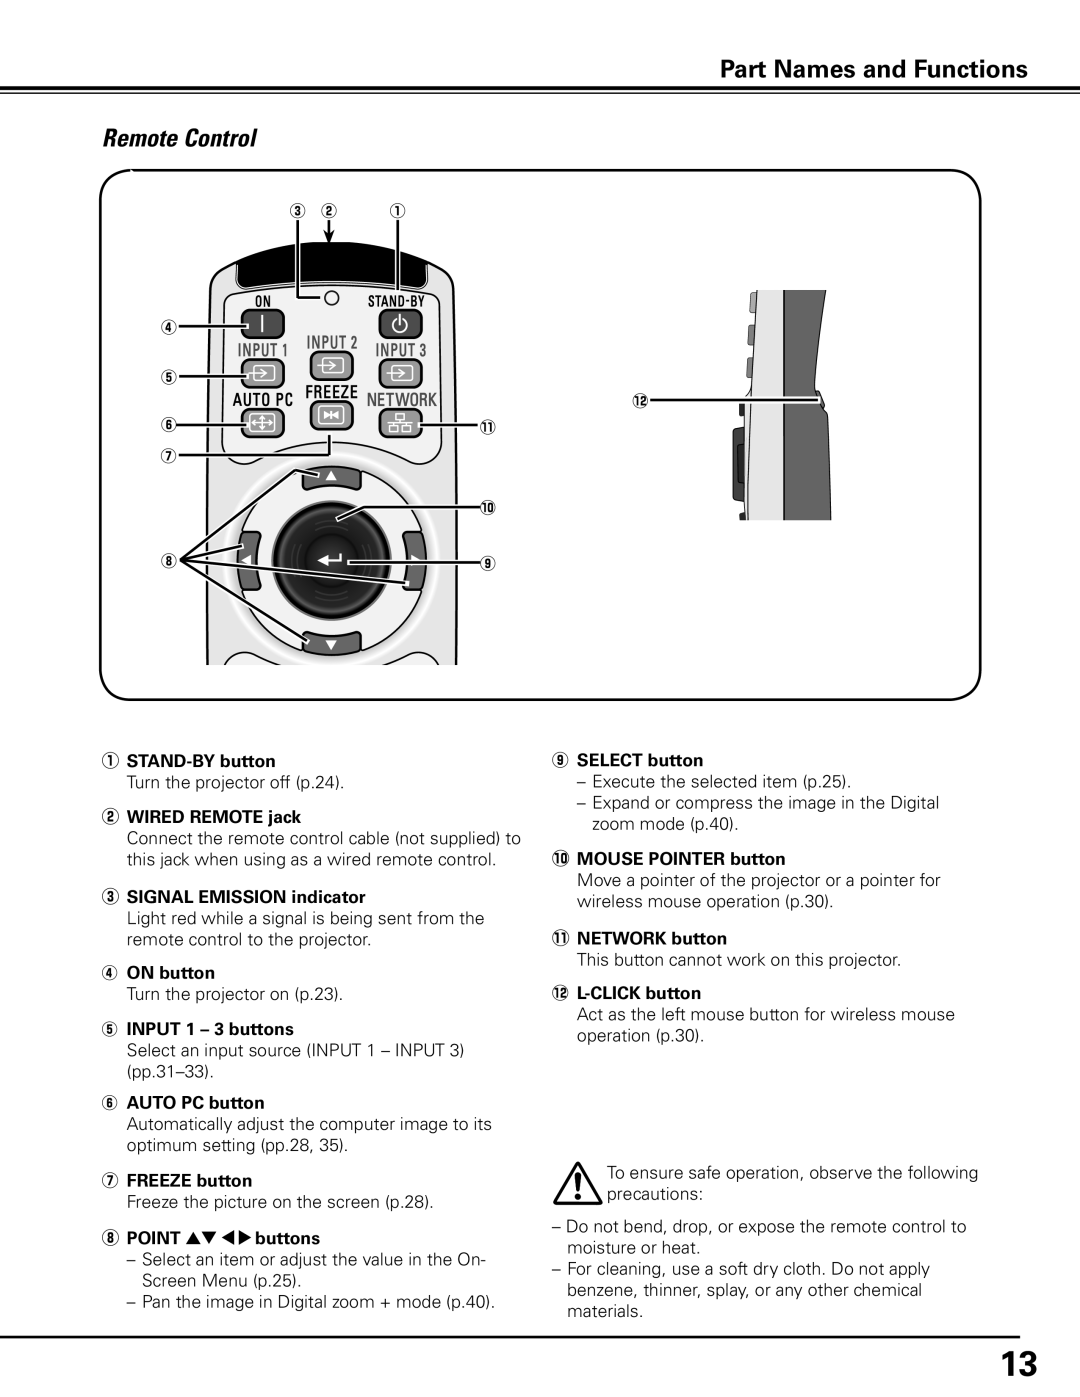
q
Turn the projector off (p.24).
wWired Remote jack
Connect the remote control cable (not supplied) to this jack when using as a wired remote control.
eSignal Emission indicator
Light red while a signal is being sent from the remote control to the projector.
rON button
Turn the projector on (p.23).
tINPUT 1 – 3 buttons
Select an input source (INPUT 1 – INPUT 3)
yAUTO PC button
Automatically adjust the computer image to its optimum setting (pp.28, 35).
uFREEZE button
Freeze the picture on the screen (p.28).
iPoint ed 7 8 buttons
–Select an item or adjust the value in the On- Screen Menu (p.25).
–Pan the image in Digital zoom + mode (p.40).
oSELECT button
–Execute the selected item (p.25).
–Expand or compress the image in the Digital zoom mode (p.40).
!0MOUSE POINTER button
Move a pointer of the projector or a pointer for wireless mouse operation (p.30).
!1NETWORK button
This button cannot work on this projector.
!2L-Click button
Act as the left mouse button for wireless mouse operation (p.30).
To ensure safe operation, observe the following precautions:
–Do not bend, drop, or expose the remote control to moisture or heat.
–For cleaning, use a soft dry cloth. Do not apply benzene, thinner, splay, or any other chemical materials.
13