5 Put the new one back into the position and close the filter cover. Make sure that the filter cartridge is properly and fully inserted.
6 Connect the AC power cord to the projector and turn on the projector.
7 Reset the filter counter and the scroll counter (p.58).
CAUTION
Make sure the filter cartridge is inserted in the projector. If the filter cartridge is not inserted, the projector cannot be turned on.
Do not put anything into the air vents. Doing so may result in malfunction of the projector.
RECOMMENDATION
We recommend avoiding dusty/smoky environments when operating the projector.. Usage in these environments may cause a poor image quality..
When using the projector under dusty or smoky conditions, dust may accumulate on a lens, liquid crystal panels, or optical elements inside the projector. Such condition may degrade the quality of the projected image.
When the symptoms above are noticed, contact your authorized dealer or service station for proper cleaning.
ORDER REPLACEMENT FILTER CARTRIDGE
Replacement filter cartridge can be ordered through your dealer. When ordering, give the following information to the dealer.
● Model No.. of your projector 103-012100-01
● Replacement Filter Cartridge Type No.. 003-001726-01
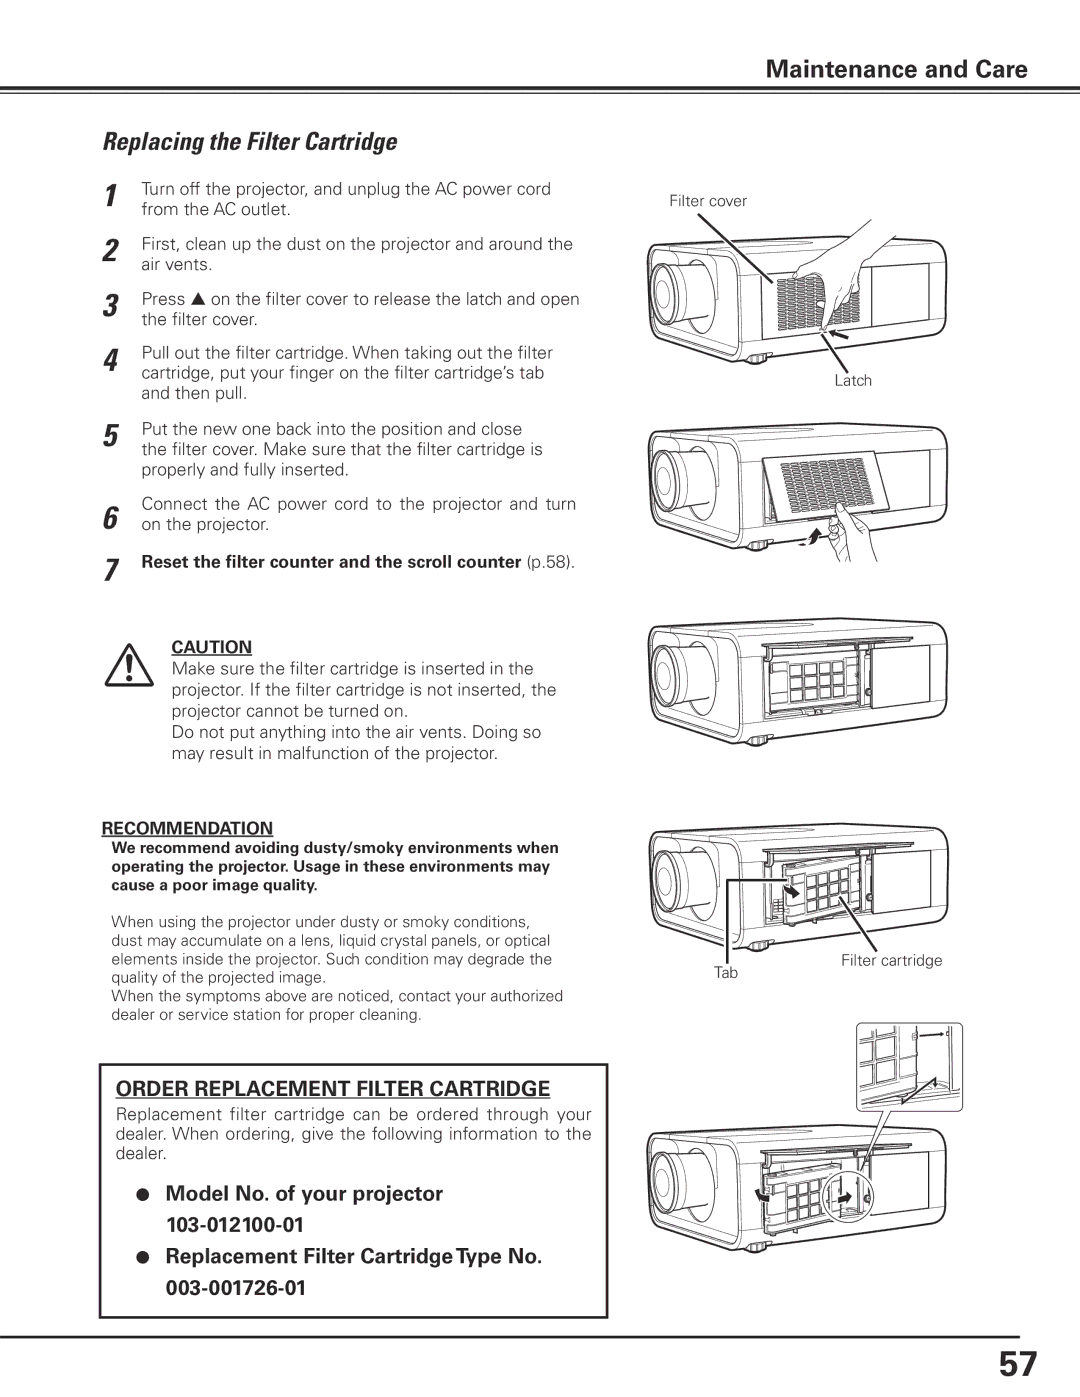
Press s on the filter cover to release the latch and open the filter cover.
First, clean up the dust on the projector and around the air vents.
Turn off the projector, and unplug the AC power cord from the AC outlet.
1
2
3
4 Pull out the filter cartridge. When taking out the filter cartridge, put your finger on the filter cartridge’s tab and then pull.
Replacing the Filter Cartridge
Maintenance and Care
Filter cover
Latch
Tab
Filter cartridge
57