Installation
Attaching the lens to the projector
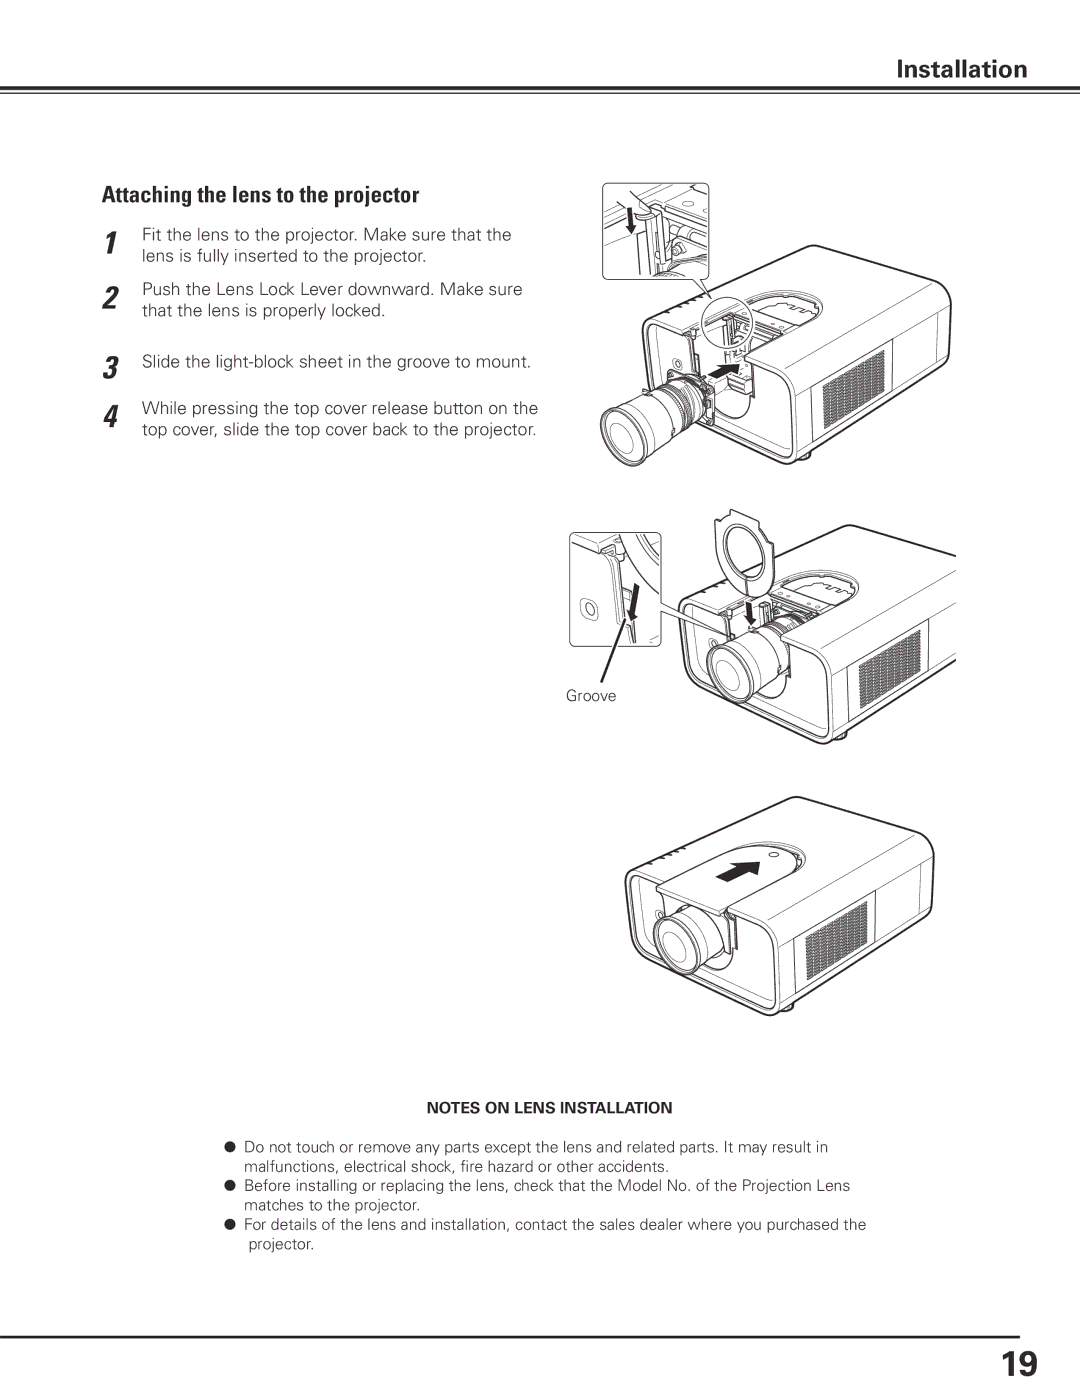
1 | Fit the lens to the projector. Make sure that the |
lens is fully inserted to the projector. | |
2 | Push the Lens Lock Lever downward. Make sure |
that the lens is properly locked. |
3
4
Slide the
While pressing the top cover release button on the top cover, slide the top cover back to the projector.
Groove
NOTES ON LENS INSTALLATION
●Do not touch or remove any parts except the lens and related parts. It may result in malfunctions, electrical shock, fire hazard or other accidents.
●Before installing or replacing the lens, check that the Model No. of the Projection Lens matches to the projector.
●For details of the lens and installation, contact the sales dealer where you purchased the projector.
19
