Video Input
Screen Size Adjustment
1 | Press the MENU button to display the |
the Point 7 8 buttons to move the red frame pointer to the | |
| Screen Menu icon. |
2 | Use the Point ed buttons to move the red frame pointer to |
the desired function and then press the SELECT button. |
Normal
Provide the image at the normal video aspect ratio of 4:3.
Wide
Provide the image at the wide screen ratio of 16:9.
Custom
Adjust the screen scale and position manually with this function. Press the SELECT button at Custom and the “Custom” is displayed on the screen for a few seconds. To display the Aspect dialog box, press the SELECT button at Custom again and then the Aspect dialog box appears.
Scale H/V | Adjust the Horizontal/Vertical screen scale. |
H&V | When set to “On,” the aspect ratio is fixed. |
| The “Scale V” appears dimmed and becomes |
| unavailable. Adjust “Scale H,” then the screen |
| scale is automatically modified based on the |
| aspect ratio. |
Position H/V | Adjust the Horizontal/Vertical screen position. |
Common | Save the adjusted scale to all the inputs. |
| Press the SELECT button at Common to |
| display a confirmation box. To save the scale, |
| press the SELECT button at “Yes.” When |
| Custom is selected, the saved scale is used. |
Reset | Reset the all adjusted values. Press the |
| SELECT button at Reset to display a |
| confirmation box. To reset, press the SELECT |
| button at “Yes.” |
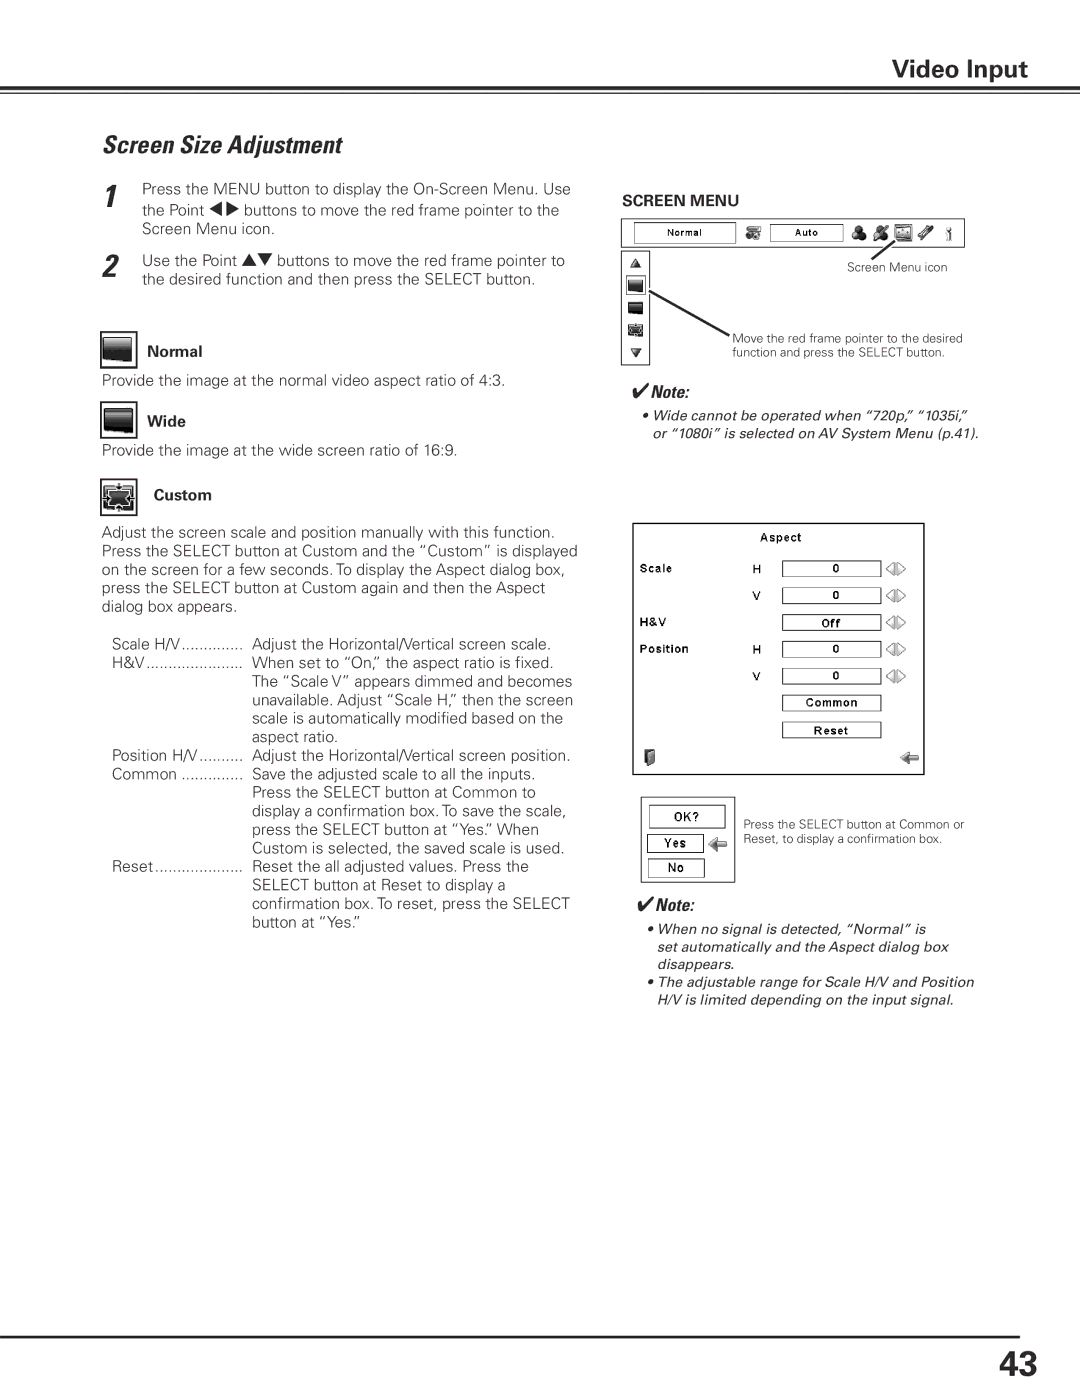
SCREEN MENU
Screen Menu icon
Move the red frame pointer to the desired function and press the SELECT button.
✔Note:
•Wide cannot be operated when “720p,” “1035i,” or “1080i” is selected on AV System Menu (p.41).
Press the SELECT button at Common or
Reset, to display a confirmation box.
✔Note:
•When no signal is detected, “Normal” is set automatically and the Aspect dialog box disappears.
•The adjustable range for Scale H/V and Position H/V is limited depending on the input signal.
43