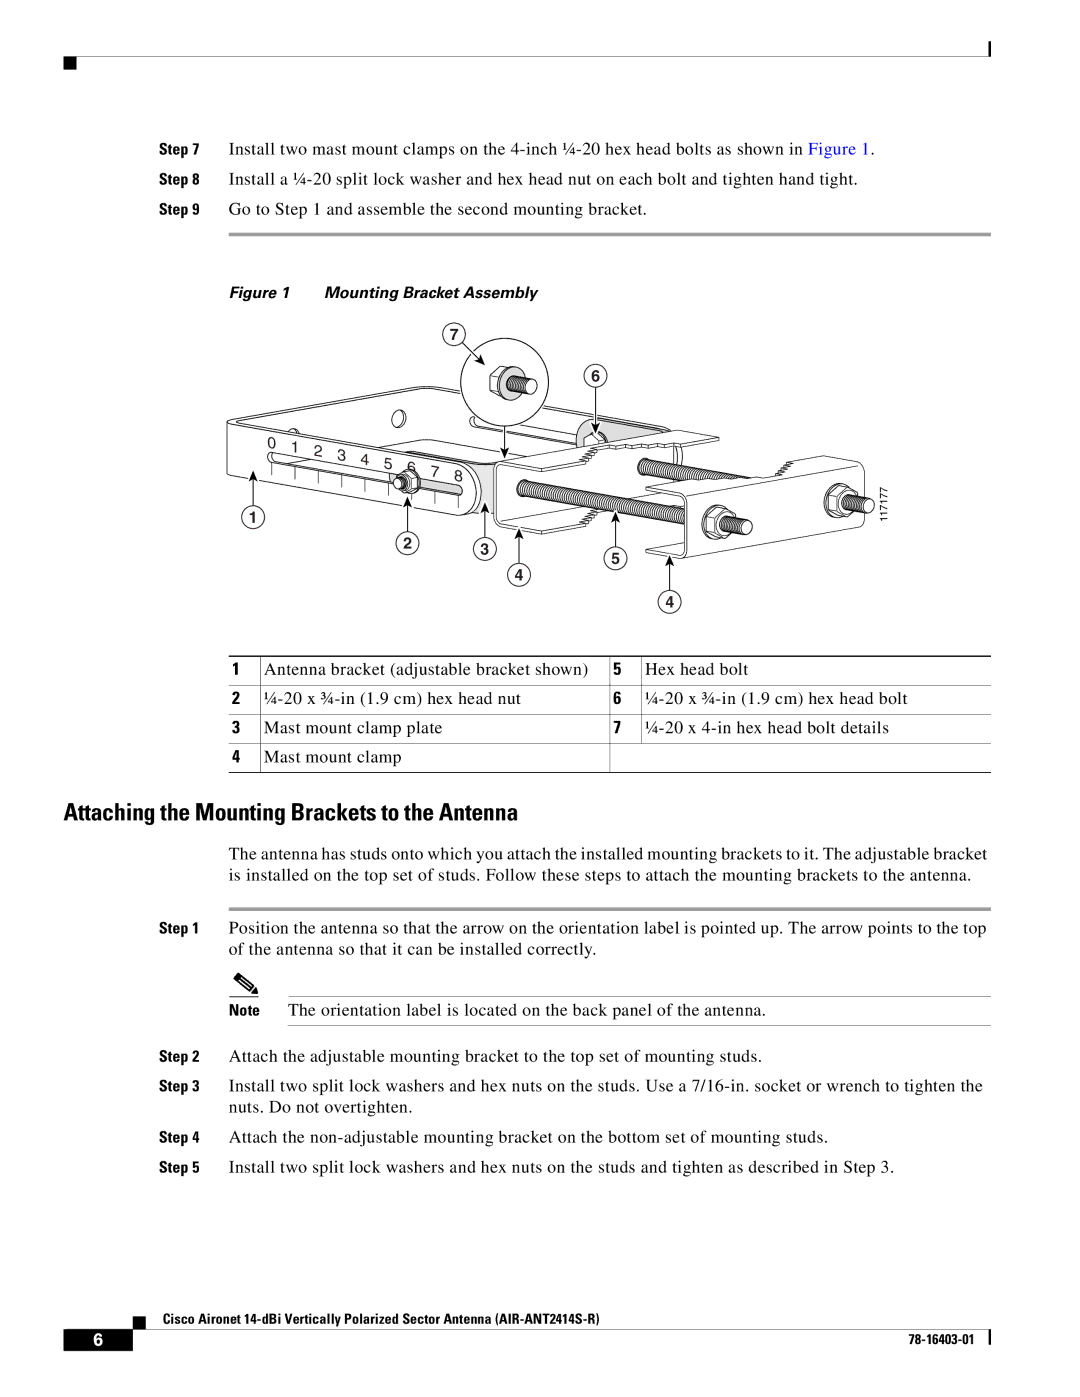
Step 7 Install two mast mount clamps on the
Figure 1 Mounting Bracket Assembly
7
6
1
2 3
![]()
![]()
![]()
![]()
![]()
![]()
![]()
![]() 117177
117177
5
4
4
1 | Antenna bracket (adjustable bracket shown) | 5 | Hex head bolt |
|
|
|
|
2 | 6 | ||
|
|
|
|
3 | Mast mount clamp plate | 7 | |
|
|
|
|
4 | Mast mount clamp |
|
|
|
|
|
|
Attaching the Mounting Brackets to the Antenna
The antenna has studs onto which you attach the installed mounting brackets to it. The adjustable bracket is installed on the top set of studs. Follow these steps to attach the mounting brackets to the antenna.
Step 1 Position the antenna so that the arrow on the orientation label is pointed up. The arrow points to the top of the antenna so that it can be installed correctly.
Note The orientation label is located on the back panel of the antenna.
Step 2 Attach the adjustable mounting bracket to the top set of mounting studs.
Step 3 Install two split lock washers and hex nuts on the studs. Use a
Step 4 Attach the
Step 5 Install two split lock washers and hex nuts on the studs and tighten as described in Step 3.
Cisco Aironet
6 |
| |
|
