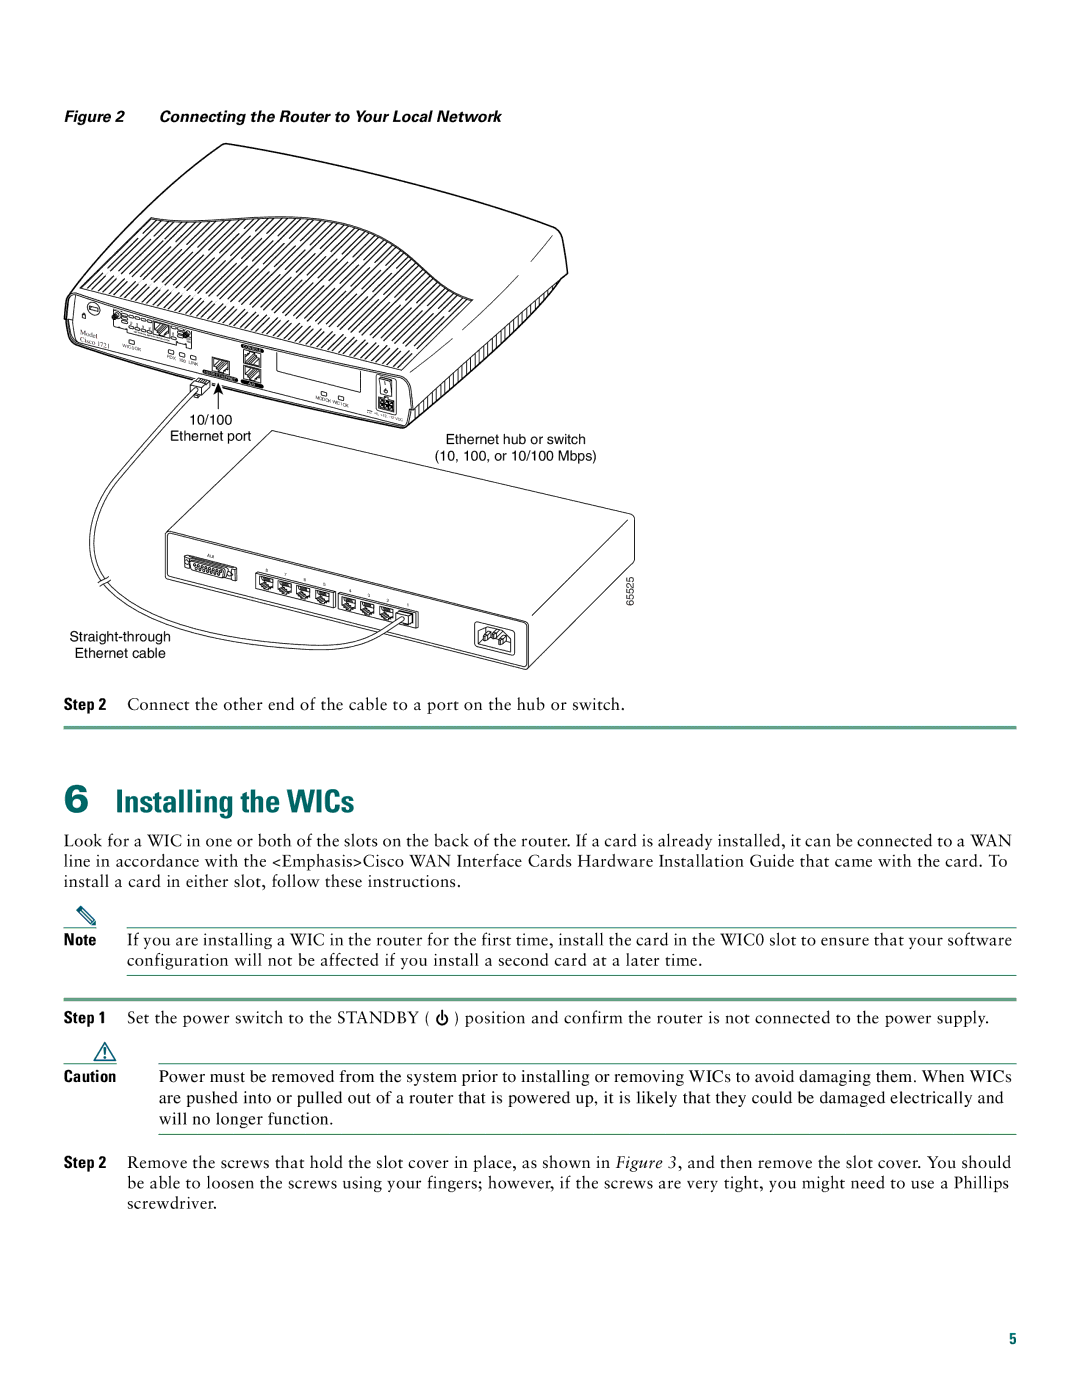
Figure 2 Connecting the Router to Your Local Network
Model Cisco 1721
TD | RD | LP | AL |
|
|
| SEE | MANUAL |
|
| CD |
|
| BEFORE |
| ||
|
|
| INSTALLATION | ||
|
|
|
| 56K | |
|
|
|
|
| DSU |
WIC0 | OK |
|
| C | ONS | OLE |
|
|
|
|
| ||
|
| FDX | 100 | LINK |
|
|
|
|
|
|
| ||
|
|
|
|
|
|
10/100 | ETHERNET |
| |
| AUX |
| MODOK |
| WIC1OK |
10/100
Ethernet port
+5, + |
|
12, | VDC |
Ethernet hub or switch
(10, 100, or 10/100 Mbps)
AUI
8 7
6 5
4 3 ![]()
![]()
![]()
![]()
![]()
![]() 2
2 ![]()
![]()
![]()
![]()
![]()
![]()
![]() 1
1
Ethernet cable
65525
Step 2 Connect the other end of the cable to a port on the hub or switch.
6Installing the WICs
Look for a WIC in one or both of the slots on the back of the router. If a card is already installed, it can be connected to a WAN line in accordance with the <Emphasis>Cisco WAN Interface Cards Hardware Installation Guide that came with the card. To install a card in either slot, follow these instructions.
Note If you are installing a WIC in the router for the first time, install the card in the WIC0 slot to ensure that your software configuration will not be affected if you install a second card at a later time.
Step 1 Set the power switch to the STANDBY ( ![]() ) position and confirm the router is not connected to the power supply.
) position and confirm the router is not connected to the power supply.
Caution Power must be removed from the system prior to installing or removing WICs to avoid damaging them. When WICs are pushed into or pulled out of a router that is powered up, it is likely that they could be damaged electrically and will no longer function.
Step 2 Remove the screws that hold the slot cover in place, as shown in Figure 3, and then remove the slot cover. You should be able to loosen the screws using your fingers; however, if the screws are very tight, you might need to use a Phillips screwdriver.
5