Unpacking the Router
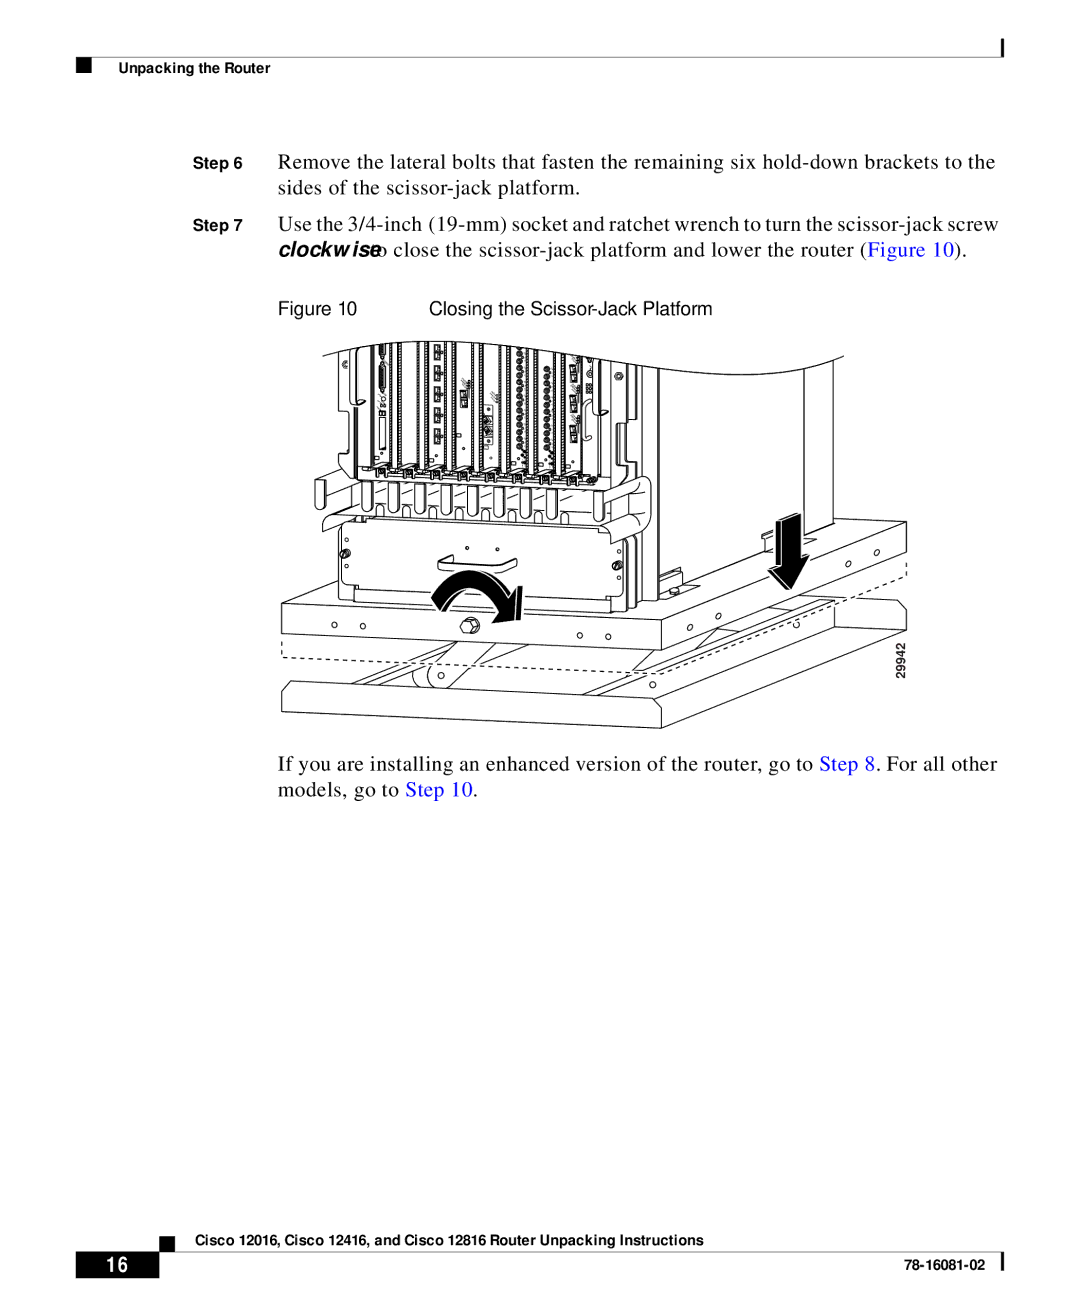
Step 6 Remove the lateral bolts that fasten the remaining six
Step 7 Use the
Figure 10
|
| CONSOLE |
| RESET | AUX |
1- | 0- |
|
SLOTSLOT | ||
EJECT |
| |
Closing the Scissor-Jack Platform
|
| RX |
|
|
|
|
| 6 |
| CARRIER |
|
|
| TX |
| ACTIVE |
|
|
| RX | RX |
| ACO/LT |
|
| 5 | 5 |
| 2 |
|
| TX | TX |
|
|
CELLRX |
| RX |
|
|
|
CARRIER |
|
| RX | PKT |
|
ACTIVE |
| 4 | 4 | RX | MINOR |
|
| TX |
| CARRIER | |
0 | PKT |
| TX | ACTIVE | MAJOR |
CARRIER |
| RX |
| CRITICAL | |
| RX | RX |
|
|
|
| ACTIVE | 3 | 3 |
| 1 |
|
| TX | TX |
|
RX | RX |
|
2 | 2 | PKTRX |
TX | ||
| TX | CARRIER |
RX |
| ACTIVE |
RX |
| |
1 | 1 |
|
TX | TX | 0 |
RX | RX |
|
0 | 0 |
|
TX | TX |
|
29942
If you are installing an enhanced version of the router, go to Step 8. For all other models, go to Step 10.
| Cisco 12016, Cisco 12416, and Cisco 12816 Router Unpacking Instructions |
16 |
