Unpacking the Router
Step 2 To remove the corrugated top cap from the shipping container, follow these steps:
a.Cut the four straps that wrap around the sides of the container from top to bottom.
b.Separate the top cap from the side panels and lift off the cap from the shipping container.
c.Safely set aside the top cap.
Step 3 To remove the corrugated
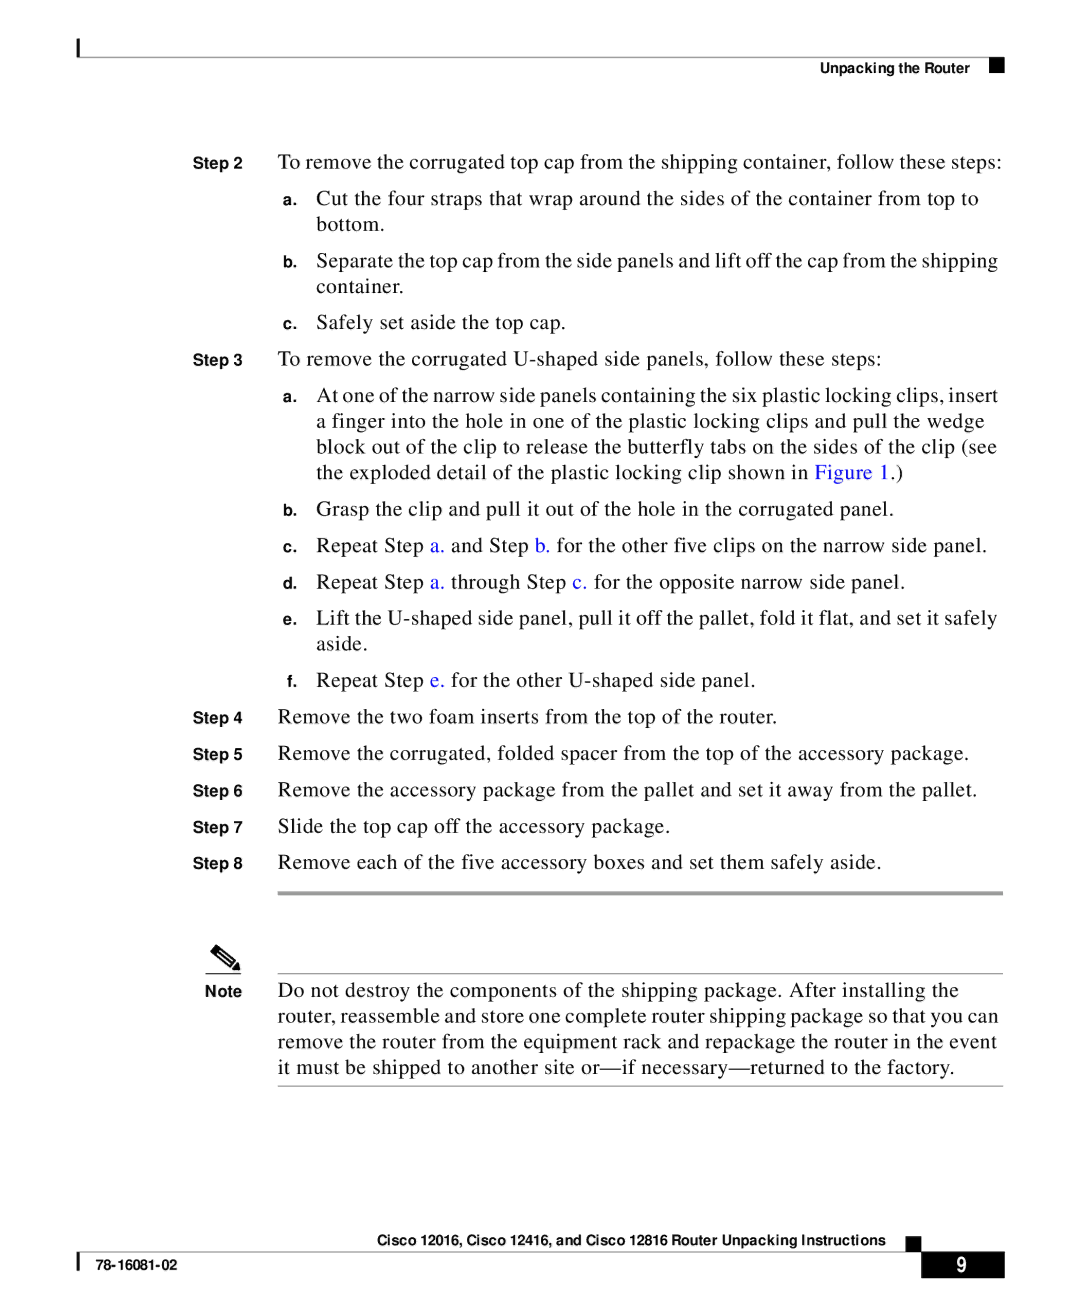
a.At one of the narrow side panels containing the six plastic locking clips, insert a finger into the hole in one of the plastic locking clips and pull the wedge block out of the clip to release the butterfly tabs on the sides of the clip (see the exploded detail of the plastic locking clip shown in Figure 1.)
b.Grasp the clip and pull it out of the hole in the corrugated panel.
c.Repeat Step a. and Step b. for the other five clips on the narrow side panel.
d.Repeat Step a. through Step c. for the opposite narrow side panel.
e.Lift the
f.Repeat Step e. for the other
Step 4 Remove the two foam inserts from the top of the router.
Step 5 Remove the corrugated, folded spacer from the top of the accessory package. Step 6 Remove the accessory package from the pallet and set it away from the pallet. Step 7 Slide the top cap off the accessory package.
Step 8 Remove each of the five accessory boxes and set them safely aside.
Note Do not destroy the components of the shipping package. After installing the router, reassemble and store one complete router shipping package so that you can remove the router from the equipment rack and repackage the router in the event it must be shipped to another site
Cisco 12016, Cisco 12416, and Cisco 12816 Router Unpacking Instructions
| 9 | |
|