Chapter 3 Removing and Installing the ISA and the ISM
ISA or ISM Removal and Installation
Cisco 7200 Series—Removing and Installing the ISA
Step 1
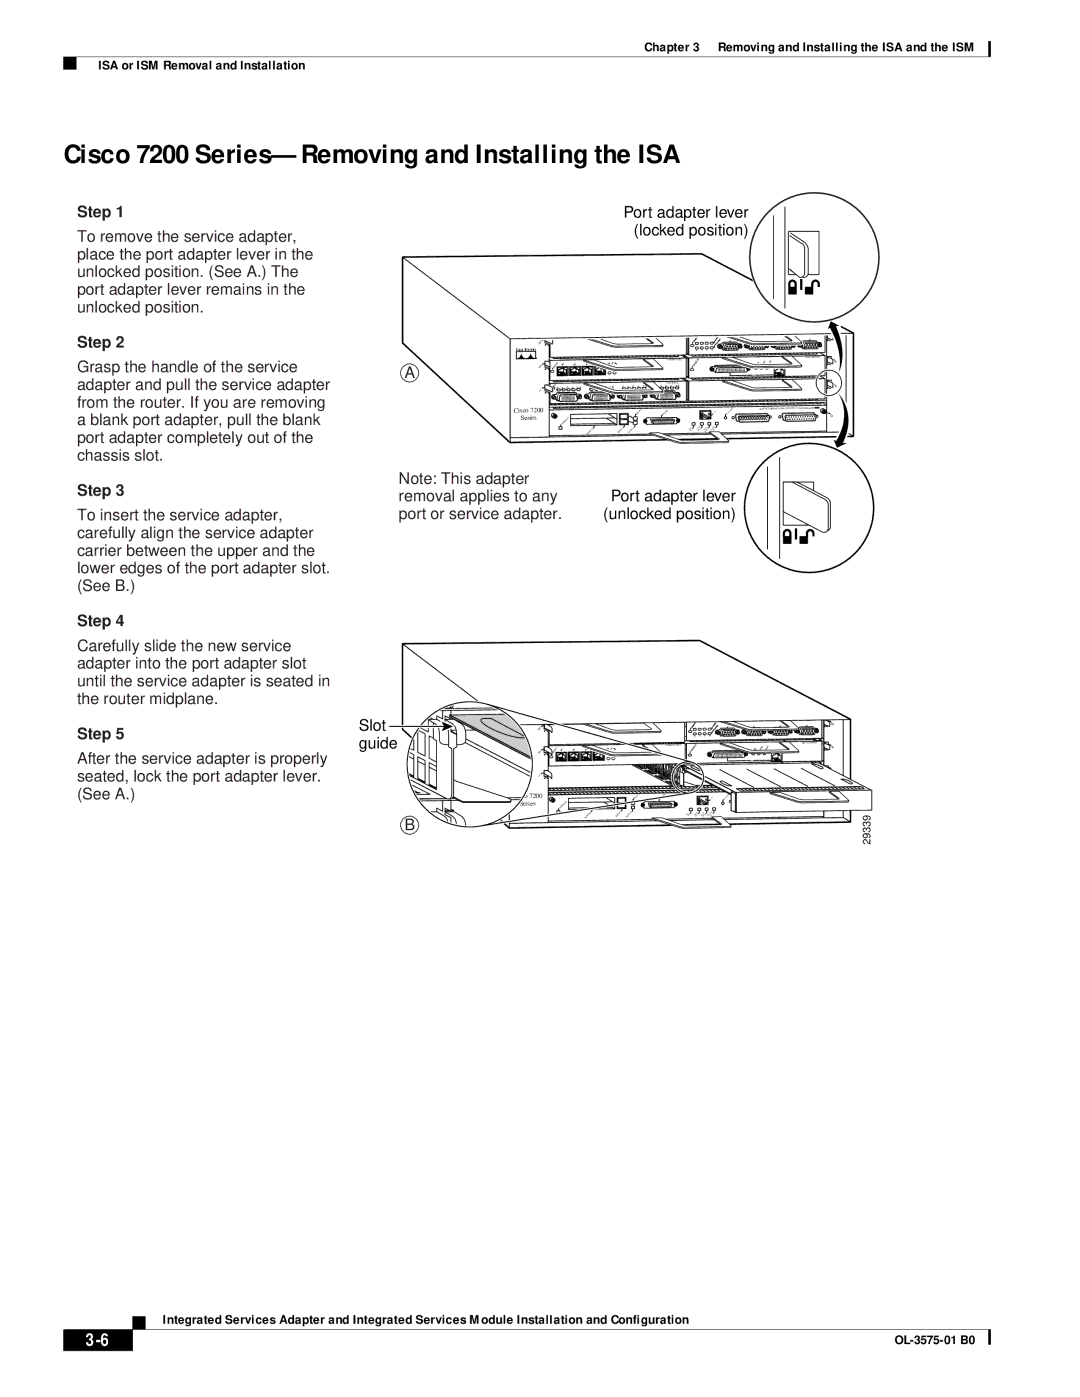
To remove the service adapter, place the port adapter lever in the unlocked position. (See A.) The port adapter lever remains in the unlocked position.
Step 2
Grasp the handle of the service adapter and pull the service adapter from the router. If you are removing a blank port adapter, pull the blank port adapter completely out of the chassis slot.
Step 3
To insert the service adapter, carefully align the service adapter carrier between the upper and the lower edges of the port adapter slot. (See B.)
Step 4
Carefully slide the new service adapter into the port adapter slot until the service adapter is seated in the router midplane.
Step 5
After the service adapter is properly seated, lock the port adapter lever. (See A.)
Port adapter lever (locked position)
|
| TOKEN RING |
|
| 6 |
| 5 |
|
|
| FAST ETHERNET |
|
| ETHERNET 10BT |
A |
| 4 |
3 |
| |
| 0 | |
| FAST SERIAL | |
|
| 2 |
| 1 |
|
| Cisco 7200 | FAST ETHERNET INPUT/OUTPUT CONTROLLER |
|
| |
| Series | 0 |
Note: This adapter | Port adapter lever | |
removal applies to any | ||
port or service adapter. | (unlocked position) | |
Slot |
| TOKEN RING |
| 6 | |
guide | 5 |
|
3 | 4 | |
|
| FAST ETHERNET |
|
| ETHERNET 10BT |
|
| 0 |
|
| 2 |
| 1 |
|
| Cisco 7200 | FAST ETHERNET INPUT/OUTPUT CONTROLLER |
| Series | 29339 |
| B | |
|
|
Integrated Services Adapter and Integrated Services Module Installation and Configuration
|
| |
|
