Chapter 3 Removing and Installing the ISA and the ISM
ISA or ISM Removal and Installation
Cisco 7100 Series—Removing and Installing the ISM
Step 1
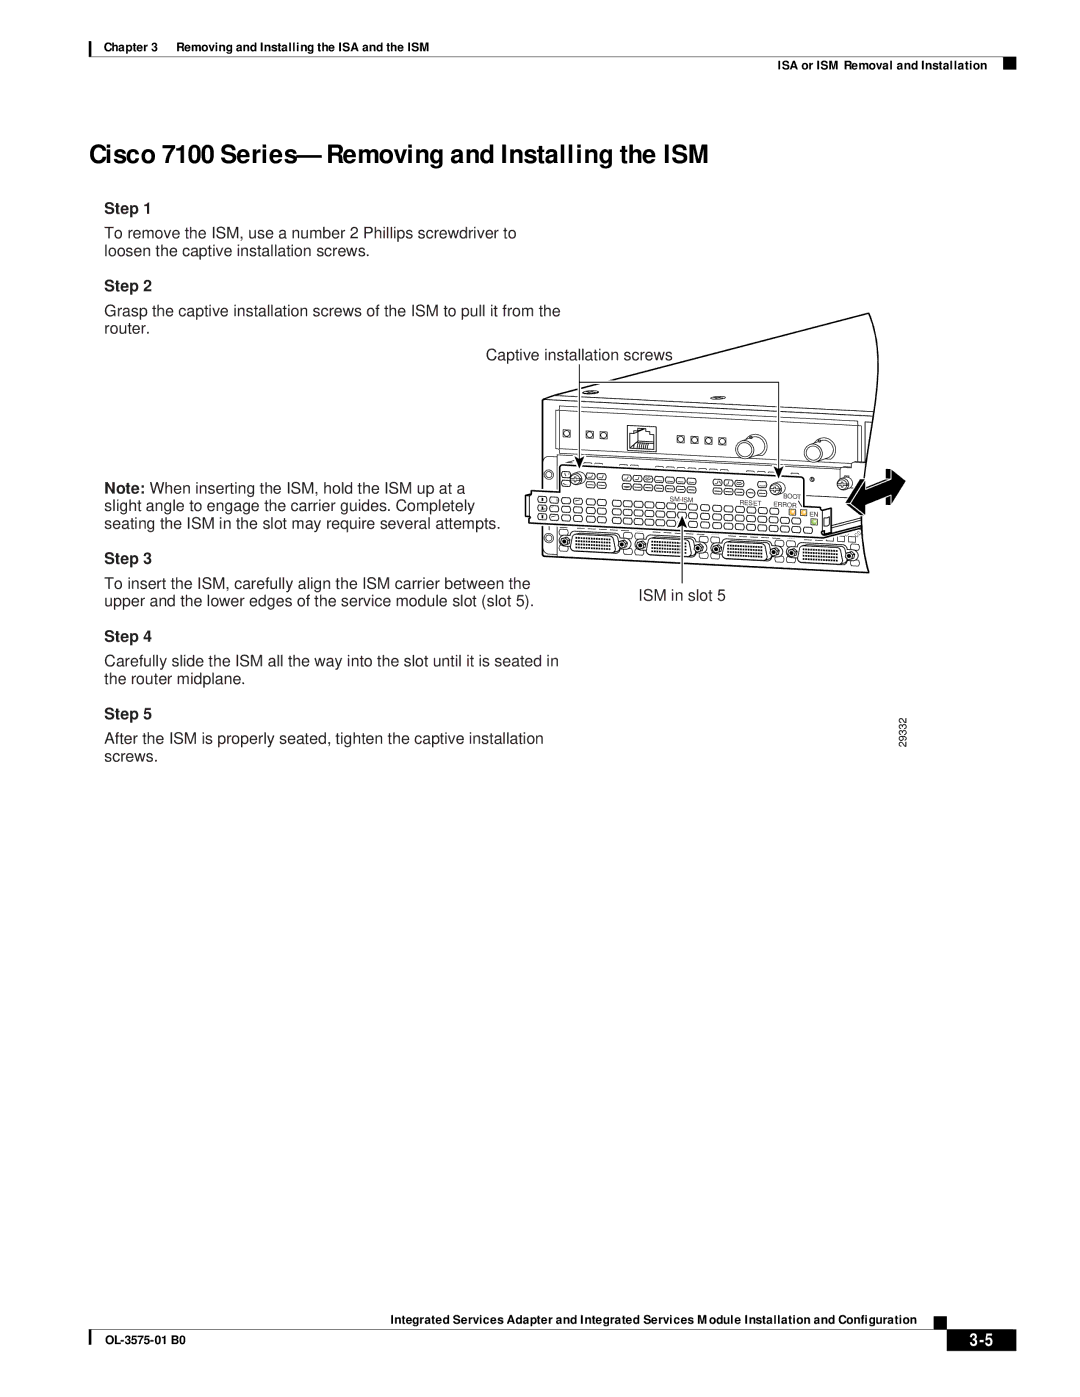
To remove the ISM, use a number 2 Phillips screwdriver to loosen the captive installation screws.
Step 2
Grasp the captive installation screws of the ISM to pull it from the router.
Captive installation screws
Note: When inserting the ISM, hold the ISM up at a
slight angle to engage the carrier guides. Completely | 5 |
|
|
|
|
|
|
|
|
|
|
| RESET |
| BOOT |
|
|
|
| |||
|
|
|
|
|
|
|
|
|
|
|
| ERROR |
|
|
|
|
| |||||
|
|
|
|
|
|
|
|
|
|
|
|
|
|
|
|
|
|
|
|
|
| |
seating the ISM in the slot may require several attempts. |
| EN | TD |
|
|
|
|
|
|
|
|
|
|
|
|
|
|
| EN |
|
|
|
I | TC | RD RC | LB | CD | TD | TC | RD RC | LB | CD | TD |
|
|
|
|
|
|
|
|
| |||
| TC | RD RC | LB | CD |
|
|
|
|
| |||||||||||||
|
|
|
|
|
|
|
|
|
|
|
|
|
| TD | TC | RD RC | LB | CD | ||||
|
|
|
|
|
|
|
|
|
|
|
|
|
|
|
|
| ||||||
|
|
|
|
|
|
|
|
|
|
|
|
|
|
|
|
|
|
|
| |||
Step 3 |
|
|
|
|
|
|
|
|
|
|
|
|
|
|
|
|
|
|
|
|
|
|
To insert the ISM, carefully align the ISM carrier between the |
|
|
|
|
|
|
| ISM in slot 5 |
|
|
|
|
|
|
|
|
| |||||
upper and the lower edges of the service module slot (slot 5). |
|
|
|
|
|
|
|
|
|
|
|
|
|
|
|
| ||||||
|
|
|
|
|
|
|
|
|
|
|
|
|
|
|
|
|
|
|
|
|
| |
Step 4
Carefully slide the ISM all the way into the slot until it is seated in the router midplane.
Step 5
After the ISM is properly seated, tighten the captive installation screws.
29332
Integrated Services Adapter and Integrated Services Module Installation and Configuration
|
| ||
|
|
