9. TROUBLESHOOTING
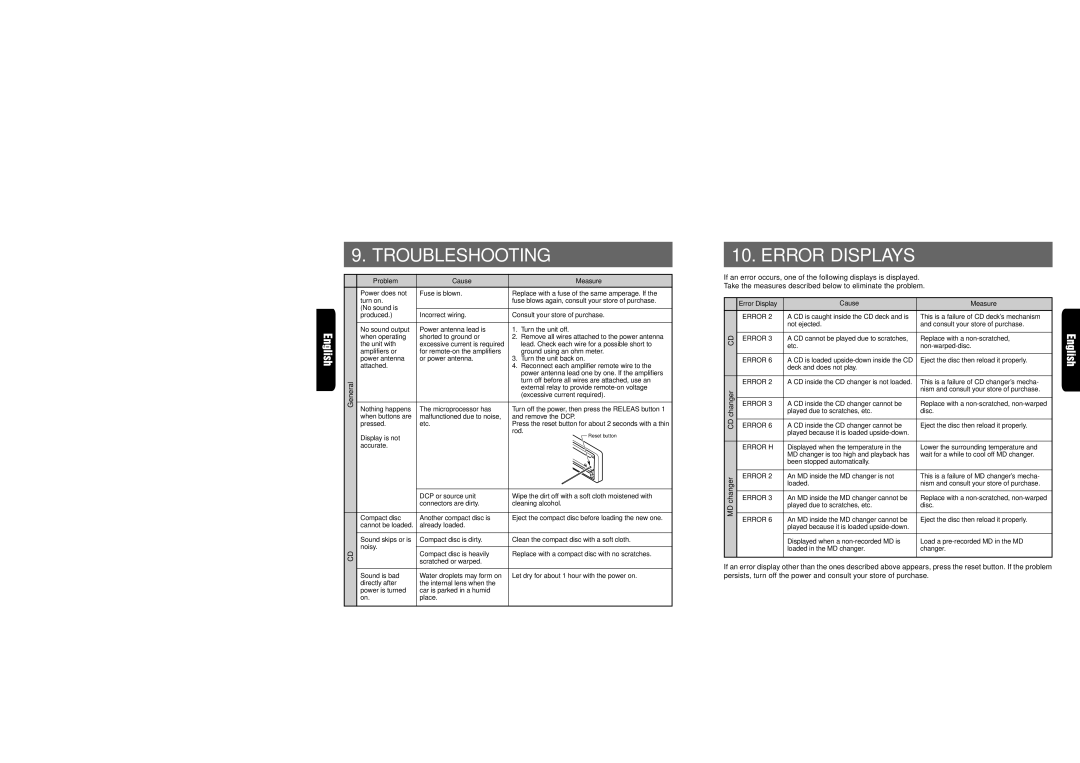
| Problem | Cause | Measure |
| Power does not | Fuse is blown. | Replace with a fuse of the same amperage. If the |
| turn on. |
| fuse blows again, consult your store of purchase. |
| (No sound is |
|
|
|
|
| |
| produced.) | Incorrect wiring. | Consult your store of purchase. |
|
|
|
|
| No sound output | Power antenna lead is | 1. Turn the unit off. |
| when operating | shorted to ground or | 2. Remove all wires attached to the power antenna |
| the unit with | excessive current is required | lead. Check each wire for a possible short to |
| amplifiers or | for | ground using an ohm meter. |
| power antenna | or power antenna. | 3. Turn the unit back on. |
| attached. |
| 4. Reconnect each amplifier remote wire to the |
|
|
| power antenna lead one by one. If the amplifiers |
General |
|
| turn off before all wires are attached, use an |
|
| external relay to provide | |
|
|
| (excessive current required). |
|
|
|
|
| Nothing happens | The microprocessor has | Turn off the power, then press the RELEAS button 1 |
| when buttons are | malfunctioned due to noise, | and remove the DCP. |
| pressed. | etc. | Press the reset button for about 2 seconds with a thin |
|
|
| rod. |
| Display is not |
| Reset button |
|
|
| |
| accurate. |
|
|
|
| DCP or source unit | Wipe the dirt off with a soft cloth moistened with |
|
| connectors are dirty. | cleaning alcohol. |
|
|
|
|
| Compact disc | Another compact disc is | Eject the compact disc before loading the new one. |
| cannot be loaded. | already loaded. |
|
|
|
|
|
| Sound skips or is | Compact disc is dirty. | Clean the compact disc with a soft cloth. |
| noisy. |
|
|
|
|
| |
CD | Compact disc is heavily | Replace with a compact disc with no scratches. | |
|
| scratched or warped. |
|
|
|
|
|
| Sound is bad | Water droplets may form on | Let dry for about 1 hour with the power on. |
| directly after | the internal lens when the |
|
| power is turned | car is parked in a humid |
|
| on. | place. |
|
10. ERROR DISPLAYS
If an error occurs, one of the following displays is displayed.
Take the measures described below to eliminate the problem.
| Error Display | Cause | Measure | |
| ERROR 2 | A CD is caught inside the CD deck and is | This is a failure of CD deck’s mechanism | |
|
| not ejected. | and consult your store of purchase. | |
CD |
|
|
| |
ERROR 3 | A CD cannot be played due to scratches, | Replace with a | ||
|
| etc. | ||
|
|
|
| |
| ERROR 6 | A CD is loaded | Eject the disc then reload it properly. | |
|
| deck and does not play. |
| |
|
|
|
| |
| ERROR 2 | A CD inside the CD changer is not loaded. | This is a failure of CD changer’s mecha- | |
changerCD |
|
| nism and consult your store of purchase. | |
|
|
| ||
ERROR 6 | A CD inside the CD changer cannot be | Eject the disc then reload it properly. | ||
| ERROR 3 | A CD inside the CD changer cannot be | Replace with a | |
|
| played due to scratches, etc. | disc. | |
|
| played because it is loaded |
| |
|
|
|
| |
| ERROR H | Displayed when the temperature in the | Lower the surrounding temperature and | |
|
| MD changer is too high and playback has | wait for a while to cool off MD changer. | |
|
| been stopped automatically. |
| |
|
|
|
| |
changer | ERROR 2 | An MD inside the MD changer is not | This is a failure of MD changer’s mecha- | |
| loaded. | nism and consult your store of purchase. | ||
|
| |||
|
|
|
| |
| ERROR 3 | An MD inside the MD changer cannot be | Replace with a | |
MD |
| played due to scratches, etc. | disc. | |
|
|
| ||
ERROR 6 | An MD inside the MD changer cannot be | Eject the disc then reload it properly. | ||
| ||||
|
| played because it is loaded |
| |
|
|
|
| |
|
| Displayed when a | Load a | |
|
| loaded in the MD changer. | changer. | |
|
|
|
|
If an error display other than the ones described above appears, press the reset button. If the problem persists, turn off the power and consult your store of purchase.
32 |
