OPERATING YOUR AMPLIFIER
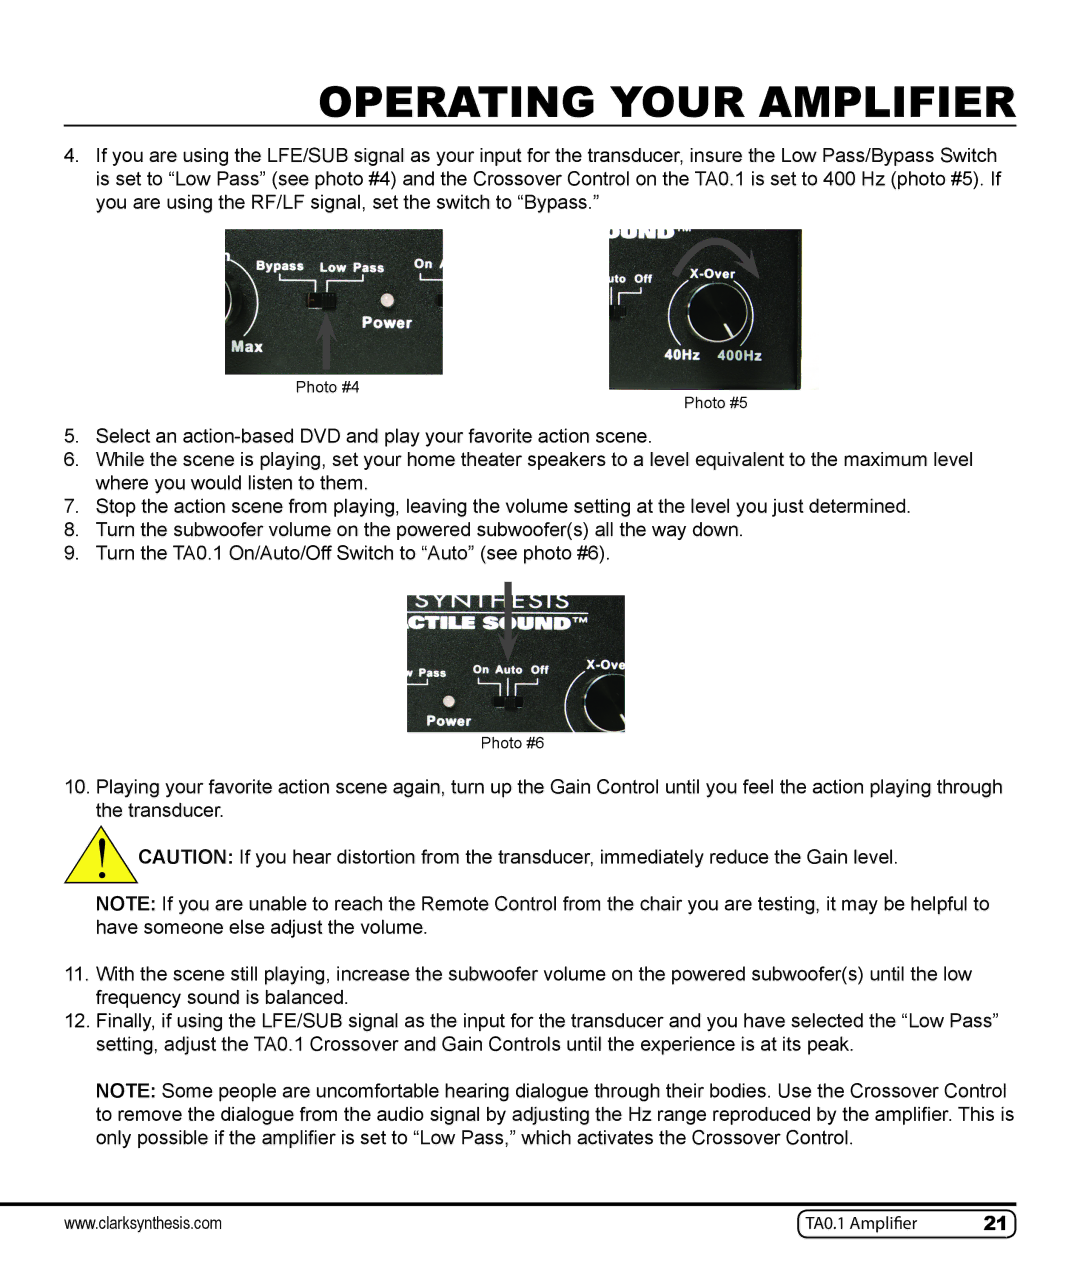
4.If you are using the LFE/SUB signal as your input for the transducer, insure the Low Pass/Bypass Switch is set to “Low Pass” (see photo #4) and the Crossover Control on the TA0.1 is set to 400 Hz (photo #5). If you are using the RF/LF signal, set the switch to “Bypass.”
Photo #4
Photo #5
5.Select an
6.While the scene is playing, set your home theater speakers to a level equivalent to the maximum level where you would listen to them.
7.Stop the action scene from playing, leaving the volume setting at the level you just determined.
8.Turn the subwoofer volume on the powered subwoofer(s) all the way down.
9.Turn the TA0.1 On/Auto/Off Switch to “Auto” (see photo #6).
Photo #6
10.Playing your favorite action scene again, turn up the Gain Control until you feel the action playing through the transducer.
!CAUTION: If you hear distortion from the transducer, immediately reduce the Gain level.
NOTE: If you are unable to reach the Remote Control from the chair you are testing, it may be helpful to have someone else adjust the volume.
11.With the scene still playing, increase the subwoofer volume on the powered subwoofer(s) until the low frequency sound is balanced.
12.Finally, if using the LFE/SUB signal as the input for the transducer and you have selected the “Low Pass” setting, adjust the TA0.1 Crossover and Gain Controls until the experience is at its peak.
NOTE: Some people are uncomfortable hearing dialogue through their bodies. Use the Crossover Control to remove the dialogue from the audio signal by adjusting the Hz range reproduced by the amplifier. This is only possible if the amplifier is set to “Low Pass,” which activates the Crossover Control.
www.clarksynthesis.com | TA0.1 Amplifier | 21 |