21
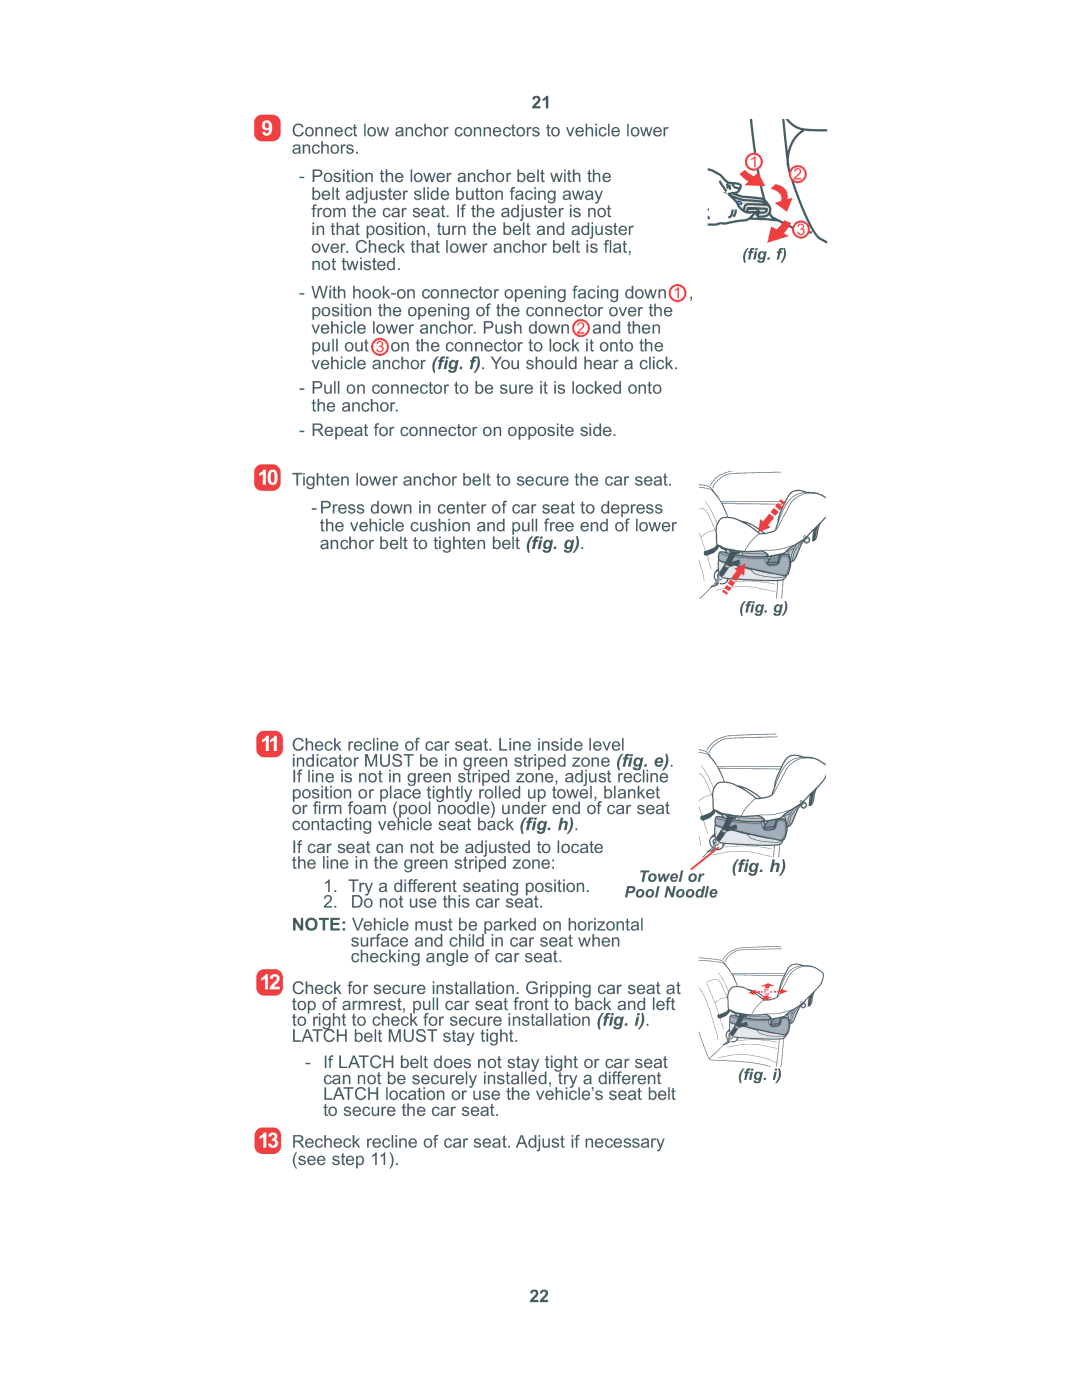
9Connect low anchor connectors to vehicle lower anchors.
-Position the lower anchor belt with the belt adjuster slide button facing away from the car seat. If the adjuster is not in that position, turn the belt and adjuster over. Check that lower anchor belt is flat, not twisted.
-With
-Pull on connector to be sure it is locked onto the anchor.
-Repeat for connector on opposite side.
10Tighten lower anchor belt to secure the car seat.
-Press down in center of car seat to depress the vehicle cushion and pull free end of lower anchor belt to tighten belt (fig. g).
11Check recline of car seat. Line inside level indicator MUST be in green striped zone (fig. e). If line is not in green striped zone, adjust recline position or place tightly rolled up towel, blanket or firm foam (pool noodle) under end of car seat
contacting vehicle seat back (fig. h).
If car seat can not be adjusted to locate the line in the green striped zone:
Towel or
1. Try a different seating position. Pool Noodle
2. Do not use this car seat.
NOTE: Vehicle must be parked on horizontal surface and child in car seat when checking angle of car seat.
12Check for secure installation. Gripping car seat at top of armrest, pull car seat front to back and left
to right to check for secure installation (fig. i). LATCH belt MUST stay tight.
-If LATCH belt does not stay tight or car seat can not be securely installed, try a different LATCH location or use the vehicle’s seat belt to secure the car seat.
13Recheck recline of car seat. Adjust if necessary (see step 11).
1 ![]() 2
2
![]() 3
3
(fig. f)
(fig. g)
(fig. h)
(fig. i)
22
