19
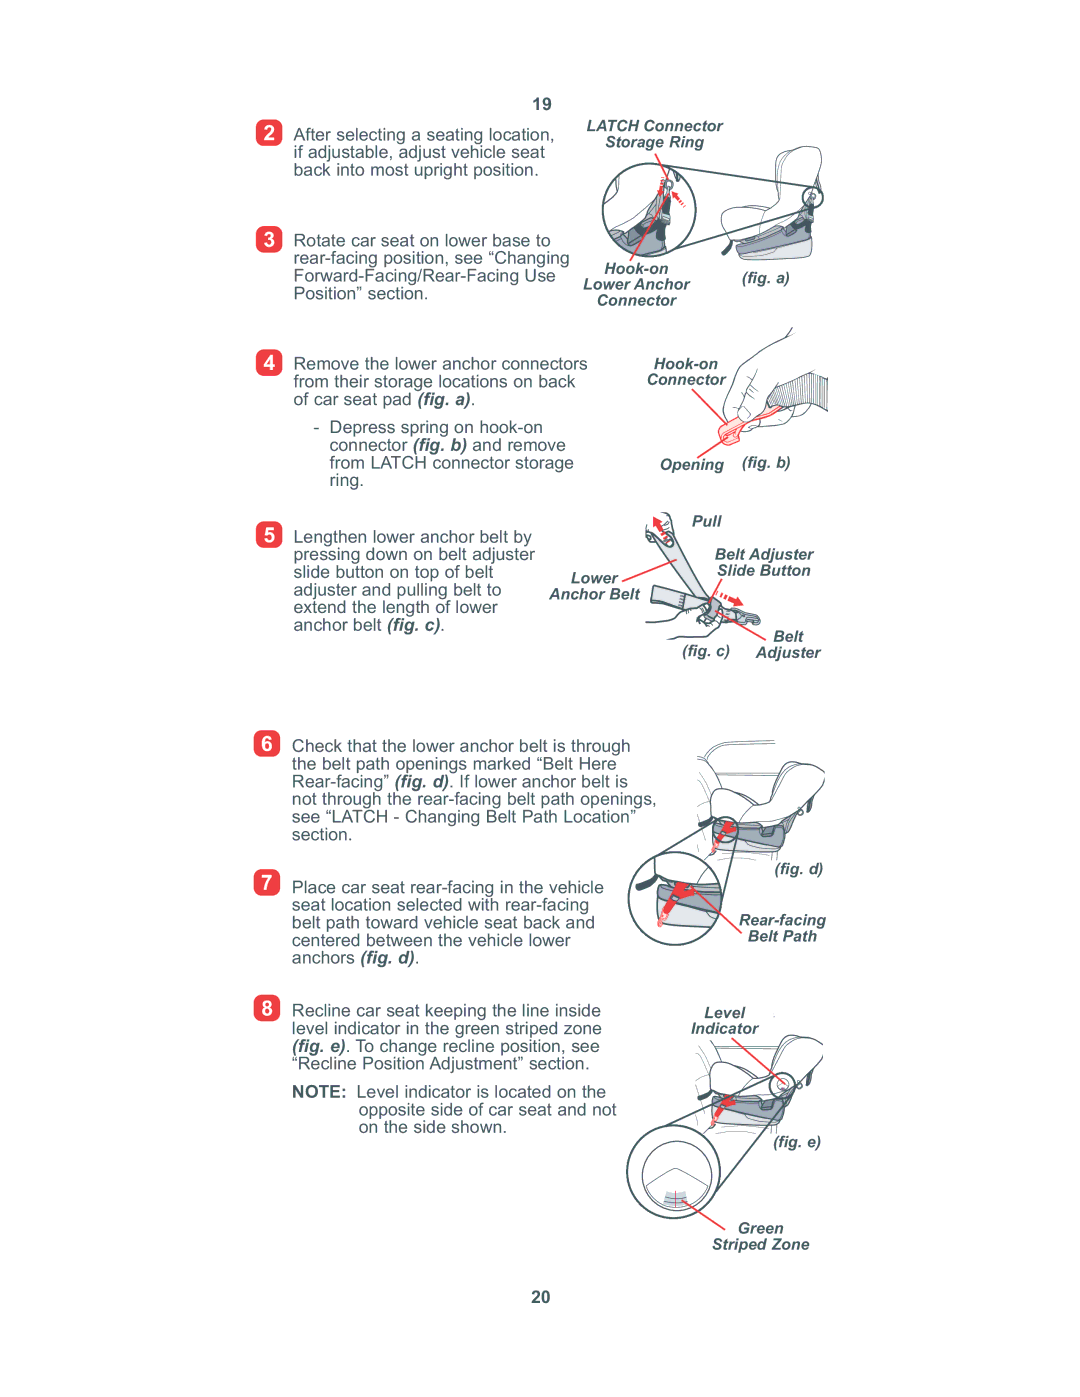
2After selecting a seating location, if adjustable, adjust vehicle seat back into most upright position.
3Rotate car seat on lower base to
LATCH Connector
Storage Ring
Lower Anchor (fig. a) Connector
4 Remove the lower anchor connectors |
| ||
from their storage locations on back | Connector |
| |
of car seat pad (fig. a). |
|
|
|
- Depress spring on |
|
|
|
connector (fig. b) and remove |
|
| |
from LATCH connector storage | Opening | (fig. b) | |
ring. |
|
|
|
5 Lengthen lower anchor belt by |
| Pull |
|
|
|
| |
pressing down on belt adjuster |
| Belt Adjuster | |
slide button on top of belt | Lower | Slide Button | |
adjuster and pulling belt to |
|
| |
Anchor Belt |
|
| |
extend the length of lower |
|
|
|
anchor belt (fig. c). |
|
| Belt |
|
| (fig. c) | |
|
| Adjuster | |
6Check that the lower anchor belt is through the belt path openings marked “Belt Here
7 Place car seat
8Recline car seat keeping the line inside level indicator in the green striped zone (fig. e). To change recline position, see “Recline Position Adjustment” section.
NOTE: Level indicator is located on the opposite side of car seat and not on the side shown.
(fig. d)
Rear-facing
Belt Path
Level
Indicator
(fig. e)
 Green Striped Zone
20
