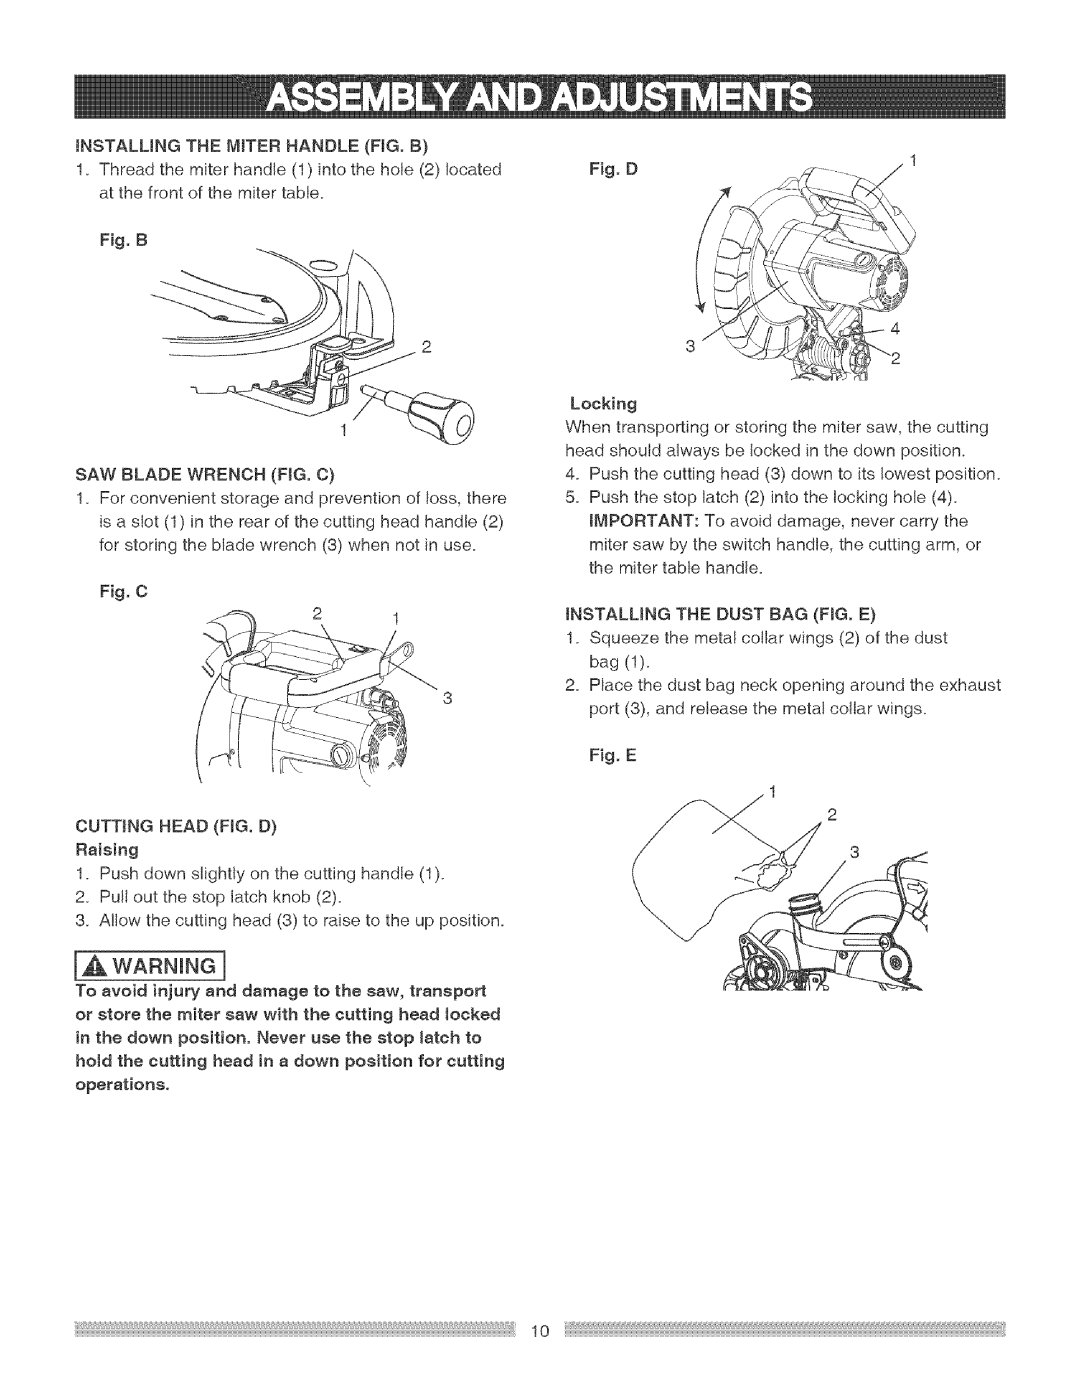
INSTALLINGTHEMITERHANDLE(FIG.B)
1.Threadthemiterhandle(1)intothehole(2)located atthefrontof themitertable.
Fig.B
SAWBLADEWRENCH(FIG.C)
1. Forconvenientstorageandpreventionofloss,there
is a slot (1) in the rear of the cutting head handle (2) for storing the blade wrench (3) when not in use.
Fig. C
CUTTING HEAD (FIG. D)
Raising
1.Push down slightly on the cutting handle (1).
2.Pull out the stop latch knob (2).
3.Allow the cutting head (3) to raise to the up position.
l,&WARNINGn
To avoid injury and damage to the saw, transport or store the miter saw with the cutting head locked in the down position. Never use the stop latch to hold the cutting head in a down position for cutting operations.
Fig.D
Locking
When transporting or storing the miter saw, the cutting head should always be locked in the down position.
4.Push the cutting head (3) down to its lowest position.
5.Push the stop latch (2) into the locking hole (4). IMPORTANT: To avoid damage, never carry the miter saw by the switch handle, the cutting arm, or the miter table handle.
iNSTALLiNG THE DUST BAG (FIG. E)
1_ Squeeze the metal collar wings (2) of the dust bag (1)_
2_ Place the dust bag neck opening around the exhaust port (3), and release the metal collar wings.
Fig. E
10
