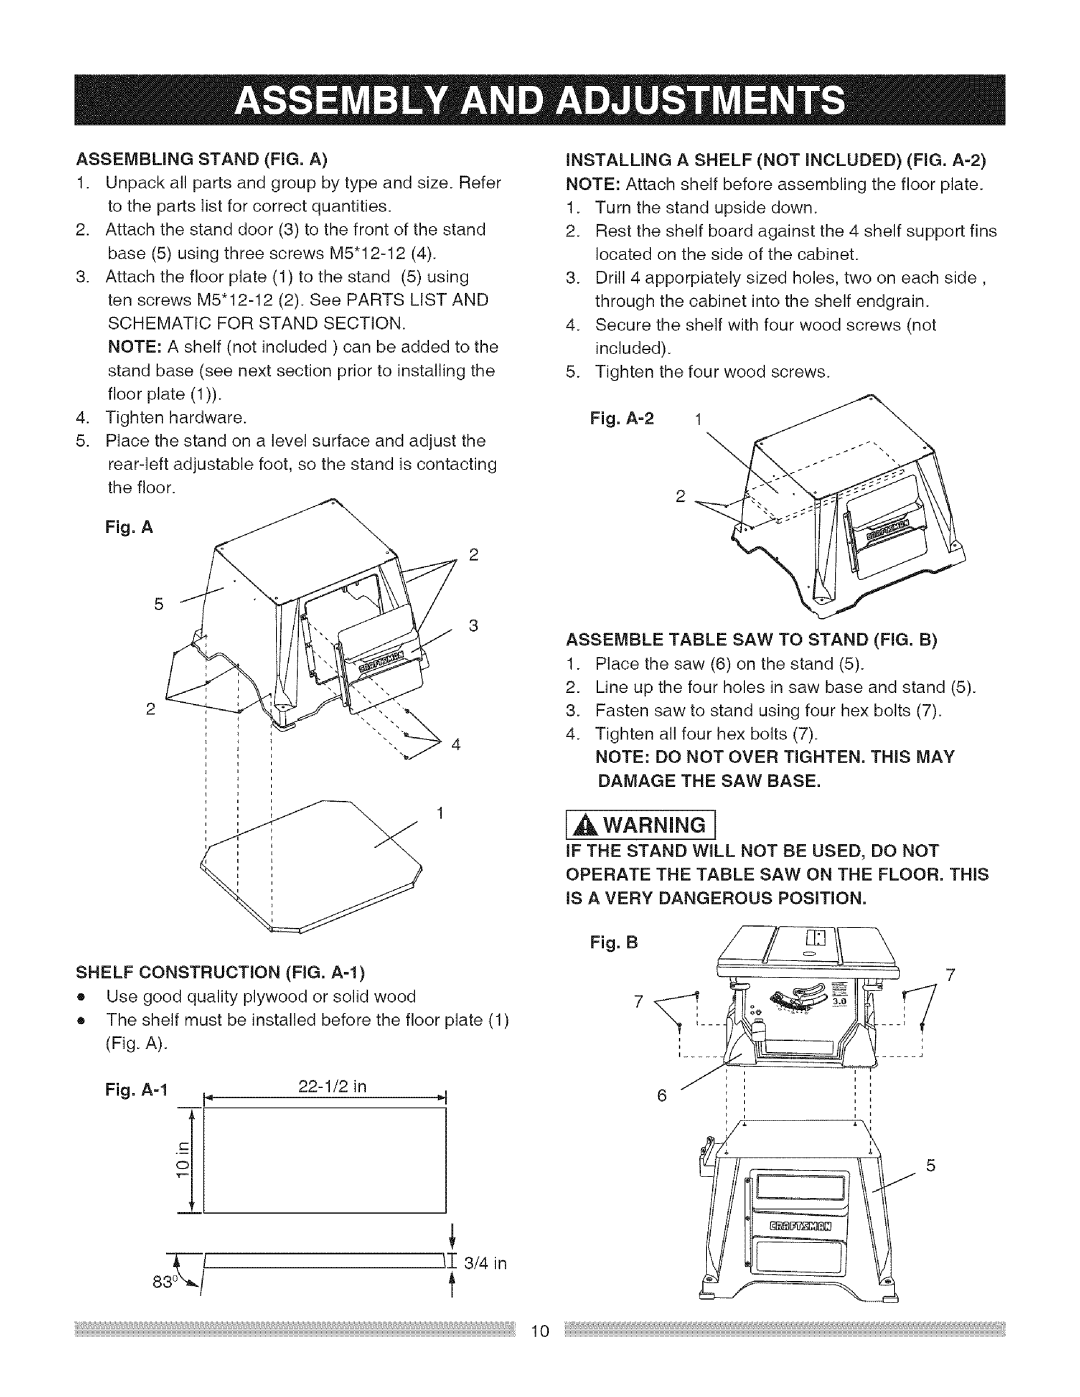
ASSEMBUNGSTAND(FIG.A)
1.Unpackallpartsandgroupbytypeandsize.Refer
tothepartslistforcorrectquantities.
2.Attachthestanddoor(3)tothefrontofthestand
3.Attachthefloorplate(1)tothestand(5)using
SCHEMATICFORSTANDSECTION. NOTE:Ashelf(notincluded) canbeaddedtothe standbase(seenextsectionpriorto installingthe floorplate(1)).
4.Tightenhardware.
5.Placethestandona levelsurfaceandadjustthe
rear-leftadjustablefoot,sothestandiscontacting thefloor.
Fig.A
SHELF CONSTRUCTION (FIG.
•Use good quality plywood or solid wood
•The shelf must be installed before the floor plate (1) (Fig. A).
Fig. | p, | ,_ | |
| J |
|
|
INSTALUNG A SHELF (NOT iNCLUDED) (FIG.
1.Turn the stand upside down.
2.Rest the shelf board against the 4 shelf support fins located on the side of the cabinet.
3.Drill 4 apporpiately sized holes, two on each side, through the cabinet into the shelf endgrain.
4.Secure the shelf with four wood screws (not included).
5.Tighten the four wood screws.
Fig. A-2 1
ASSEMBLE TABLE SAW TO STAND (FIG. B)
1.Place the saw (6) on the stand (5).
2.Line up the four holes in saw base and stand (5).
3.Fasten saw to stand using four hex bolts (7).
4.Tighten all four hex bolts (7).
NOTE: DO NOT OVER TIGHTEN. THiS MAY
DAMAGE THE SAW BASE.
I ,WARNING
IF THE STAND WILL NOT BE USED, DO NOT OPERATE THE TABLE SAW ON THE FLOOR. THiS IS A VERY DANGEROUS POSiTiON.
Fig. B
83" / | ,I3/4 |
| t |
