Manuals
/
Craftsman
/
Power Tools
/
Saw
Craftsman
137.24885
operating instructions
Abcd Jklm
Models:
137.24885
1
7
30
30
Download
30 pages
49.86 Kb
4
5
6
7
8
9
10
11
Schematic
Blade Tilting Indicator FIG. T
Symptom Possible Causes
Adjusting Rear Table Extension
Safety
ON/OFF Switch FIG
Usingthe Dust Chute FIG. Y
Page 7
Image 7
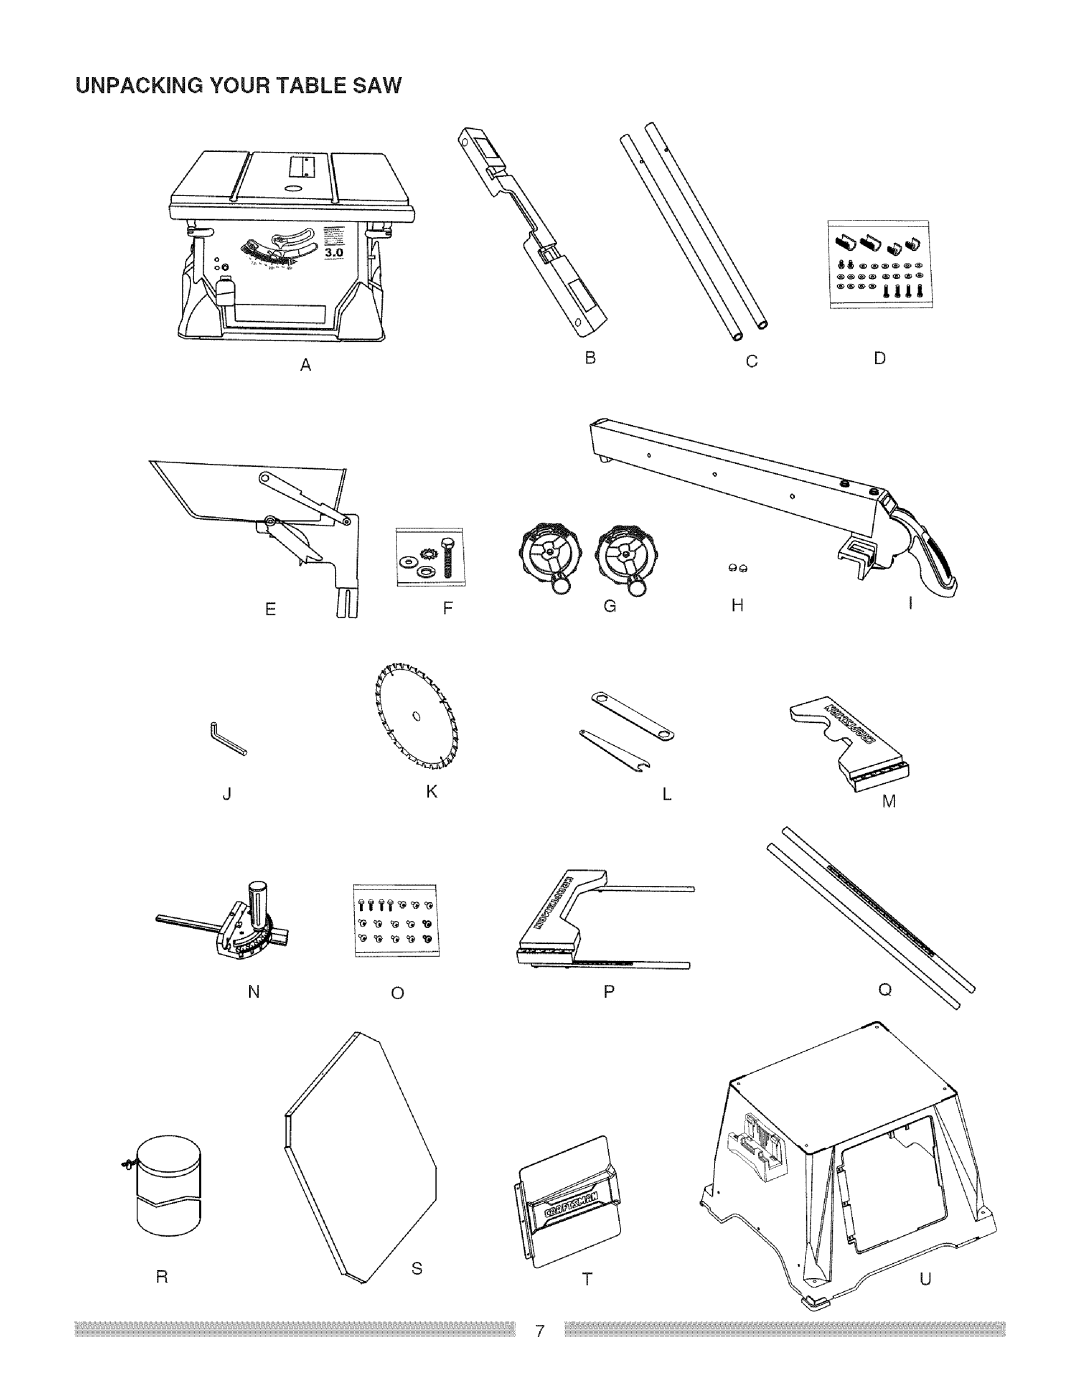
UNPACKING
YOUR TABLE SAW
l .... J,Jl_ 1
A
B
C
D
\
J
K
L
M
N
0
P
R
T
Page 6
Page 8
Page 7
Image 7
Page 6
Page 8
Contents
Visit our Craftsman website
Safety Instructions
Motor
ONE=YEAR Full Warranty on Craftsman Tool
Section
Lead from lead-based paints
USE only Recommended Accessories
Dang ER Look for this symbol that
Never USE the Miter Gauge and Fence Simultaneously
Never Perform ANY Operation
Grounding iNSTRUCTiONS
Quantity
= Only use atackable dadoes
Abcd Jklm
Page
RESIN- a stickysapthathashardened
ARBOR- Theshaftonwhichthebladeordadois mounted
BLADEELEVATIONHANDWHEEL- Raisesand lowerstheblade
COMPOUNDCUT- Asimultaneousbevelandmiter cut
Damage the SAW Base
Tightenhardware Placethestandona levelsurfaceandadjustthe
ASSEMBUNGSTANDFIG.A
Assemble Table SAW to Stand FIG. B
RIP Fence FIG. D
Installing and Changing the Blade FIG. E, F, G
Mountsawonworksurface
Blade Raising Handwheel FIG. C
Blade Guard Assembly FIG. H, I, J
Proper insert in place. Use the original installed
To avoid possible injury and damage to
Serious injury
Installing Table Side Extensions FIG. L, L=I
Installing Rightside Table Extension Wing FIG. K
Avoid Kickbacks FIG. J
RIP Fence Indicator Adjustment FIG. N
Installing Rear Table Extension FIG, M
Adjusting Rear Table Extension
RIP Fence Adjustment FIG. N
Loosenthebladebevellockknob1andmovethe
900Stop Disconnectthesawfromthepowersource
If the blade is partial to left aide
Blade Tilting Indicator FIG. T
Miter Gauge Adjustment FIG. T=I
Rotatethebladebringingthemarkedtoothtothe
Overload Protection FIG
ON/OFF Switch FIG
Using the Table Extension FIG. W
Basicsawoperations Raisetheblade FIG. U
Greatly increase the likelihood of injury
Usingthe Dust Chute FIG. Y
To prevent sawdust buildup inside the saw housing
Cutting Operations
Always position the larger surface of the workpiece
RiPPiNG Small Pieces
To prevent serious injury
Enough to cause a severe injury
Fig, DD
WARNINe
Fig. HH
DADOCUTSFIG. HH
Lubrication
Corrective Action
Symptom Possible Causes
10 in. Table SAW
Schematic
SAW Model
Parts LiST and Schematic for Stand
Page
Page
=888-SU=HOGAR
=800=LE=FOYER
Top
Page
Image
Contents