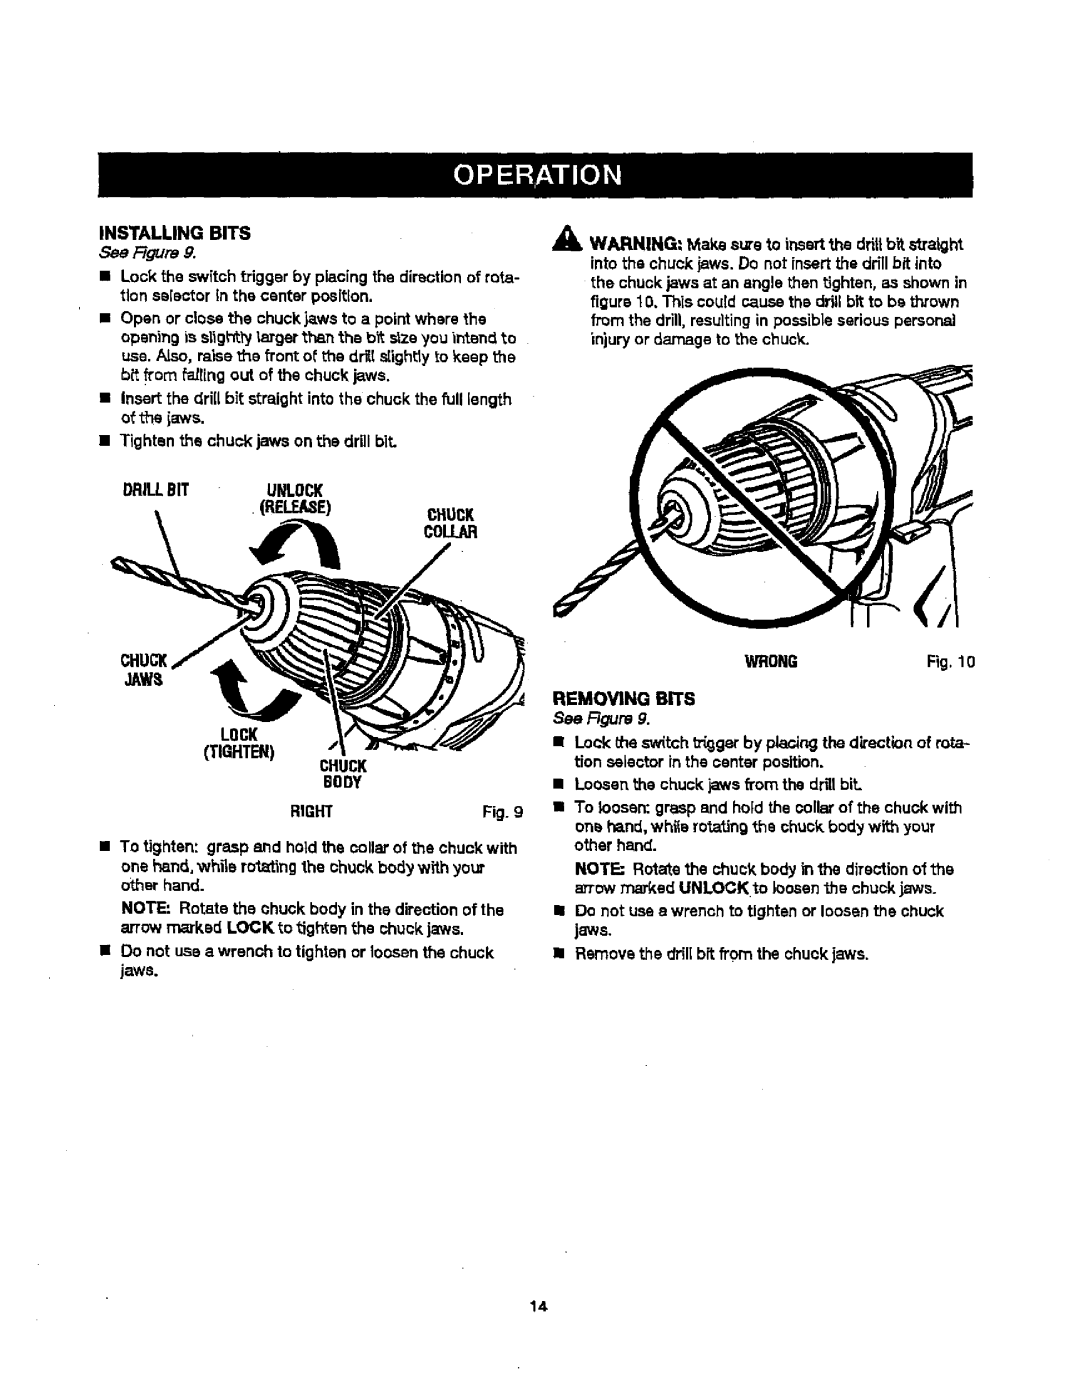
INSTALLING | BITS | WARNING: Make sure to insertthe drillbit straight | |
F/gure 9. | _k | ||
| into the chuck jaws. Do not insertthe drillbit into | ||
• Lock the switch trigger by piecing the direction of rota- | |||
the chuck jaws at an angle then tighten, as shownin | |||
tion selector | in the center position. | ||
figure 1O.Thls could cause the drill bit to be thrown | |||
• Open or close the chuck j_zwsto a point where the | from the drill, resultingin possib]e serious personal | ||
opening Lsalight/largar then the bit elze you intend to | injuryor damage to the chuck. | ||
use. Also, raise the front of the driftstighttyto keep the |
| ||
b_ from fa_ling out of the chuck jaws.
•Insert the drill bit straight into the chuck the full length of the jaws.
•Tighten the chuck jaws on the drill bit.
DRILLBIT | UNLOCK |
|
| . (RELEAEE) | CHUCK |
|
| |
|
| COLLAR |
LOCK
(TIGHTEN)
CHUCK
BODY
RIGHT | Fig. 9 |
•TOtighten: grasp and hold the collar of the chuck with
one hand, while ro'_tingthe chuck body with your other hand.
NOTE: Rotate the chuck body in the direction of the arrow marked LOCK to tighten the chuck jaws.
•Do not use a wrench to tighten or loosen the chuck
ja.w8.
WRONGFig. 10
REMOVING BITS
See F_jure g.
•Lock the sw(tch t_gar by placing the direction of rota- tion selector in the center position.
•Loosen the chuck jaws from the drillbiL
•To loosen: grasp and hold the collar of the chuck with one hand,while ro_ting the chuck body with your other hand.
NOTE: Rotate the chuck body in the direction at the arrow ma_sd UNLOCK to loosenthe chuck jaws.
•Do not use a wrench to tighten or loosen the chuck
jaws.
•Remove the driftbit from the chuck jaws.
14
