_I_ WARNING: When servicing, use on3yidentical
Craftsman replar.sment parts. Use of any other paTt may create a hazard or cause product damage.
_k WARNNG: Always wear safety goggles or safety gta.sesswith side shields when using compressed air to clean tools. ITthe operation is dusty,siso wear a dust mask.
_lk WARNING: To avoid serious personalinjury,always remove the battery pack from the tool when cleaning or performingany maintenance.
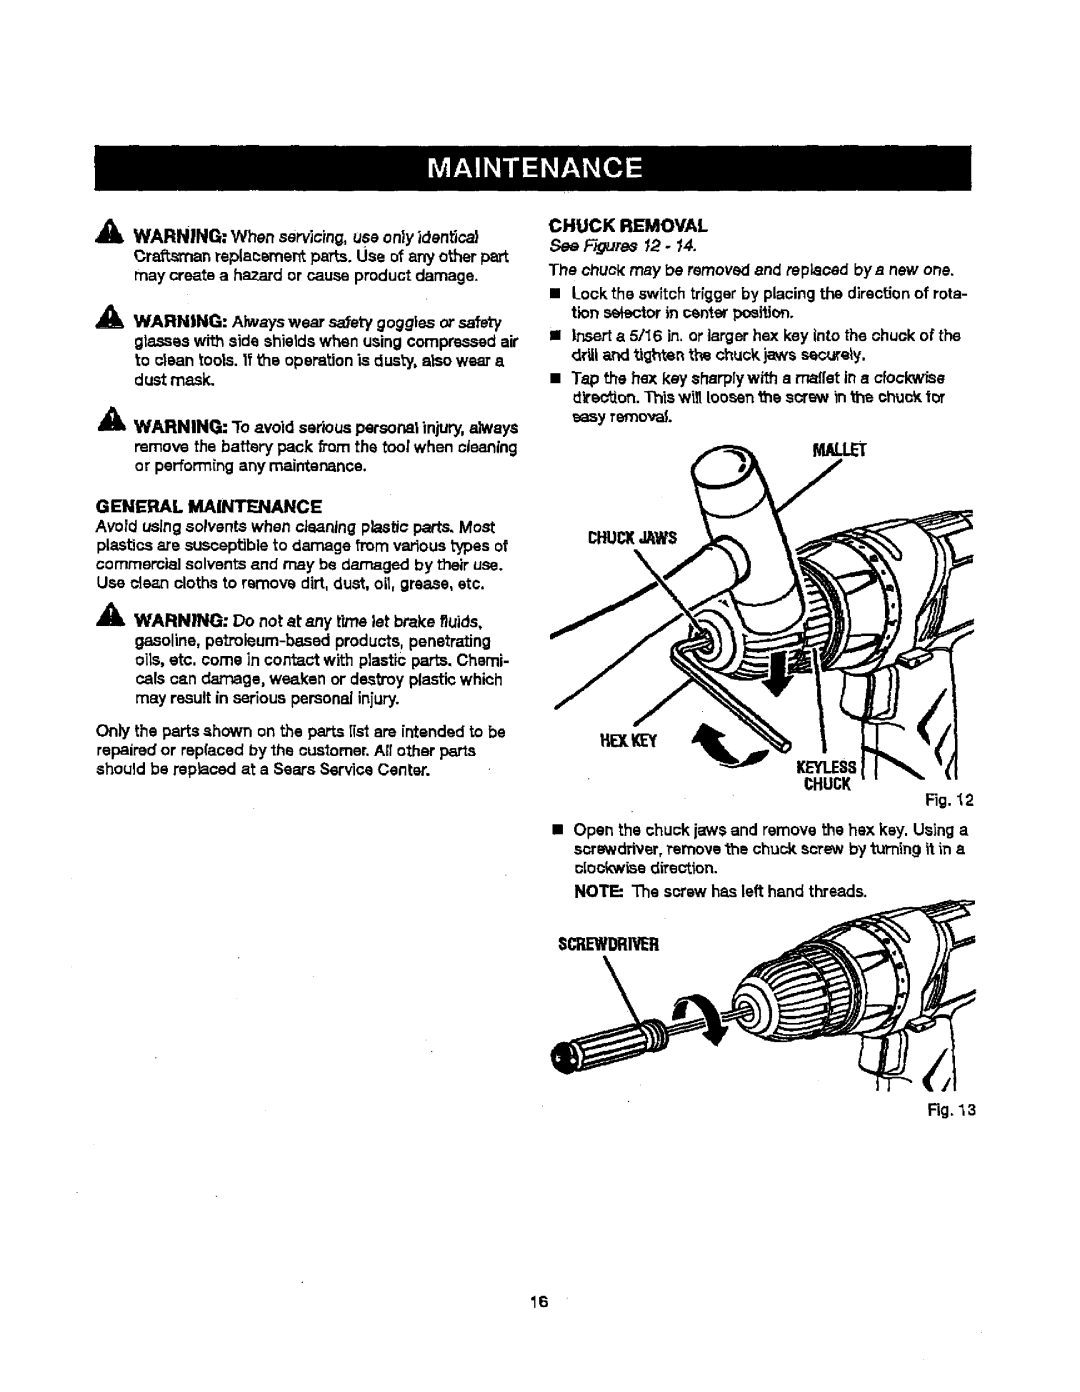
CHUCK REMOVAL
See F-_ums 12- 14.
The chuci( may be removed and replaced bye new one.
•Lock the switch triggerby placing the directionof rota- tion selector in center position.
•nsert a 5116 in. or larger hex key into the chuck of the driUarid tighten the chuck jaws securely.
•Tap the box key sharplywith a ma[(et in a clockwise direc_on. This w_ loosen the scrs_, _nthe ohucY,tot
easy removal
G ENERAL MAINTENANCE
Avoid using solvents when cleaning plastic parts. Most plasticsare susceptible to damage from various types st commemia] solventsand may be damaged by their use. Use clean cloths to remove dirt, dust, sit, grease, eta.
_1_ WARNING: Do not at any time let brake fluids,
gasoline,
Pals can damage, weaken or destroy plasticwhich may result in serious personalinjury.
Only the parts shown on the parts [(st are intended to be
repairedor rep(aced by the customer.All other parts should be replaced at a Sears Service Center.
KEYt,.ESS
CHUCK
Fig. "t2
•Open the chuck jaws and remove the hsx key. Using a scrawdriver,remove the chuck screw by b._'ningit in a clockwisedirection.
NOTE: The screw has left hand threads.
SCREWDRIVER
Fig. 13
16