Model No
Operators Manual
Sears, Roebuck and Co., Hoffman Estates, IL
ONE Year Full Warranty on Craftsman GAS Weedwacker
Keepchildren,bystanders,animals 50feet15metersaway
Reducetheriskoffireandserious
358.79108
Brushcutterattachment 358.79244
Alwayskeepengineontheright handsideofyourbody
Wearhearingprotection
Keephandlesfreeofoilandfuel
Failuretodosoisaviolationofthe
Flerbeservicedorreplacedbya
SearsServiceCenter
SPECIALNOTICEThisunitis
Unit
Stickstobethrownortoricochet
Blowertubes
Restrictproperairflow
Objectssuchasrocks,vines,branch- es,rope,string,etc
Hedge Trimmer Safety
Pole Pruner Safety
Disconnectattachmentfromthe
Snow Thrower Safety
Cartoncontents Checkcartoncontentsagainstthefol- lowinglist
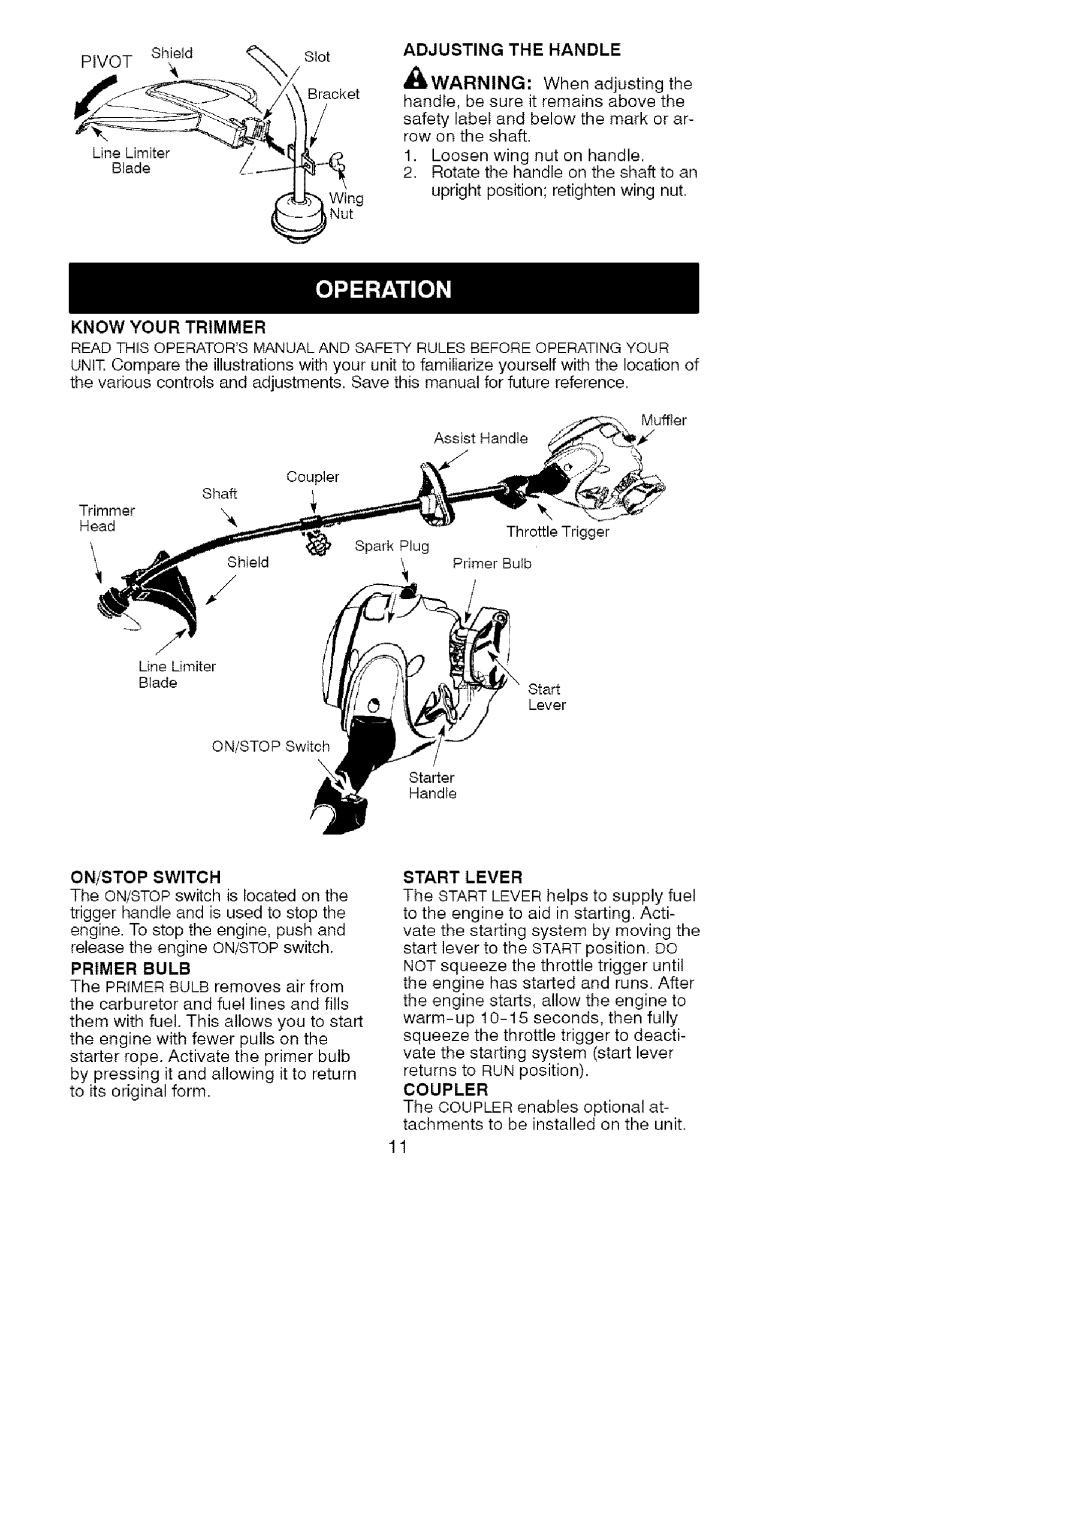
Start Lever
Handle
Starting a Cold Engine
HOW to Start Your Unit
Switeh
Before Starting Engine
Starting a Flooded Engine
Craftsman Convertible TM Feature
Installing Optional ATTACH- Ments
Starting a Warm Engine
Trimmer Line Advance
HOW to Stop Your Unit
Operating Instructions
Operating Position Always Wear
Mowing
Maintenance Schedule
Right
Trimming
Muffler is very hot
General Recommendations
Bels
Muffler on this
Holes
Line Replacement
Carburetor Adjustment
Idle Speed Adjustment
Engine
Storeinacleandryarea
Lightlyoilexternalmetalsurfaces
Fuel System
Cause
Troubleshooting Table
Ranty Responsibilities As
Your Warranty Rights
Manufacturers Warranty
41 I 61 I 81
Where to GET Warranty SER
MAINTENANCE, Replacement and Repair of Emission RE
Emission Control Warranty
T19t64
Repair Parts
Llk Warning
Advertenoia
Page
Seguridad DEL Usuario
Iiaivertencia
Informacion DE Seguridad DEL Aparato
Seguridad CON EL Combustible
Seguridad DEL Aparato Y EN EL Mantenimiento
Siempre de
Guridad Para Accesorios
Transporte Y Almacenamiento
Aviso Especial Su aparato viene
Seguridad AL Cortadora DE Malezas
Seguridad AL Cortar Bordes
Advertencia
Seguridad AL Propulsor DE AIRE/ASPIRADORA
Seguridad AL Cultivador
Cortado
DtADVERTENCIALacuchillasi
Niendoencontactoelladederecho Lamismaconmaterialyacortado
Ramas
Tengaoagarreelaparatoporlacuchilla.est& en movimiento
Montaje
Seguridad AL Soplador DE
ADVERTENClA Nunca este
Gire
Aprietan
Instalacion DE LA Protector
Palanca DEL Arrancador
Ajuste DEL Mango
Conozca SU Aparato
Bombeador
Para Poner EN Marcha EL Motor Advertencia
Antes DE Poner EN Marcha EL Motor
Importante
Para Detener EL Motor
Como Remover EL Accesorio
Para Arrancar CON EL Motor Caliente
Arranque DE Motor Ahogado
Funcion DE Craftsman Convertible
Posicion DE USO
Instalacion DEL Accesorios
Instrucciones DE USO
Metodos DE Corte
Avance DE LA Ljnea DE Corte
Verifique QUE no HAY.& Piezas Daiadas O Gastadas
Cronograma DE Mantenimiento
Recomendaciones Generales
Verifique QUE no Haya FIJA- Dores NI Piezas Sueltas
Inspeccione EL Silenciador Y LA Rejilla Antichispas
Sequeelaparatousandountrapo secoylimpio
Limpie EL Filtro DEL Aire
Reemplazo DE LA Linea
Marcha Lenta
Ajuste AL Carburador
Mantenga a
Otros
Abastecimiento DEL Motor
Sintoma
Tabla Diagnostica
SUS Derechos Y Obligaciones
Modificadas
SearsDANOSPORCONSECUEClA. Piezas RELAClONADAS CON LA
Dasolamodificaci6ndepiezas
Page
Page
Your Home
MY-HOME

