NOTE:Thedustcupandretaining | NOTE: | Make | sure all | parts | are in place | |||
washerarelocatedonthegearboxshaft | as | illustrated, | and the | blade | is sand- | |||
andnotinthepartsbagAllotherfas.- | wiched | between the dust cup and the | ||||||
tenersmentionedinthefollowingas- | retaining | washer. There should | be no | |||||
semblystepsareinthepartsbag. | space between the blade and | the dust | ||||||
1. Removetheretainingwasherfrom | cup or the retaining | washer. |
|
| ||||
thethreadedshaftofthegearbox. | 7. | Align hole | in dust | cup with | hole in | |||
Leavethedustcupontheshaft. |
| side | of gearbox | by rotating | the | |||
2. Installthebladeandtheretaining |
| blade. |
|
|
|
|
| |
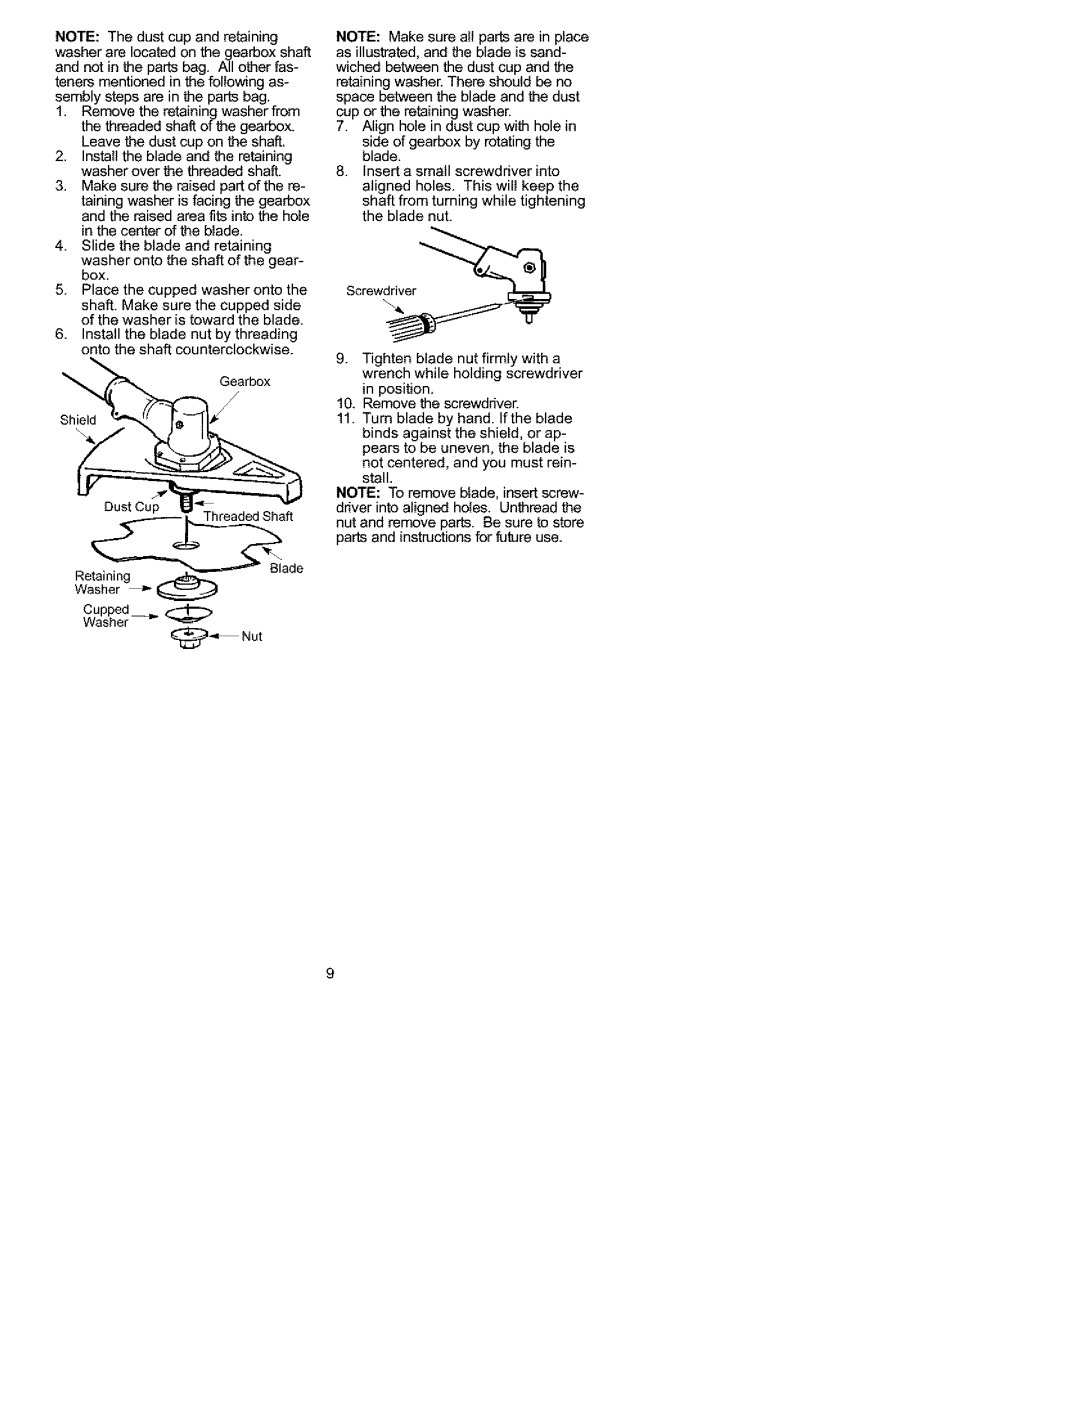
washeroverthethreadedshaft. | 8. | Insert a small | screwdriver | into | ||||
3.Makesuretheraisedpartofthere- aligned holes. This will keep the tainingwasherisfacingthegearbox shaft from turning while tightening andtheraisedareafitsintothehole the blade nut. inthecenteroftheblade.
4.Slidethebladeandretaining washerontotheshaftofthegear- box.
5.Placethecuppedwasherontothe Screwier _ shaftMakesurethecuppedside. ofthewasheristowardtheblade.
6.Installthebladenutbythreading ontotheshaftcounterclockwise.
9.Tighten blade nut firmly with a
Gearbox |
| wrench while | holding screwdriver | |
|
| |||
|
| in position. |
| |
*/ | 10. | Remove the | screwdriver. | |
11. | Turn | blade by hand. If the blade | ||
| binds | against | the shield, or ap- | |
pears to be uneven, the blade is not centered, and you must rein- stall.
NOTE: To remove blade, insert screw- driver into aligned holes. Unthreed the nut and remove parts. Be sure to store parts and instructions for future use.
Cupped _ @
Washer
_Nut