
536.88644 specifications
The Craftsman 536.88644 is a versatile snow blower designed to tackle the challenges of winter weather with efficiency and ease. As part of the Craftsman lineup, this machine exemplifies the brand's commitment to quality, performance, and user satisfaction.One of the standout features of the Craftsman 536.88644 is its powerful engine. Equipped with a reliable 24-inch clearing width, the snow blower can efficiently handle heavy snowfall, making it an ideal choice for homeowners in areas that experience significant winter weather. The engine delivers robust performance, allowing the machine to handle not only light dustings but also deeper snow accumulations.
The Craftsman 536.88644 features a self-propelling system, which ensures that users can effortlessly maneuver the machine across various terrains. The adjustable speed settings offer flexibility, enabling users to customize their pace based on the snow conditions and their own preferences. This feature is particularly beneficial during heavy snowfall, where control and direction become crucial.
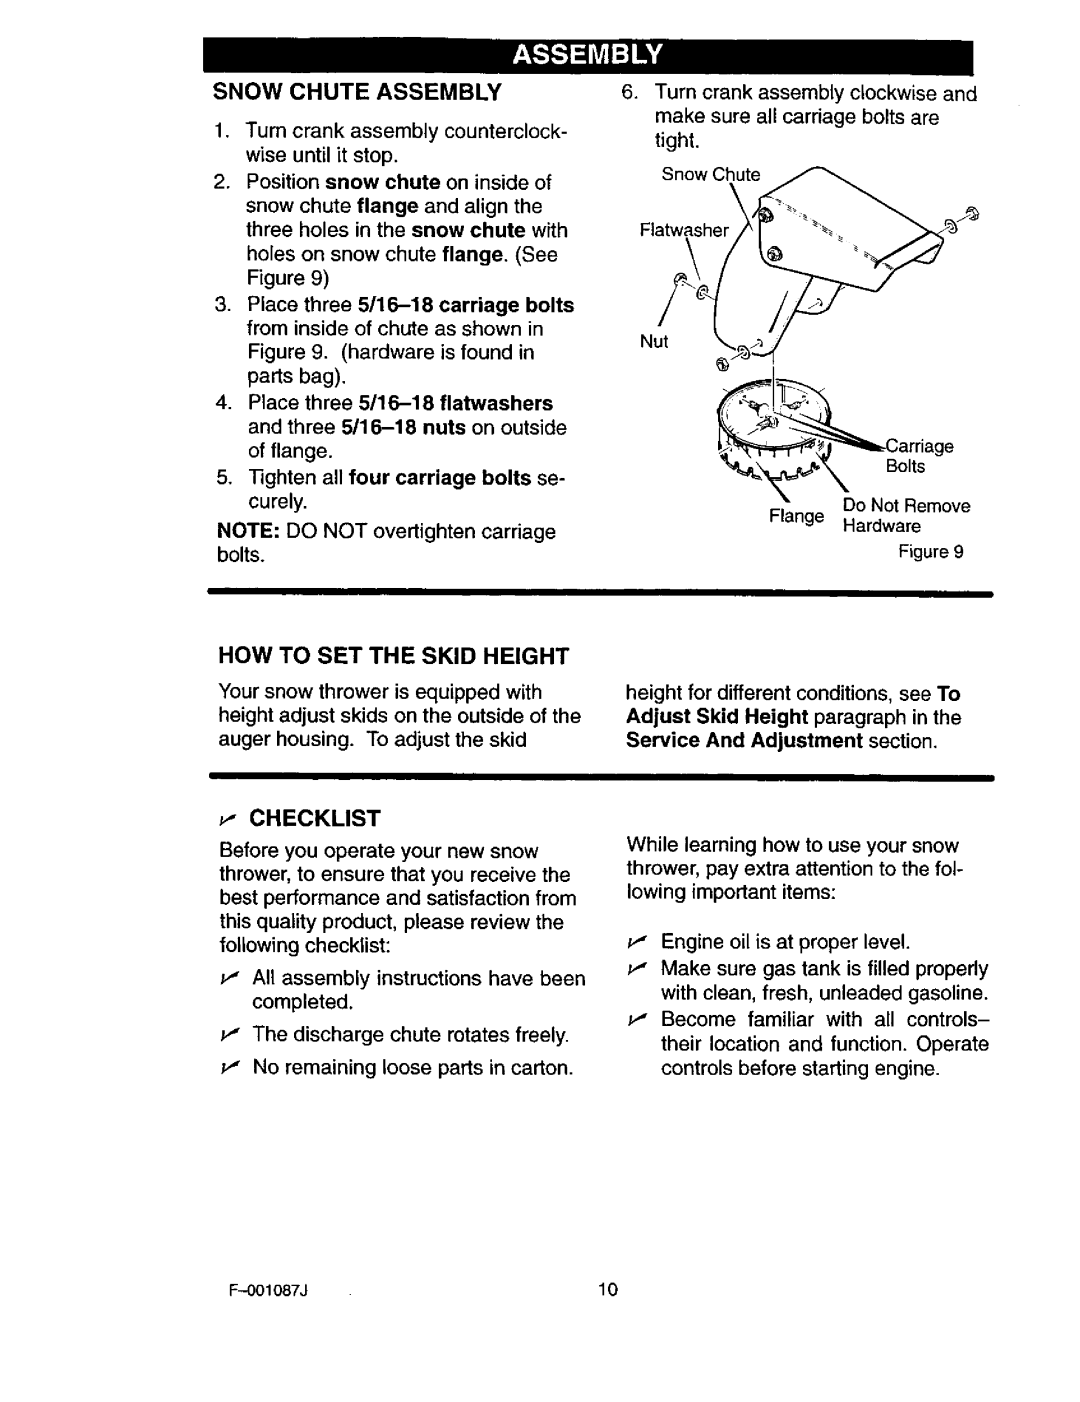
An additional innovative technology integrated into the design is the 180-degree chute rotation. This allows users to easily direct snow away from walkways, driveways, and parked vehicles, providing optimal snow management. The chute can be adjusted with a simple crank, making it user-friendly and efficient for rapid snow clearing tasks.
Durability is a key characteristic of the Craftsman 536.88644. Built with robust materials, it is engineered to withstand the rigors of winter use. The reinforced auger and impeller design not only enhances durability but also increases the machine's snow-throwing capability, allowing it to throw snow up to 40 feet away.
User comfort is also a consideration in the design of this snow blower. The ergonomically designed controls and comfortable grip handles reduce fatigue during operation, while the heated hand grips provide warmth during cold winter days. This thoughtful design ensures that users can operate the Craftsman 536.88644 for extended periods without discomfort.
Overall, the Craftsman 536.88644 combines power, versatility, and user-friendly features to create a reliable snow-clearing solution. With its robust performance, thoughtful design, and durable construction, this snow blower is well-suited for homeowners seeking to maintain clear pathways and driveways during the winter months. Whether faced with light snowfall or heavy blizzards, the Craftsman 536.88644 ensures efficient and effective snow removal.