Right AngleAttachment53002
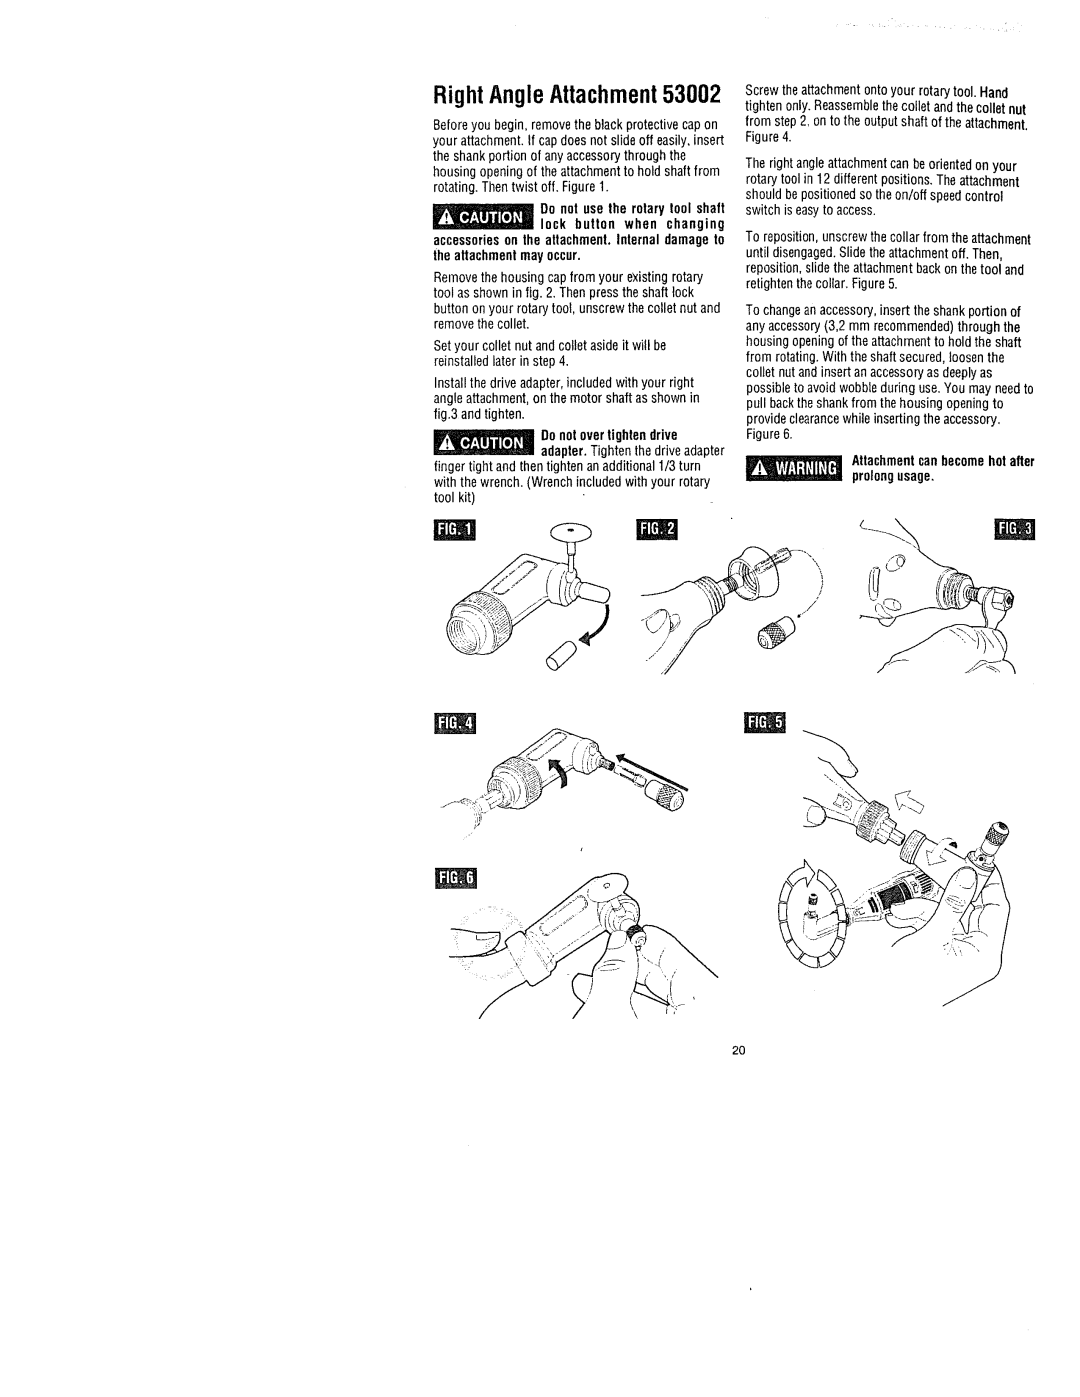
Before you begin, removethe black protective capon your attachment. If cap doesnot slide off easily, insert the shank portion of anyaccessory through the housing opening of the attachmentto hold shaftfrom rotating. Then twist off. Figure 1.
Do not use the rotary !ool shaft lock button when changing
accessorieson the attachment. Internal damage to the attachmentmay occur.
Remove the housing capfrom your existing rotary tool as shown in Jig. 2. Thenpressthe shaft _ock button on your rotary tool, unscrew the collet nut and removethe collet.
Setyour collet nut and collet asideit will be reinstalled later in step 4.
Install the drive adapter,included with your right angle attachment,on the motor shaft asshown in fig.3 and tighten.
Donot over tightendrive adapter. Tighten the driveadapter
finger tight and then tighten an additional 1/3 turn with the wrench. (Wrench included with your rotary tool kit)
/
Screw the attachment onto your rotary tool. Hand tighten only. Reassemblethe collet and the collet nut from step2, on to the output shaft of the attachment. Figure4.
The right angle attachmentcan be orientedon your rotary tool in 12 different positions. The attachment should be positioned so the on/off speed control switch is easy to access.
To reposition, unscrew the collar from the attachment until disengaged. Slidethe attachmentoff. Then, reposition,slide the attachment back on the tool and retightenthe collar. Figure5.
To changean accessory,insert the shank portion of
anyaccessory(3,2 mm recommended) through the housing opening of the attachmentto hold the shaft from rotating. With the shaftsecured, loosen the collet nut andinsert an accessoryas deeplyas
possibleto avoid wobbleduring use. You may needt( pull backthe shank from the housing opening to provide clearancewhile inserting the accessory. Figure 6.
_ | Attachmentcan becomehot afte |
| prolongusage. |
2O