KNOW YOUR TIMER
![]()
![]()
![]() Minute Cook End
Minute Cook End ![]()
![]() Minder
Minder![]() Period Time
Period Time
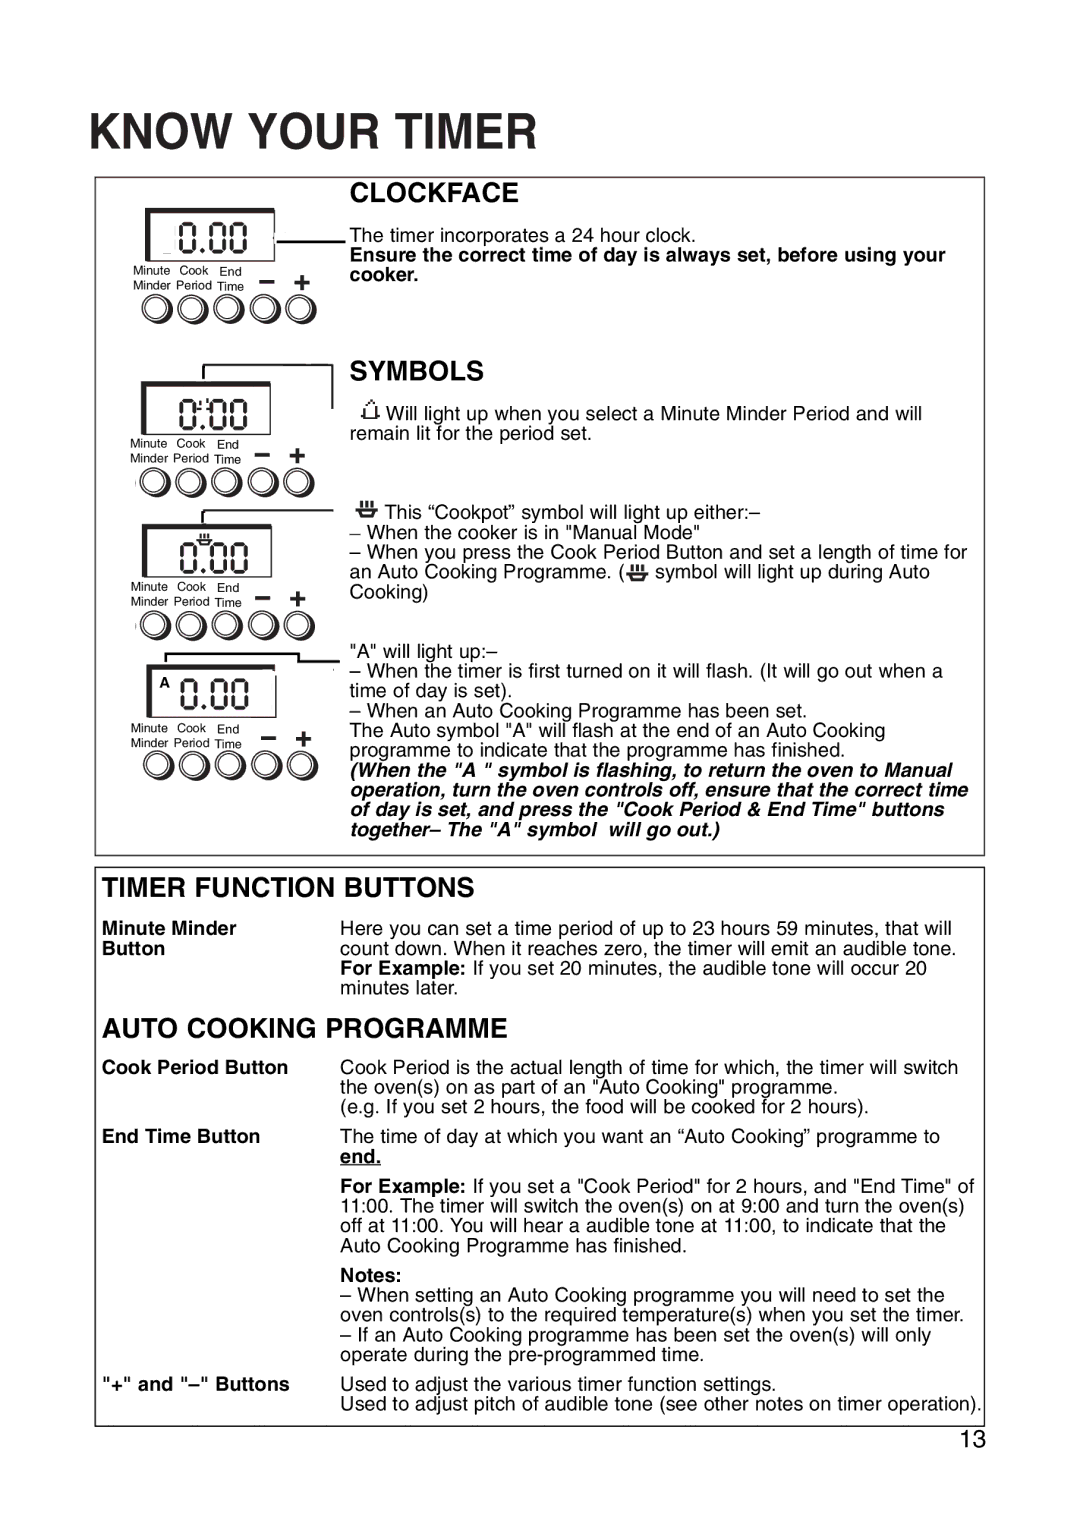
CLOCKFACE
The timer incorporates a 24 hour clock.
Ensure the correct time of day is always set, before using your cooker.


 Minute Cook End
Minder Period Time
MinuteMinuteCook CookEnd End
MinderMinderPeriod PeriodTime ManualTime
A | A |
U |
T
O
O
MinuteMinuteCook CookEnd End
Minder Period Time Manual
Minder Period Time
SYMBOLS
![]() Will light up when you select a Minute Minder Period and will remain lit for the period set.
Will light up when you select a Minute Minder Period and will remain lit for the period set.
![]() This “Cookpot” symbol will light up either:– _ When the cooker is in "Manual Mode"
This “Cookpot” symbol will light up either:– _ When the cooker is in "Manual Mode"
– When you press the Cook Period Button and set a length of time for an Auto Cooking Programme. ( symbol will light up during Auto Cooking)
"A" will light up:–
–When the timer is first turned on it will flash. (It will go out when a time of day is set).
–When an Auto Cooking Programme has been set.
The Auto symbol "A" will flash at the end of an Auto Cooking programme to indicate that the programme has finished.
(When the "A " symbol is flashing, to return the oven to Manual operation, turn the oven controls off, ensure that the correct time of day is set, and press the "Cook Period & End Time" buttons together– The "A" symbol will go out.)
TIMER FUNCTION BUTTONS
Minute Minder | Here you can set a time period of up to 23 hours 59 minutes, that will |
Button | count down. When it reaches zero, the timer will emit an audible tone. |
| For Example: If you set 20 minutes, the audible tone will occur 20 |
| minutes later. |
AUTO COOKING PROGRAMME
Cook Period Button | Cook Period is the actual length of time for which, the timer will switch |
| the oven(s) on as part of an "Auto Cooking" programme. |
| (e.g. If you set 2 hours, the food will be cooked for 2 hours). |
End Time Button | The time of day at which you want an “Auto Cooking” programme to |
| end. |
| For Example: If you set a "Cook Period" for 2 hours, and "End Time" of |
| 11:00. The timer will switch the oven(s) on at 9:00 and turn the oven(s) |
| off at 11:00. You will hear a audible tone at 11:00, to indicate that the |
| Auto Cooking Programme has finished. |
Notes:
–When setting an Auto Cooking programme you will need to set the oven controls(s) to the required temperature(s) when you set the timer.
–If an Auto Cooking programme has been set the oven(s) will only operate during the
"+" and
Used to adjust pitch of audible tone (see other notes on timer operation).
13
