CH and CL Series Power Amplifiers
2 Setup
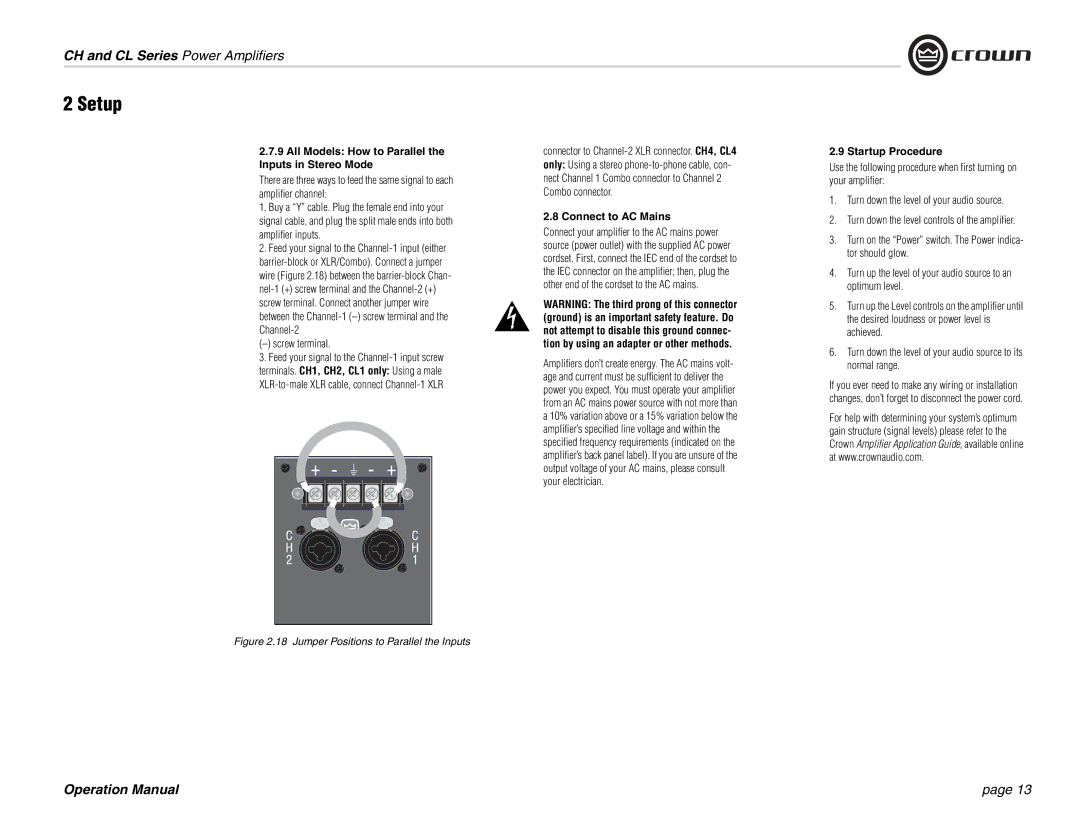
2.7.9 All Models: How to Parallel the Inputs in Stereo Mode
There are three ways to feed the same signal to each amplifier channel:
1. Buy a “Y” cable. Plug the female end into your signal cable, and plug the split male ends into both amplifier inputs.
2. Feed your signal to the
(–) screw terminal.
3. Feed your signal to the
connector to
2.8 Connect to AC Mains
Connect your amplifier to the AC mains power source (power outlet) with the supplied AC power cordset. First, connect the IEC end of the cordset to the IEC connector on the amplifier; then, plug the other end of the cordset to the AC mains.
WARNING: The third prong of this connector (ground) is an important safety feature. Do not attempt to disable this ground connec- tion by using an adapter or other methods.
Amplifiers don’t create energy. The AC mains volt- age and current must be sufficient to deliver the power you expect. You must operate your amplifier from an AC mains power source with not more than a 10% variation above or a 15% variation below the amplifier’s specified line voltage and within the specified frequency requirements (indicated on the amplifier’s back panel label). If you are unsure of the output voltage of your AC mains, please consult your electrician.
2.9 Startup Procedure
Use the following procedure when first turning on your amplifier:
1.Turn down the level of your audio source.
2.Turn down the level controls of the amplifier.
3.Turn on the “Power” switch. The Power indica- tor should glow.
4.Turn up the level of your audio source to an optimum level.
5.Turn up the Level controls on the amplifier until the desired loudness or power level is achieved.
6.Turn down the level of your audio source to its normal range.
If you ever need to make any wiring or installation changes, don’t forget to disconnect the power cord.
For help with determining your system’s optimum gain structure (signal levels) please refer to the Crown Amplifier Application Guide, available online at www.crownaudio.com.
Figure 2.18 Jumper Positions to Parallel the Inputs
Operation Manual | page 13 |