P/N48586113E203-R0
REAR PROJECTION TV
INSTRUCTION MANUAL
DJ - 4710 DJ - 4720 DJ - 4710E / 5510E DJ - 4720E / 5520E
PROJECTION TV
IMPORTANT SAFEGUARDS
19. Safety Check
12. Power Lines
17. Damage Requiring Service
18. Replacement Parts
parts inside. Refer to qualified service personnel for repair
benzene, naphtha- near the product since it
Please keep the users manual in a safe place for future reference
Do not put volatile substance-such as
substance, or
OPTIONAL ADJUSTMENT OF SOUND
This product has advantages as follows
Make Sure of Auxiliary Parts
Information for setting up the TV
Application Guide
Table of Contents
Installation and Maintenance
Basic Guide
WHEN USING THE COMBINING ADAPTER
Antenna Connection
Indoor Antenna Connection
WHEN THE IMAGE IS NOT CLEAR
ANT/CABLE
CTV Antenna Connection
When a coaxial cable is used
When a feeder cable is used
VHF Antenna UHF Antenna ANT/CABLE
Outdoor Antenna Connection
Single Antenna Connection
Separate Antenna Connection
Video Connection
Connecting with an External Source
Connecting with SCART VIDEO
Watching the Camcorder Recording on TV
Camcorder & Video Game Connection
Video game
DVD Connection Component Video Method
External Input Connection Source
Cable TV Broadcasting Connection
Cable TV Broadcasting Station
Antenna Input Connection
Front Panel
Name of Each Part
Y Cb Cr
Side and Rear Panel
Rear Panel
Side Panel
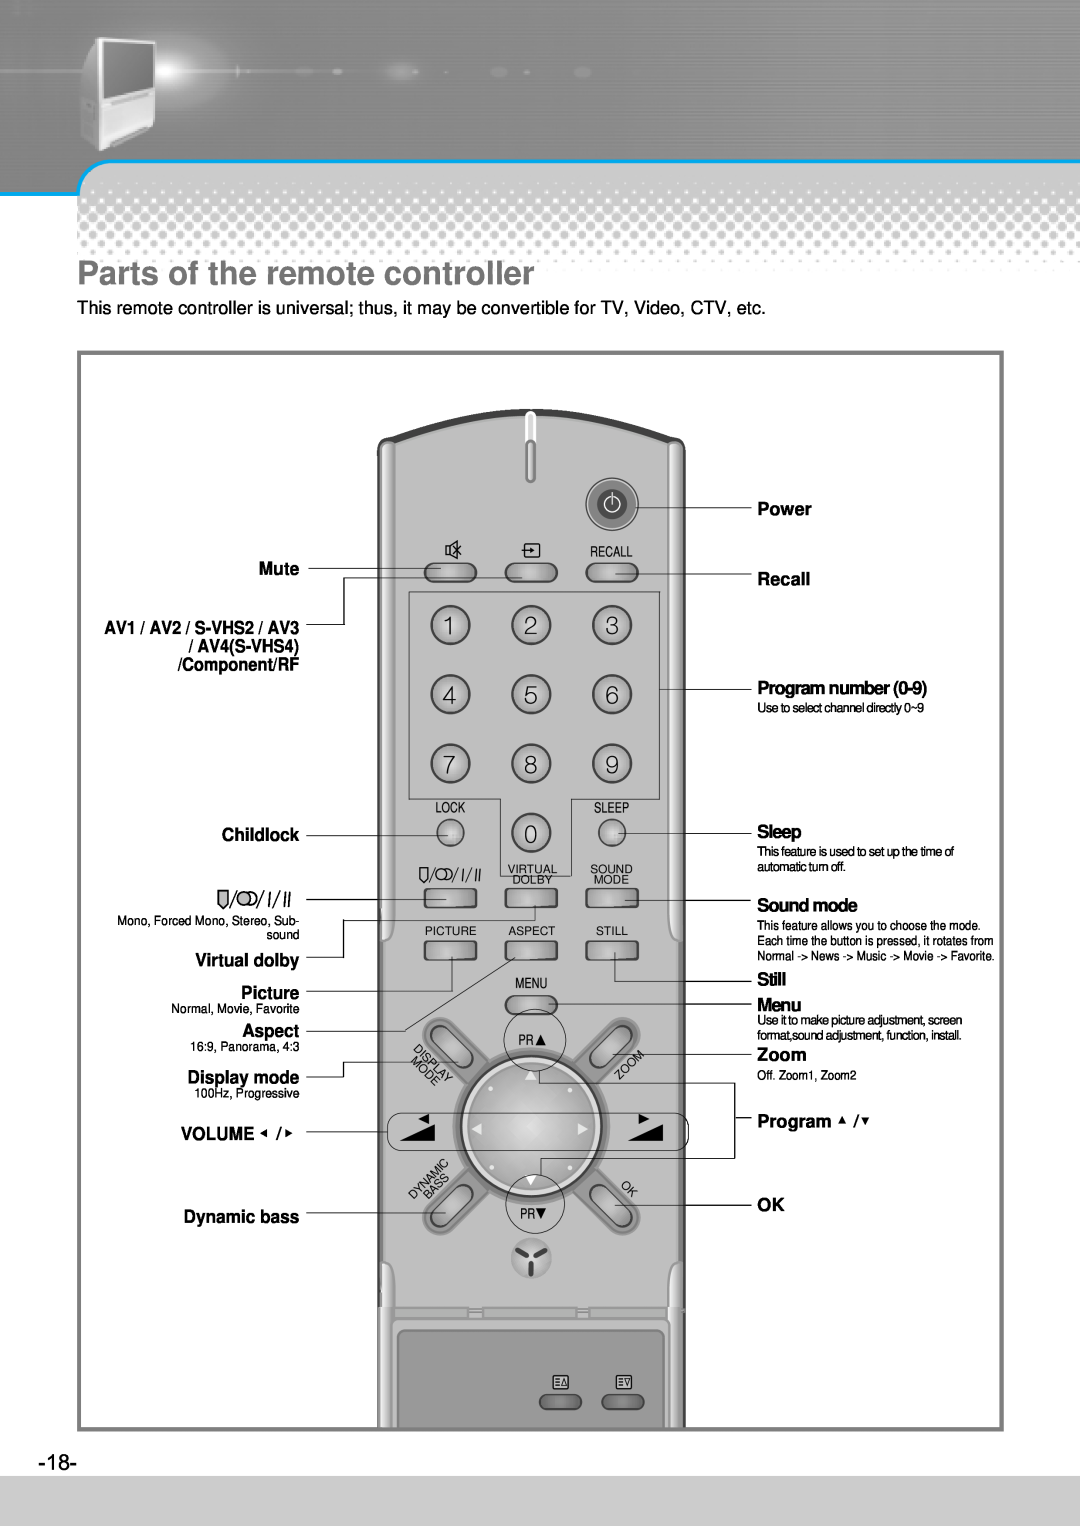
Parts of the remote controller
Page Up Red Green
Page Down Blue Yellow Size Cancel Index Mix
When the TV screen image is unclear
BATTERY INSTALLATION
P i c t u r e S c r e e n S o u n d F u n c t i o n I n s t a l l
Press the “Menu” button
Basic Menu
Press the “PR” button
Press the “ON/OFF” button of the front of the set
To Watch TV
On/Off, Number, Mute, Recall
When pressing the Program button
Press the “ON/OFF” button
Adjust volume
Press the “Power” button for turning the TV off
TO Watch TV
Select the “Auto Tuning”
Setting Up TV Stations
Auto Tuning
Repeatedly press the Menu button to select the Install menu
Please wait until the Edit menu appears
Press the VOL button to display the Auto tuning menu
Select the country you require with “VOL” button
Press the OK button
Skipping the Programs
Edit
Deleting the program positions
Moving the program positions
Pr Change
Manual tuning
Access OK Store MENU Exit
Manual Tuning
Searching for channels in the Edit menu
Press the “VOL” buttons
You can also search a channel in the Edit menu
Move the selection bar to Fine tuning and press the
Fine tuning
Fine Tuning
Cautions in menu setup
Selection of Input Signal
When watching video, Camcorder, DVD, Cable TV
Press the “ AV” button
When setting up various screen modes
Screen Adjustment
Press the “Picture” button
Select the item desired to adjust and press the “VOL” button
When adjusting the screen to taste
Adjust Contrast, Colour, and Sharpness in the same manner
Select “Picture” by pressing the “Menu” button
Press the “Aspect” and “Zoom” button
Adjustment of Screen Size
The AUTO screen operates when power is turned on firstly
Select “Convergence”
Adjustment of Colour Match
Convergence
Select “Screen”
Convergence
Press the Menu button to return to normal TV viewing
Still of Main Screen
Setup of Child Lock
Still
Press the “Lock” button
SOUND
Sound Adjust
When selecting various sound modes
Press the “Sound Mode” button
Select items desired to adjust and press the “VOL ” button
When adjusting sound to taste
To adjust the audio equalizer
Select “Sound” by pressing the “Menu” button
Select Dynamic bass Mode
Select Virtual Dolby Mode
Select Balance Mode
Language Selection for bilingual broadcast
Multi-Sound and Stereo
Press the “ ” button
Mono Sound Selection
Select “Function” by pressing the “Menu” button
Adjustment of Time
Adjustment of Time
Select “Timer”
Adjustment of Time
Setting the Time
Automatic clock setting and correction
Setting the Wake up time / Program
Select the “Function” after pressing the “Menu” button
Setup of Off-time
Press “Timer” for selection
Press the “Menu” button if time setup is completed
Press the “SLEEP” button
Choosing Set Amounts of Minutes Before Sleep Time
Adjust sleep time with sleep button on the remote control
Select “Language” by pressing “VOL” button
Selection of Language
Selection of Language
Press the menu button and select “Function”
Teletext
Symptoms and Solutions
Troubleshooting
Standard of Product