CARE AND MAINTENANCE
GRILL BURNER CLEANING:
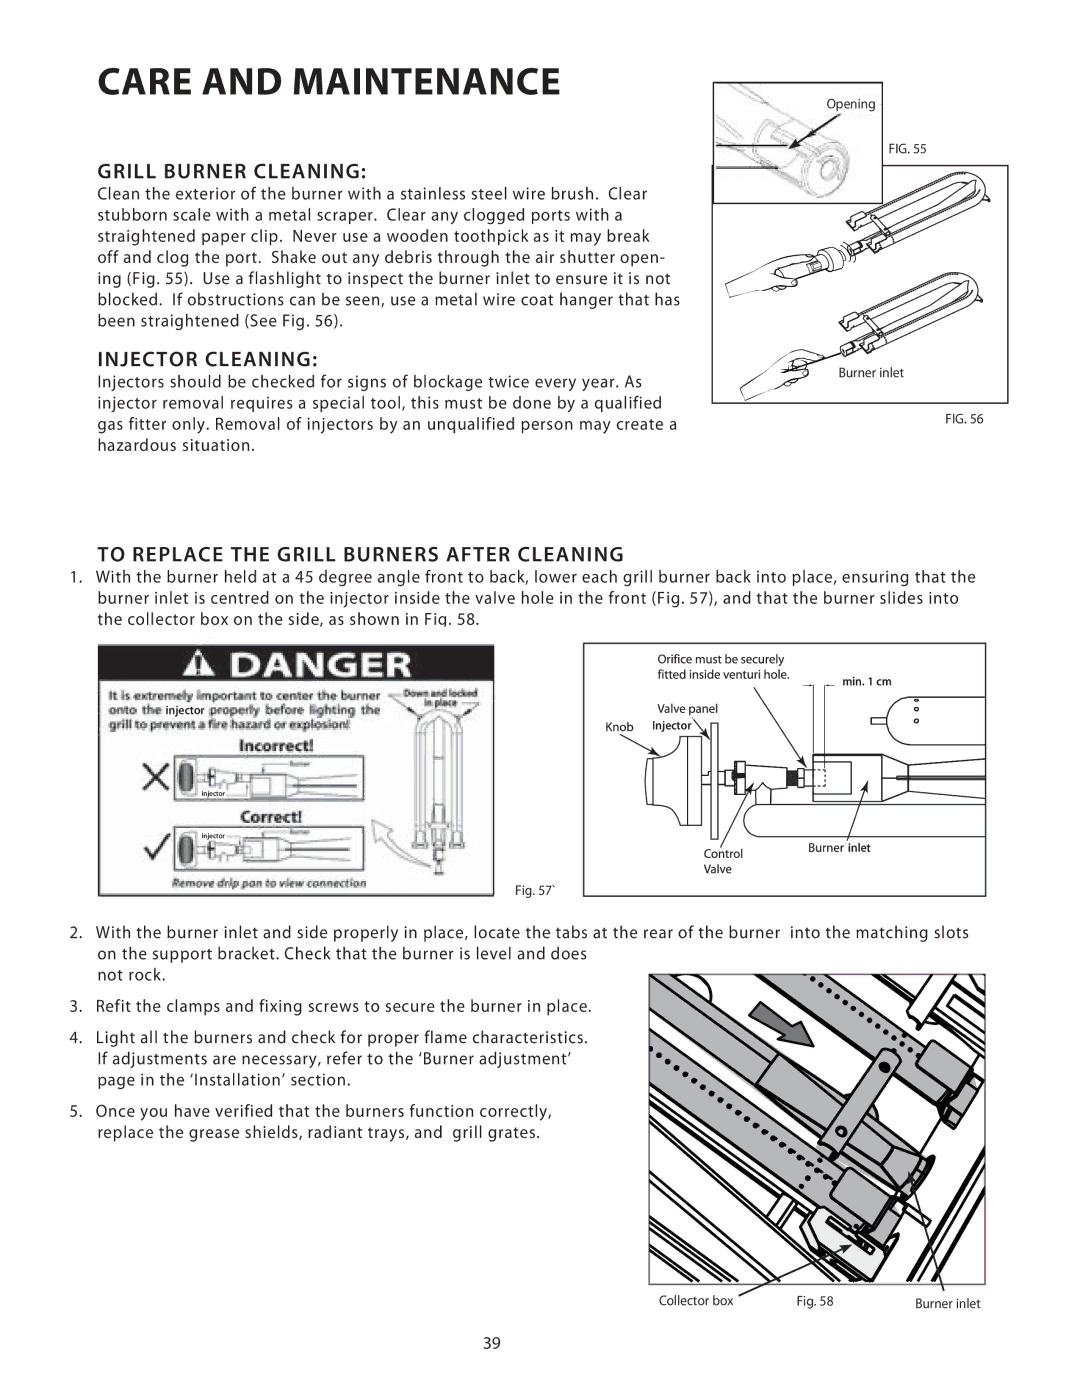
Clean the exterior of the burner with a stainless steel wire brush. Clear stubborn scale with a metal scraper. Clear any clogged ports with a straightened paper clip. Never use a wooden toothpick as it may break off and clog the port. Shake out any debris through the air shutter open- ing (Fig. 55). Use a flashlight to inspect the burner inlet to ensure it is not blocked. If obstructions can be seen, use a metal wire coat hanger that has been straightened (See Fig. 56).
INJECTOR CLEANING:
Injectors should be checked for signs of blockage twice every year. As injector removal requires a special tool, this must be done by a qualified gas fitter only. Removal of injectors by an unqualified person may create a hazardous situation.
Opening |
FIG. 55 |
Burner inlet |
FIG. 56
TO REPLACE THE GRILL BURNERS AFTER CLEANING
1.With the burner held at a 45 degree angle front to back, lower each grill burner back into place, ensuring that the burner inlet is centred on the injector inside the valve hole in the front (Fig. 57), and that the burner slides into the collector box on the side, as shown in Fig. 58.
injector
injector
injector
Fig. 57`
min. 1 cm |
Injector |
inlet |
2.With the burner inlet and side properly in place, locate the tabs at the rear of the burner into the matching slots on the support bracket. Check that the burner is level and does
not rock.
3. Refit the clamps and fixing screws to secure the burner in place.
4. Light all the burners and check for proper flame characteristics. If adjustments are necessary, refer to the ‘Burner adjustment’ page in the ‘Installation’ section.
5. Once you have verified that the burners function correctly, replace the grease shields, radiant trays, and grill grates.
Collector box | Fig. 58 | Burner inlet |
39