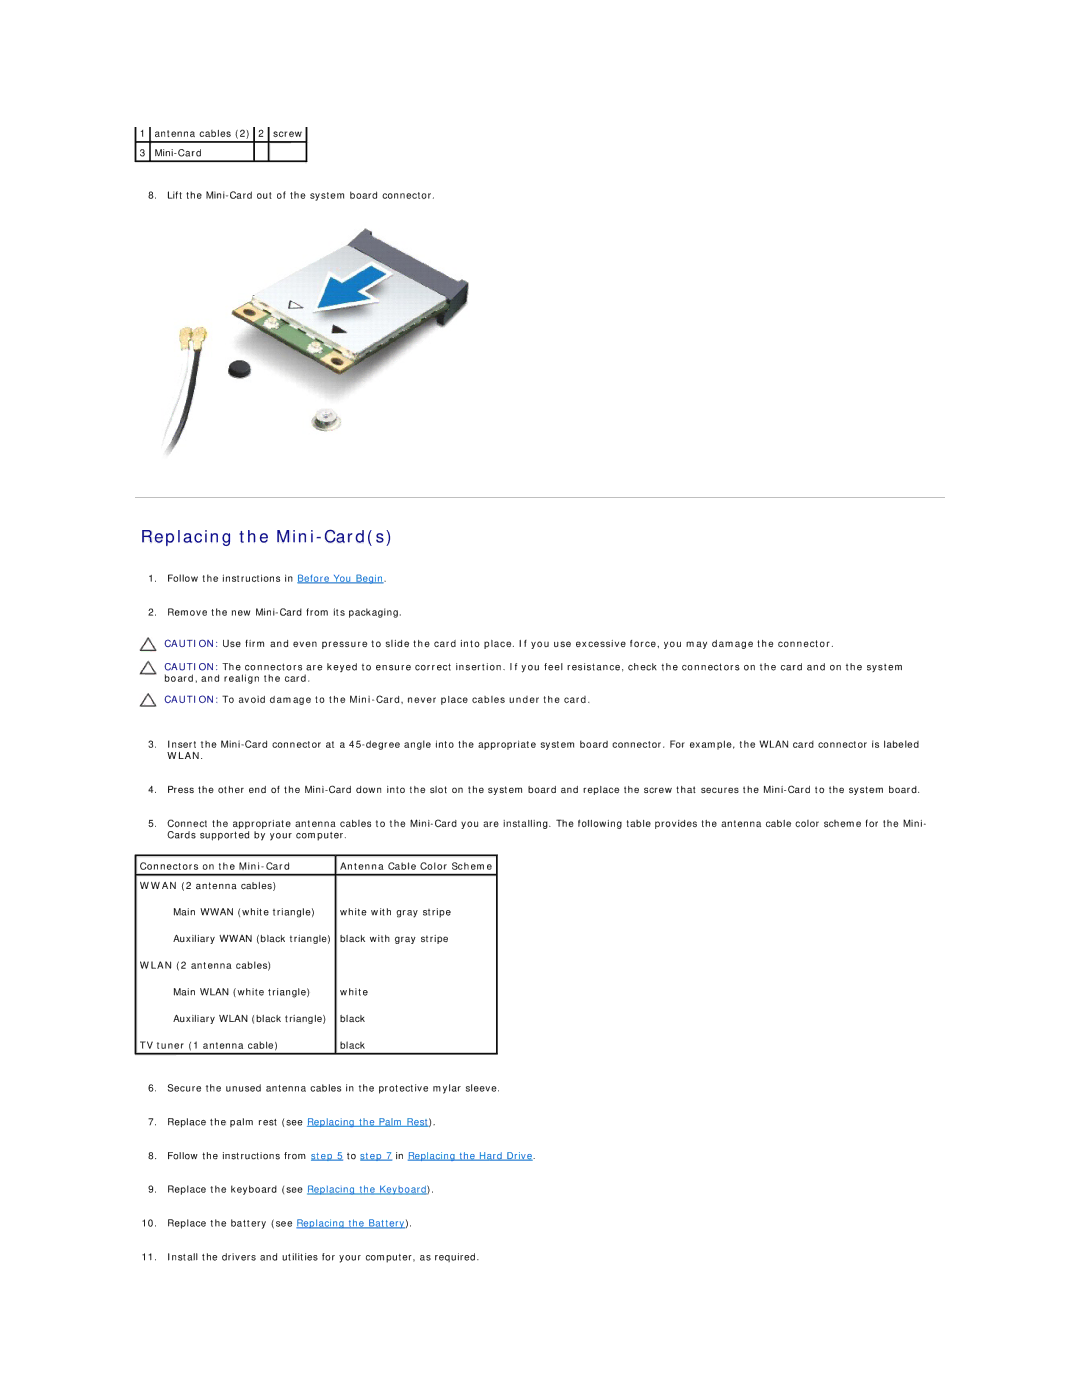
1antenna cables (2) 2 screw
3
8.Lift the
Replacing the Mini-Card(s)
1.Follow the instructions in Before You Begin.
2.Remove the new
CAUTION: Use firm and even pressure to slide the card into place. If you use excessive force, you may damage the connector.
CAUTION: The connectors are keyed to ensure correct insertion. If you feel resistance, check the connectors on the card and on the system board, and realign the card.
CAUTION: To avoid damage to the
3.Insert the
4.Press the other end of the
5.Connect the appropriate antenna cables to the
Connectors on the | Antenna Cable Color Scheme |
|
|
WWAN (2 antenna cables) |
|
Main WWAN (white triangle) | white with gray stripe |
Auxiliary WWAN (black triangle) | black with gray stripe |
WLAN (2 antenna cables) |
|
Main WLAN (white triangle) | white |
Auxiliary WLAN (black triangle) | black |
TV tuner (1 antenna cable) | black |
|
|
6.Secure the unused antenna cables in the protective mylar sleeve.
7.Replace the palm rest (see Replacing the Palm Rest).
8.Follow the instructions from step 5 to step 7 in Replacing the Hard Drive.
9.Replace the keyboard (see Replacing the Keyboard).
10.Replace the battery (see Replacing the Battery).
11.Install the drivers and utilities for your computer, as required.