Back to Contents Page
Processor Fan
Dell™ Inspiron™ 11 Service Manual
Removing the Processor Fan
Replacing the Processor Fan
WARNING: Before working inside your computer, read the safety information that shipped with your computer. For additional safety best practices information, see the Regulatory Compliance Homepage at www.dell.com/regulatory_compliance.
CAUTION: Only a certified service technician should perform repairs on your computer. Damage due to servicing that is not authorized by Dell™ is not covered by your warranty.
CAUTION: To avoid electrostatic discharge, ground yourself by using a wrist grounding strap or by periodically touching an unpainted metal surface (such as a connector on your computer).
CAUTION: To help prevent damage to the system board, remove the main battery (see Removing the Battery) before working inside the computer.
Removing the Processor Fan
1.Follow the procedures in Before You Begin.
2.Remove the battery (see Removing the Battery).
3.Remove the keyboard (see Removing the Keyboard).
4.Remove the palm rest (see Removing the Palm Rest).
5.Disconnect the speaker cable from the speaker cable connector on the I/O board (see Removing the Speakers).
6.Remove the hard drive (see Removing the Hard Drive).
7.Remove the memory module (see Removing the Memory Module).
8.Remove the palm rest bracket (see Removing the Palm Rest Bracket).
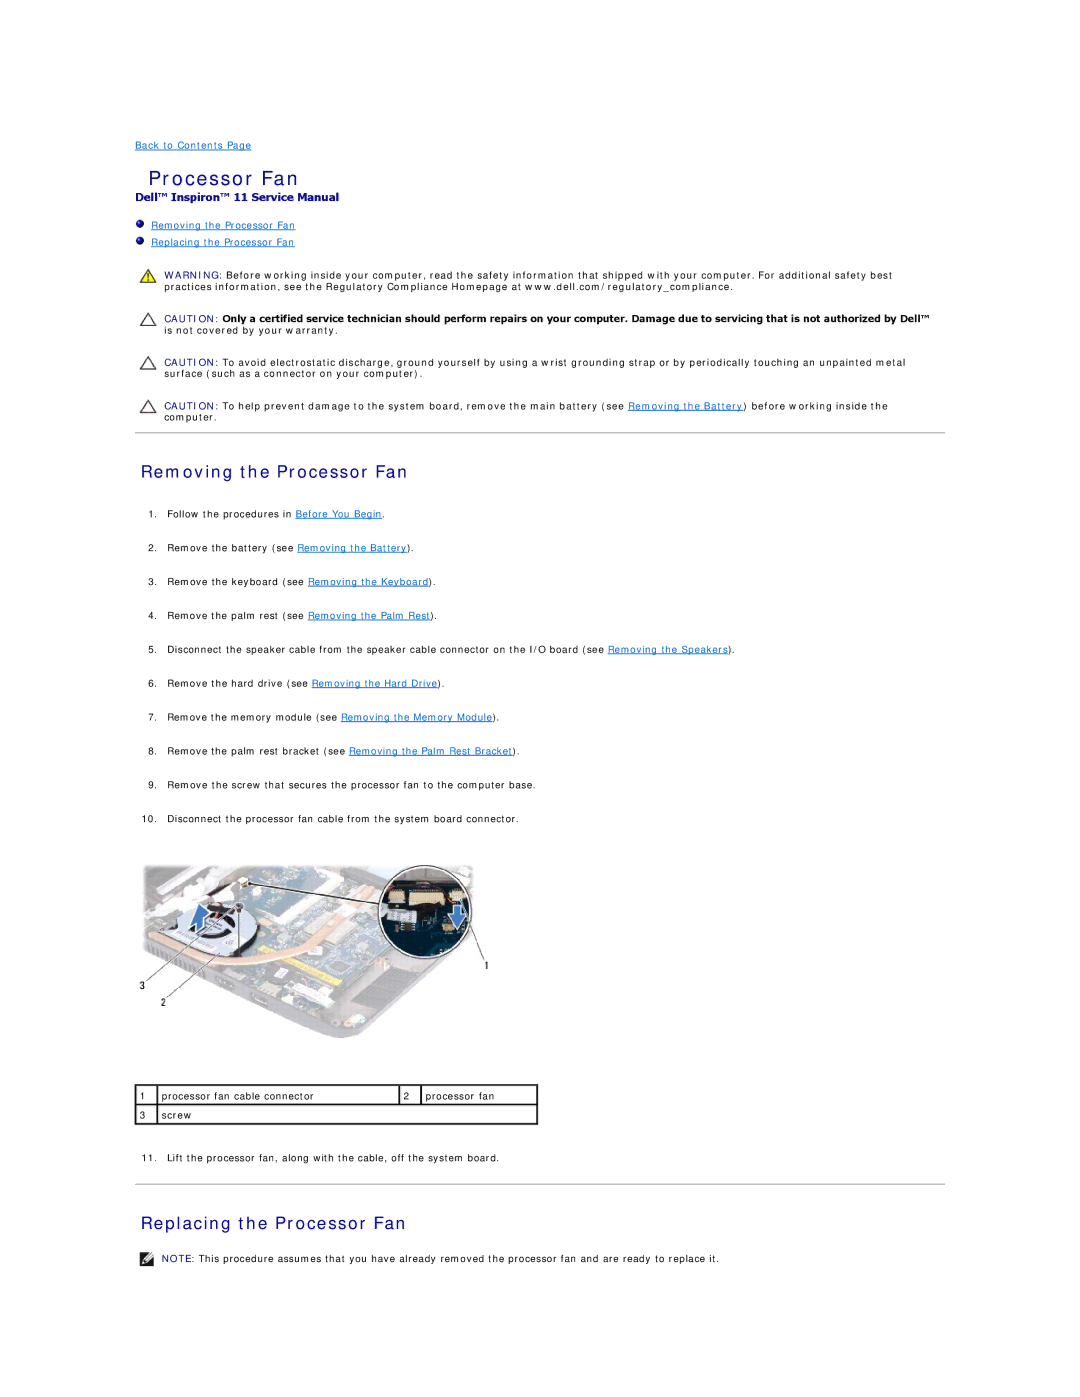
9.Remove the screw that secures the processor fan to the computer base.
10.Disconnect the processor fan cable from the system board connector.
1 processor fan cable connector | 2 | processor fan | |
|
|
|
|
3screw
11.Lift the processor fan, along with the cable, off the system board.
Replacing the Processor Fan
NOTE: This procedure assumes that you have already removed the processor fan and are ready to replace it.