Back to Contents Page
Hard Drive
Dell™ Vostro™ 1510
Service Manual
Removing the Hard Drive
Replacing the Hard Drive
NOTE: Dell does not guarantee compatibility or provide support for hard drives obtained from sources other than Dell.
Removing the Hard Drive
CAUTION: Before you begin any of the procedures in this section, follow the safety instructions that shipped with your computer.
CAUTION: Do not touch the metal housing of the hard drive if you remove the hard drive from the computer while the drive is hot.
NOTICE: To prevent data loss, turn off your computer before removing the hard drive. Do not remove the hard drive while the computer is on or in Sleep state.
NOTICE: Hard drives are extremely fragile. Exercise care when handling the hard drive.
1.Follow the procedures in Before Working on Your Computer, ensuring that you remove the battery.
2.Close the display and turn the computer upside down.
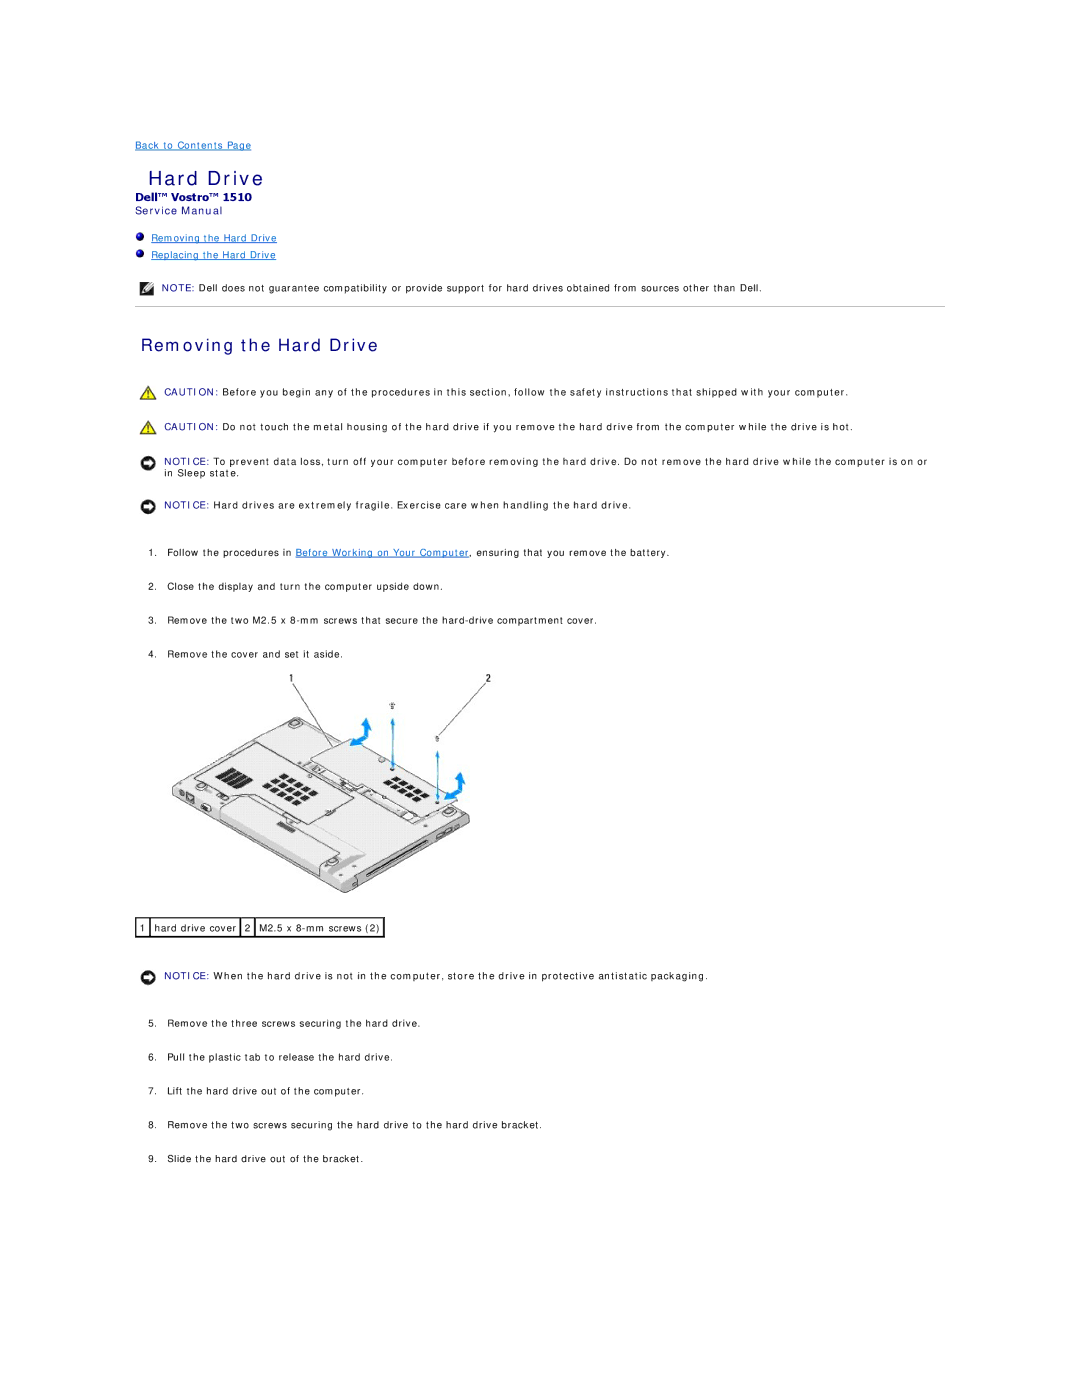
3.Remove the two M2.5 x
4.Remove the cover and set it aside.
![]() 1
1 ![]() hard drive cover
hard drive cover ![]() 2
2 ![]() M2.5 x
M2.5 x ![]()
NOTICE: When the hard drive is not in the computer, store the drive in protective antistatic packaging.
5.Remove the three screws securing the hard drive.
6.Pull the plastic tab to release the hard drive.
7.Lift the hard drive out of the computer.
8.Remove the two screws securing the hard drive to the hard drive bracket.
9.Slide the hard drive out of the bracket.