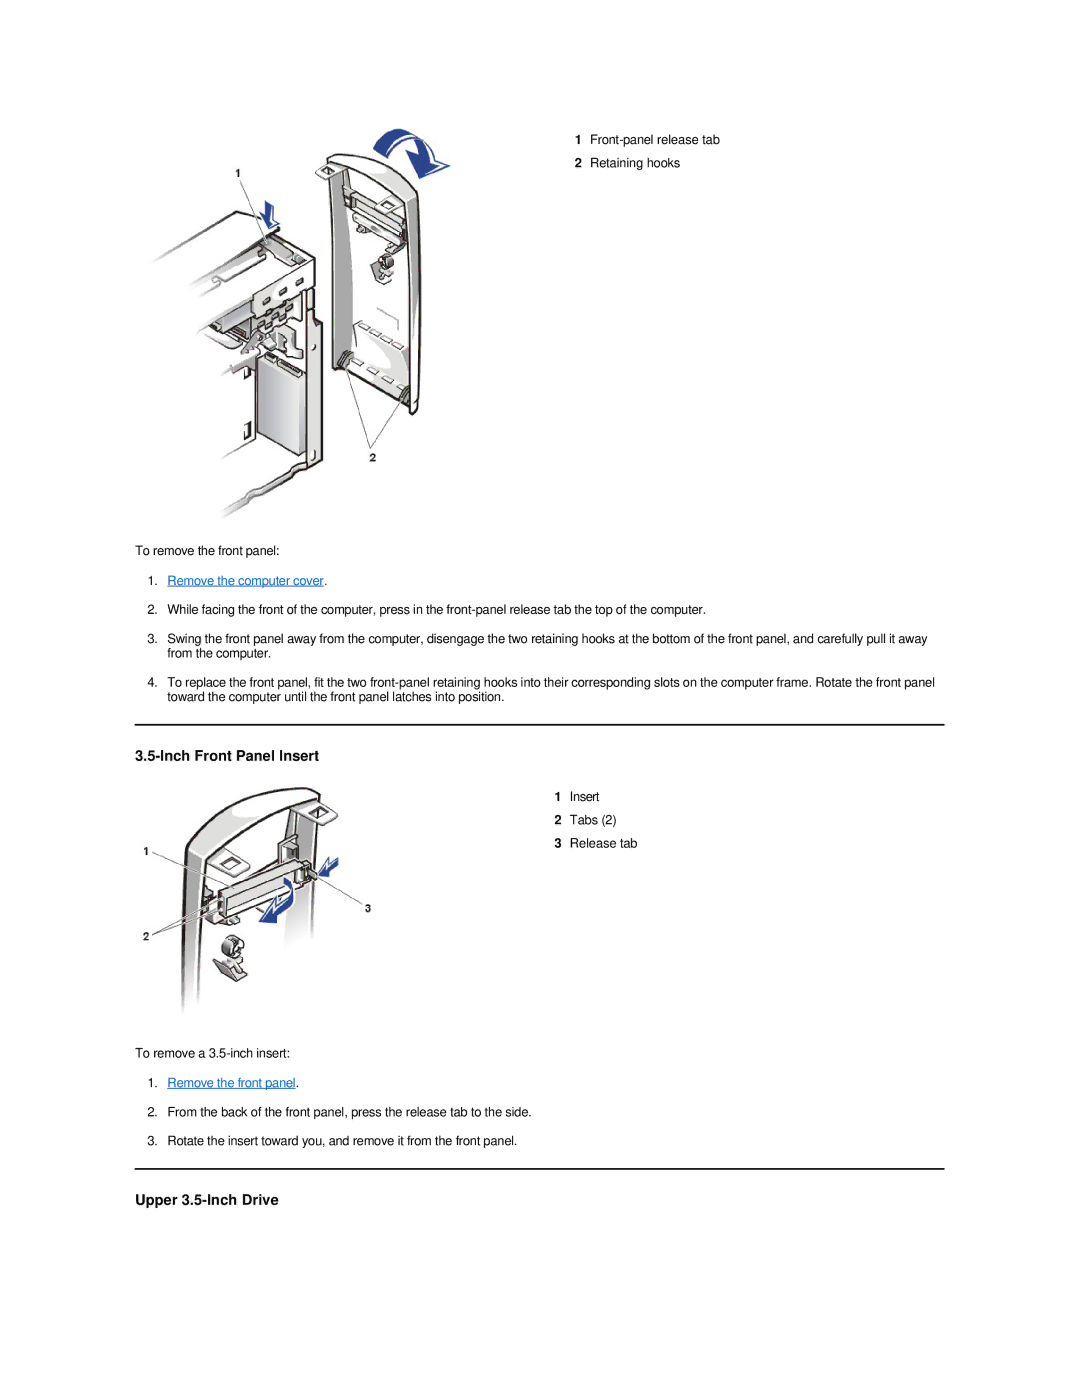
Dell Dimension 2100 Inch Front Panel Insert, Upper 3.5-Inch Drive, Tabs, Remove the front panel

Models: Dimension 2100

1 44
Download 44 pages 36.68 Kb
Page 17
Image 17
3.5-Inch Front Panel Insert

1 Front-panel release tab

2 Retaining hooks

To remove the front panel:

1.Remove the computer cover.

2.While facing the front of the computer, press in the front-panel release tab the top of the computer.

3.Swing the front panel away from the computer, disengage the two retaining hooks at the bottom of the front panel, and carefully pull it away from the computer.

4.To replace the front panel, fit the two front-panel retaining hooks into their corresponding slots on the computer frame. Rotate the front panel toward the computer until the front panel latches into position.

3.5-Inch Front Panel Insert

1

Insert

2

Tabs (2)

3

Release tab

To remove a 3.5-inch insert:

1.Remove the front panel.

2.From the back of the front panel, press the release tab to the side.

3.Rotate the insert toward you, and remove it from the front panel.

Upper 3.5-Inch Drive

Page 17
Image 17
Dell Dimension 2100 Inch Front Panel Insert, Upper 3.5-Inch Drive, Tabs, Remove the front panel, Remove the computer cover