NOTE: This card is only compatible with the Microsoft Windows Vista™ operating system.
If you ordered an FCM card with your computer, the card is already installed.
Removing the FCM
CAUTION: Before you begin any of the procedures in this section, follow the safety instructions located in the Product Information Guide.
NOTICE: To prevent damage to the system board, remove the main battery before you service the computer.
1.Follow the procedures in Before You Begin.
2.Remove the hinge cover and keyboard. See Removing the Hinge Cover and Removing the Keyboard.
3.Ground yourself by touching one of the metal connectors on the back of the computer.
NOTE: If you leave the area, ground yourself again when you return to the computer.
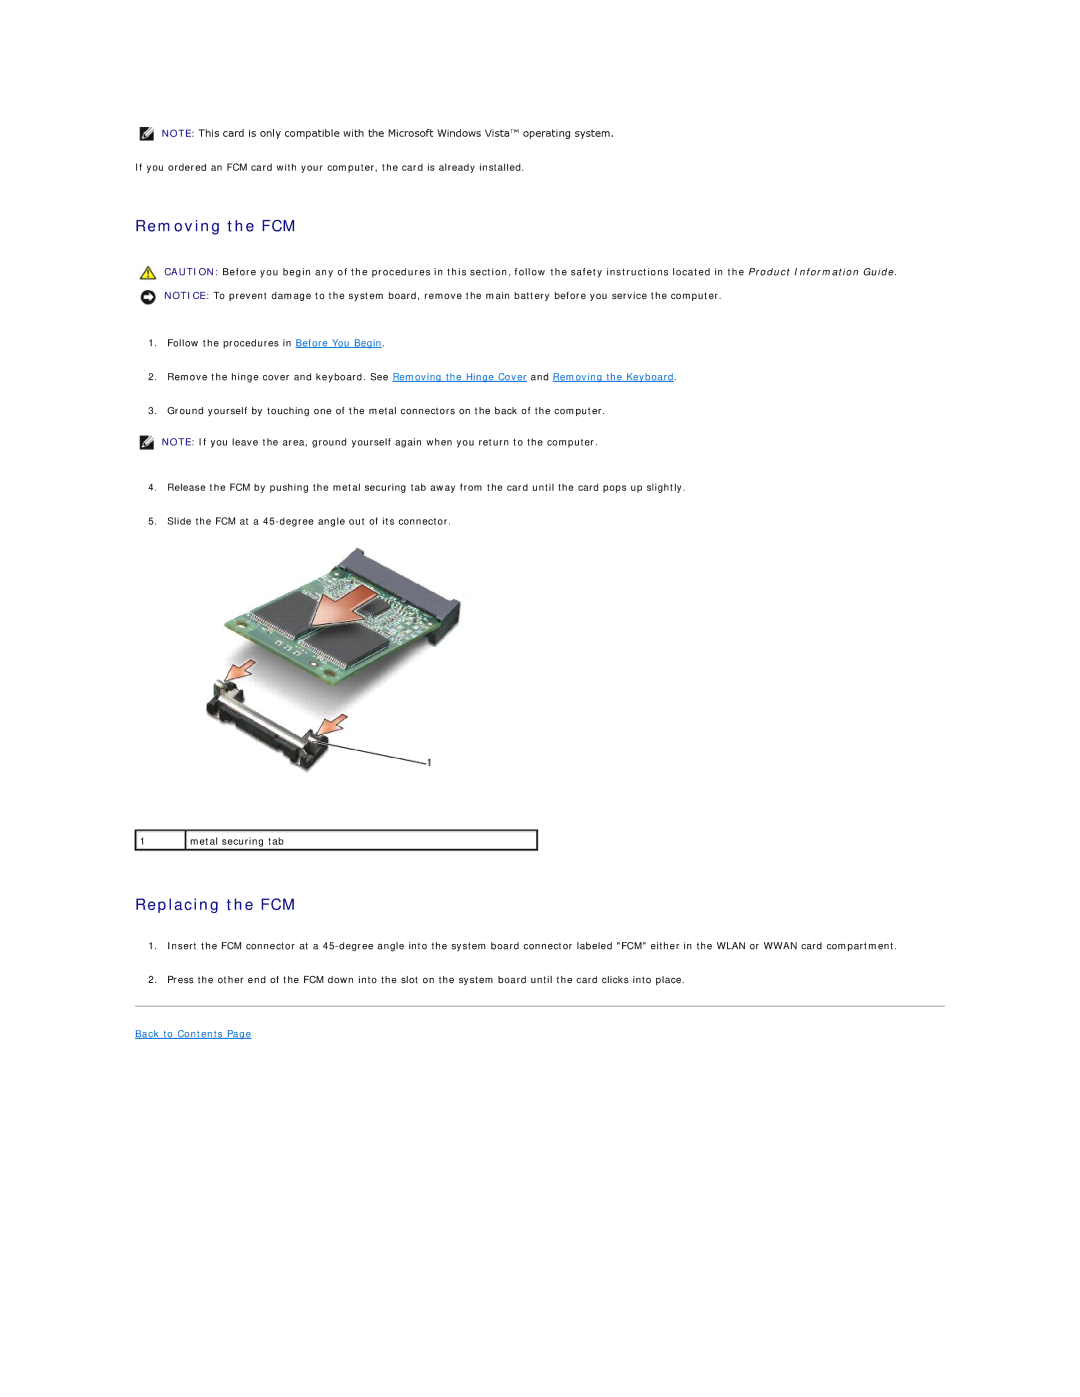
4.Release the FCM by pushing the metal securing tab away from the card until the card pops up slightly.
5.Slide the FCM at a
1 | metal securing tab |
|
|
Replacing the FCM
1.Insert the FCM connector at a
2.Press the other end of the FCM down into the slot on the system board until the card clicks into place.
