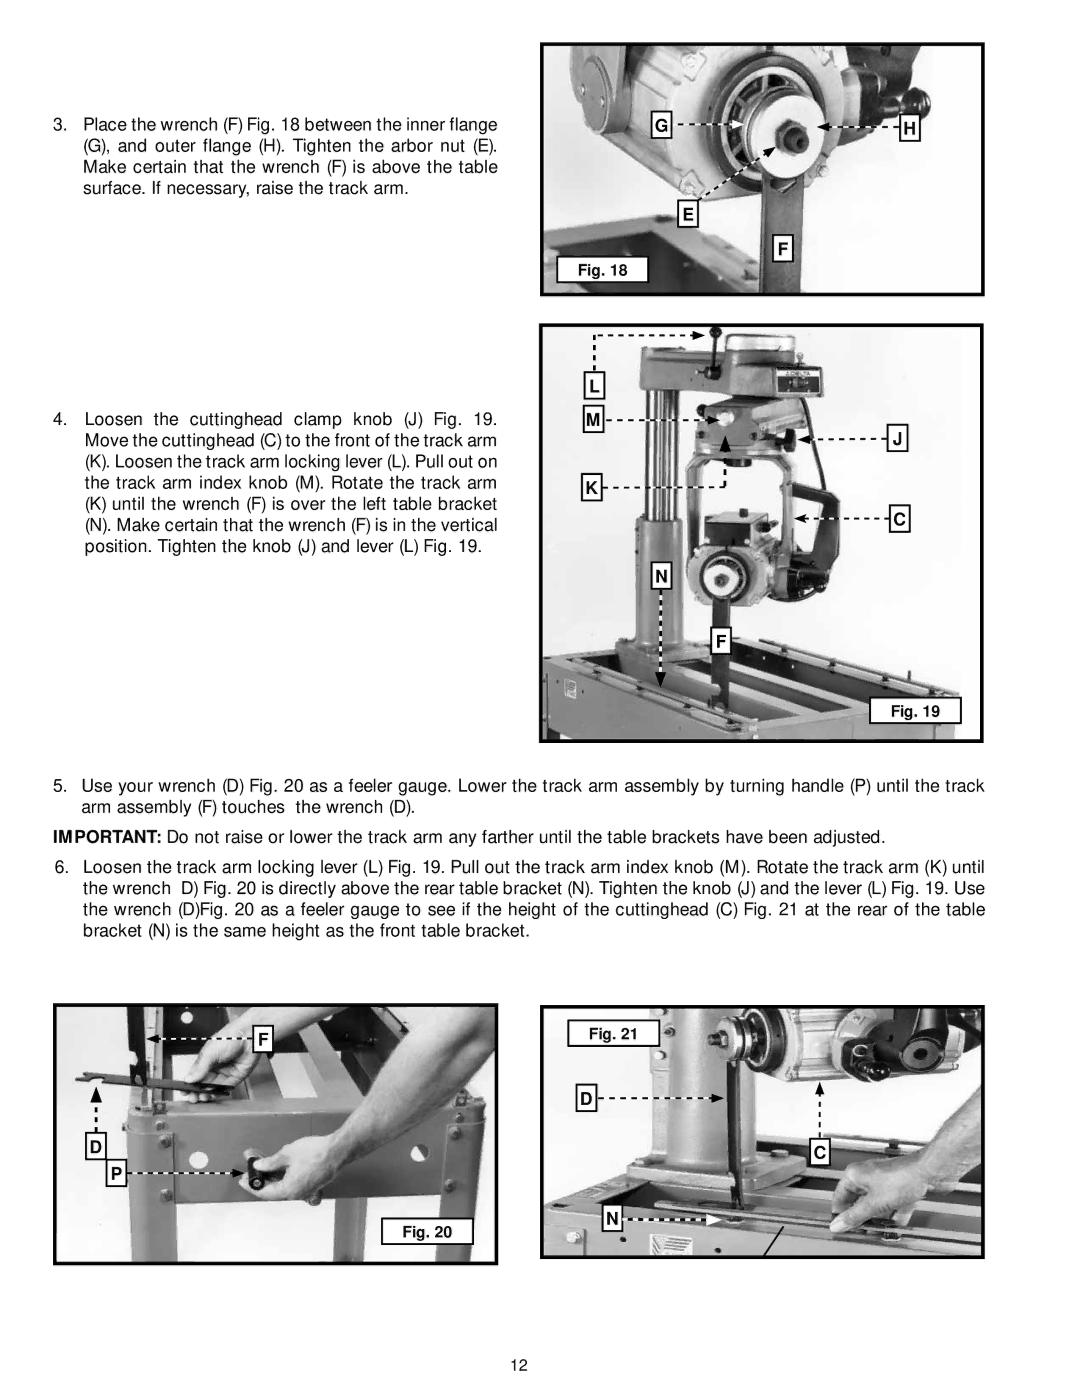
3.Place the wrench (F) Fig. 18 between the inner flange (G), and outer flange (H). Tighten the arbor nut (E). Make certain that the wrench (F) is above the table surface. If necessary, raise the track arm.
4.Loosen the cuttinghead clamp knob (J) Fig. 19. Move the cuttinghead (C) to the front of the track arm
(K).Loosen the track arm locking lever (L). Pull out on the track arm index knob (M). Rotate the track arm
(K)until the wrench (F) is over the left table bracket
(N).Make certain that the wrench (F) is in the vertical position. Tighten the knob (J) and lever (L) Fig. 19.
G ![]()
![]()
![]()
![]() H
H
E
F
Fig. 18
L
M![]()
![]()
![]()
![]() J
J
K ![]()
![]()
![]() C
C
N
F
Fig. 19
5.Use your wrench (D) Fig. 20 as a feeler gauge. Lower the track arm assembly by turning handle (P) until the track arm assembly (F) touches the wrench (D).
IMPORTANT: Do not raise or lower the track arm any farther until the table brackets have been adjusted.
6.Loosen the track arm locking lever (L) Fig. 19. Pull out the track arm index knob (M). Rotate the track arm (K) until the wrench D) Fig. 20 is directly above the rear table bracket (N). Tighten the knob (J) and the lever (L) Fig. 19. Use the wrench (D)Fig. 20 as a feeler gauge to see if the height of the cuttinghead (C) Fig. 21 at the rear of the table bracket (N) is the same height as the front table bracket.
![]()
![]() F
F
D
P ![]()
![]()
Fig. 20
Fig. 21
D ![]()
![]()
C
N ![]()
![]()
12
