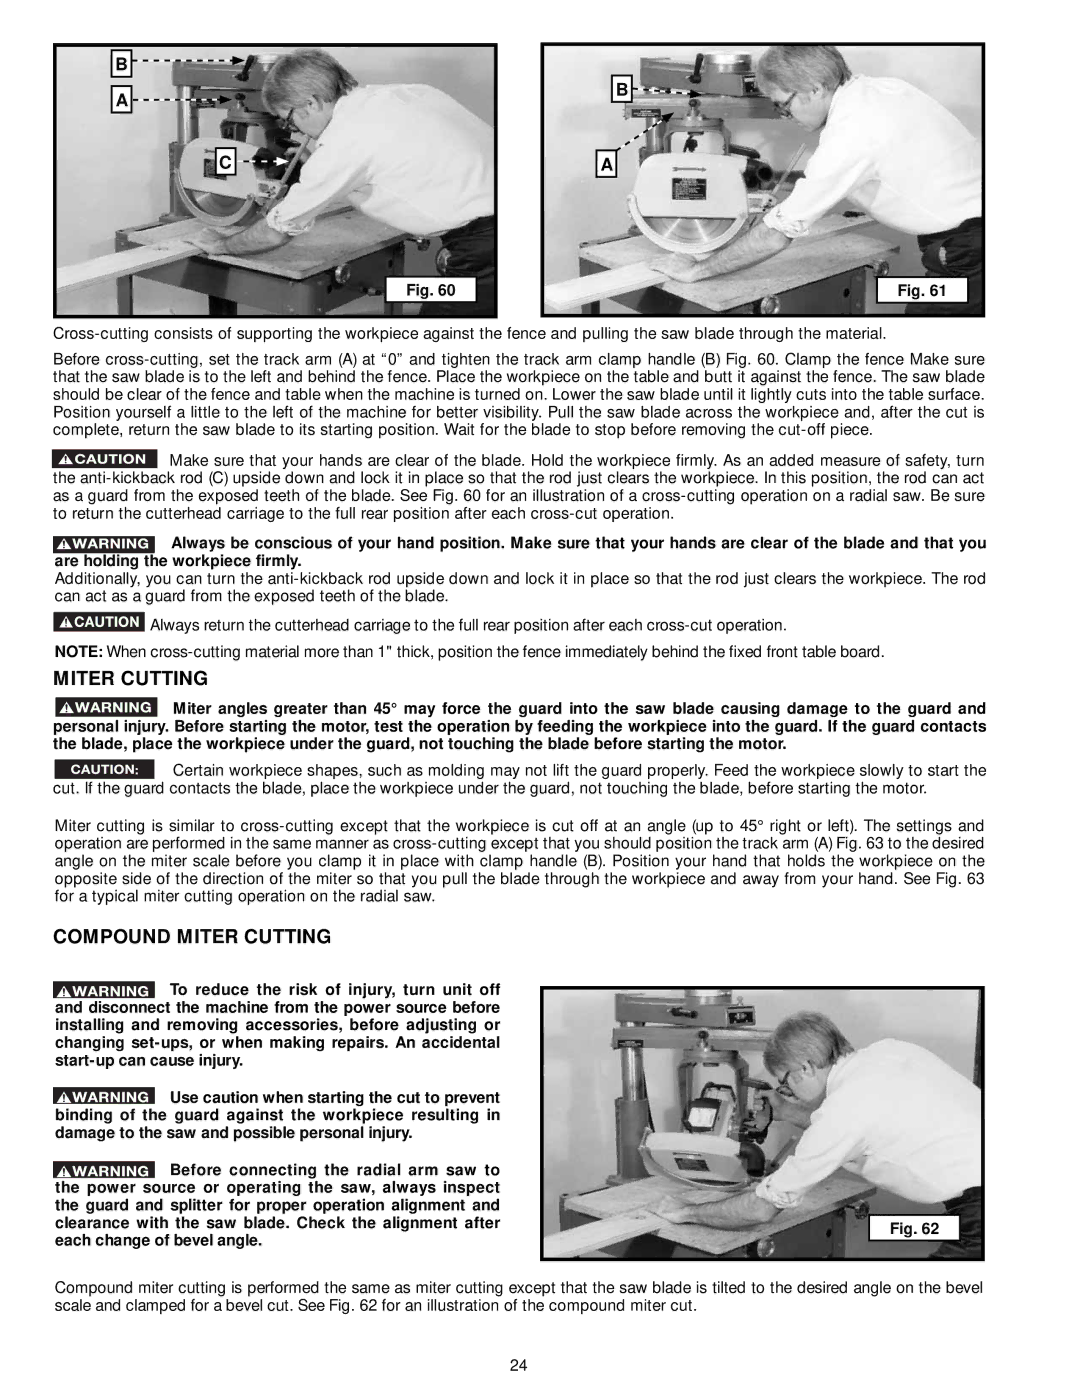
B ![]()
![]()
A
C ![]()
![]()
Fig. 60
B ![]()
![]()
A
Fig. 61
Before
![]() Make sure that your hands are clear of the blade. Hold the workpiece firmly. As an added measure of safety, turn the
Make sure that your hands are clear of the blade. Hold the workpiece firmly. As an added measure of safety, turn the
![]() Always be conscious of your hand position. Make sure that your hands are clear of the blade and that you are holding the workpiece firmly.
Always be conscious of your hand position. Make sure that your hands are clear of the blade and that you are holding the workpiece firmly.
Additionally, you can turn the
![]() Always return the cutterhead carriage to the full rear position after each
Always return the cutterhead carriage to the full rear position after each
NOTE: When
MITER CUTTING
![]() Miter angles greater than 45° may force the guard into the saw blade causing damage to the guard and personal injury. Before starting the motor, test the operation by feeding the workpiece into the guard. If the guard contacts the blade, place the workpiece under the guard, not touching the blade before starting the motor.
Miter angles greater than 45° may force the guard into the saw blade causing damage to the guard and personal injury. Before starting the motor, test the operation by feeding the workpiece into the guard. If the guard contacts the blade, place the workpiece under the guard, not touching the blade before starting the motor.
![]() Certain workpiece shapes, such as molding may not lift the guard properly. Feed the workpiece slowly to start the cut. If the guard contacts the blade, place the workpiece under the guard, not touching the blade, before starting the motor.
Certain workpiece shapes, such as molding may not lift the guard properly. Feed the workpiece slowly to start the cut. If the guard contacts the blade, place the workpiece under the guard, not touching the blade, before starting the motor.
Miter cutting is similar to
COMPOUND MITER CUTTING
![]() To reduce the risk of injury, turn unit off and disconnect the machine from the power source before installing and removing accessories, before adjusting or changing
To reduce the risk of injury, turn unit off and disconnect the machine from the power source before installing and removing accessories, before adjusting or changing
![]() Use caution when starting the cut to prevent binding of the guard against the workpiece resulting in damage to the saw and possible personal injury.
Use caution when starting the cut to prevent binding of the guard against the workpiece resulting in damage to the saw and possible personal injury.
![]() Before connecting the radial arm saw to the power source or operating the saw, always inspect the guard and splitter for proper operation alignment and clearance with the saw blade. Check the alignment after each change of bevel angle.
Before connecting the radial arm saw to the power source or operating the saw, always inspect the guard and splitter for proper operation alignment and clearance with the saw blade. Check the alignment after each change of bevel angle.
Fig. 62
Compound miter cutting is performed the same as miter cutting except that the saw blade is tilted to the desired angle on the bevel scale and clamped for a bevel cut. See Fig. 62 for an illustration of the compound miter cut.
24