EXTENSION CORDS
![]() Use proper extension cords. Make sure your extension cord is in good condition and is a
Use proper extension cords. Make sure your extension cord is in good condition and is a
MINIMUM GAUGE EXTENSION CORD
RECOMMENDED SIZES FOR USE WITH STATIONARY ELECTRIC MACHINES
Ampere |
| Total Length | Gauge of |
Rating | Volts | of Cord in Feet | Extension Cord |
|
|
|
|
120 | up to 25 | 18 AWG | |
120 | 16 AWG | ||
120 | 16 AWG | ||
120 | 14 AWG | ||
120 | up to 25 | 18 AWG | |
120 | 16 AWG | ||
120 | 14 AWG | ||
120 | 12 AWG | ||
|
|
|
|
120 | up to 25 | 16 AWG | |
120 | 16 AWG | ||
120 | 14 AWG | ||
120 | 12 AWG | ||
|
|
|
|
120 | up to 25 | 14 AWG | |
120 | 12 AWG | ||
120 | GREATER THAN 50 FEET NOT RECOMMENDED | ||
|
|
|
|
Fig. D-1
FUNCTIONAL DESCRIPTION
FOREWORD
Delta Model
NOTICE: THE PHOTO ON THE MANUAL COVER ILLUSTRATES THE CURRENT PRODUCTION MODEL. ALL OTHER ILLUSTRATIONS CONTAINED IN THE MANUAL ARE REPRESENTATIVE ONLY AND MAY NOT DEPICT THE ACTUAL COLOR, LABELING OR ACCESSORIES AND ARE INTENDED TO ILLUSTRATE TECHNIQUE ONLY.
CARTON CONTENTS
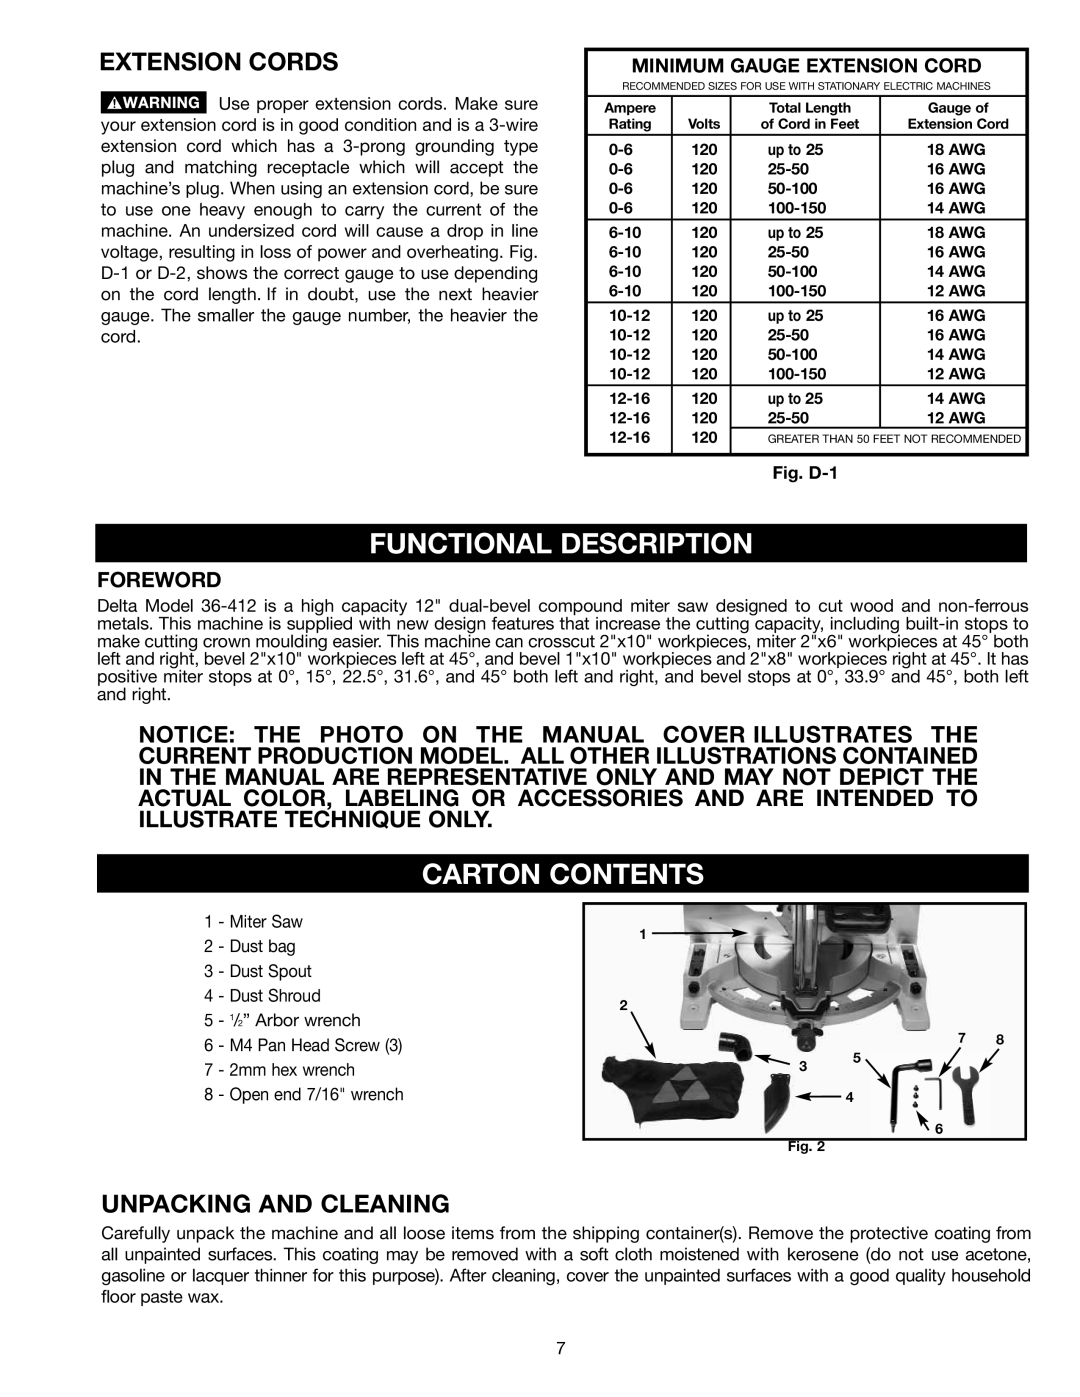
1 - Miter Saw
2 - Dust bag
3 - Dust Spout
4 - Dust Shroud
5 - 1/2” Arbor wrench
6 - M4 Pan Head Screw (3)
7 - 2mm hex wrench
1 ![]()
2
3
7 8
5
8 - Open end 7/16" wrench
4
![]() 6
6
Fig. 2
UNPACKING AND CLEANING
Carefully unpack the machine and all loose items from the shipping container(s). Remove the protective coating from all unpainted surfaces. This coating may be removed with a soft cloth moistened with kerosene (do not use acetone, gasoline or lacquer thinner for this purpose). After cleaning, cover the unpainted surfaces with a good quality household floor paste wax.
7