CHANGING THE BLADE
DISCONNECT MACHINE FROM
POWER SOURCE.
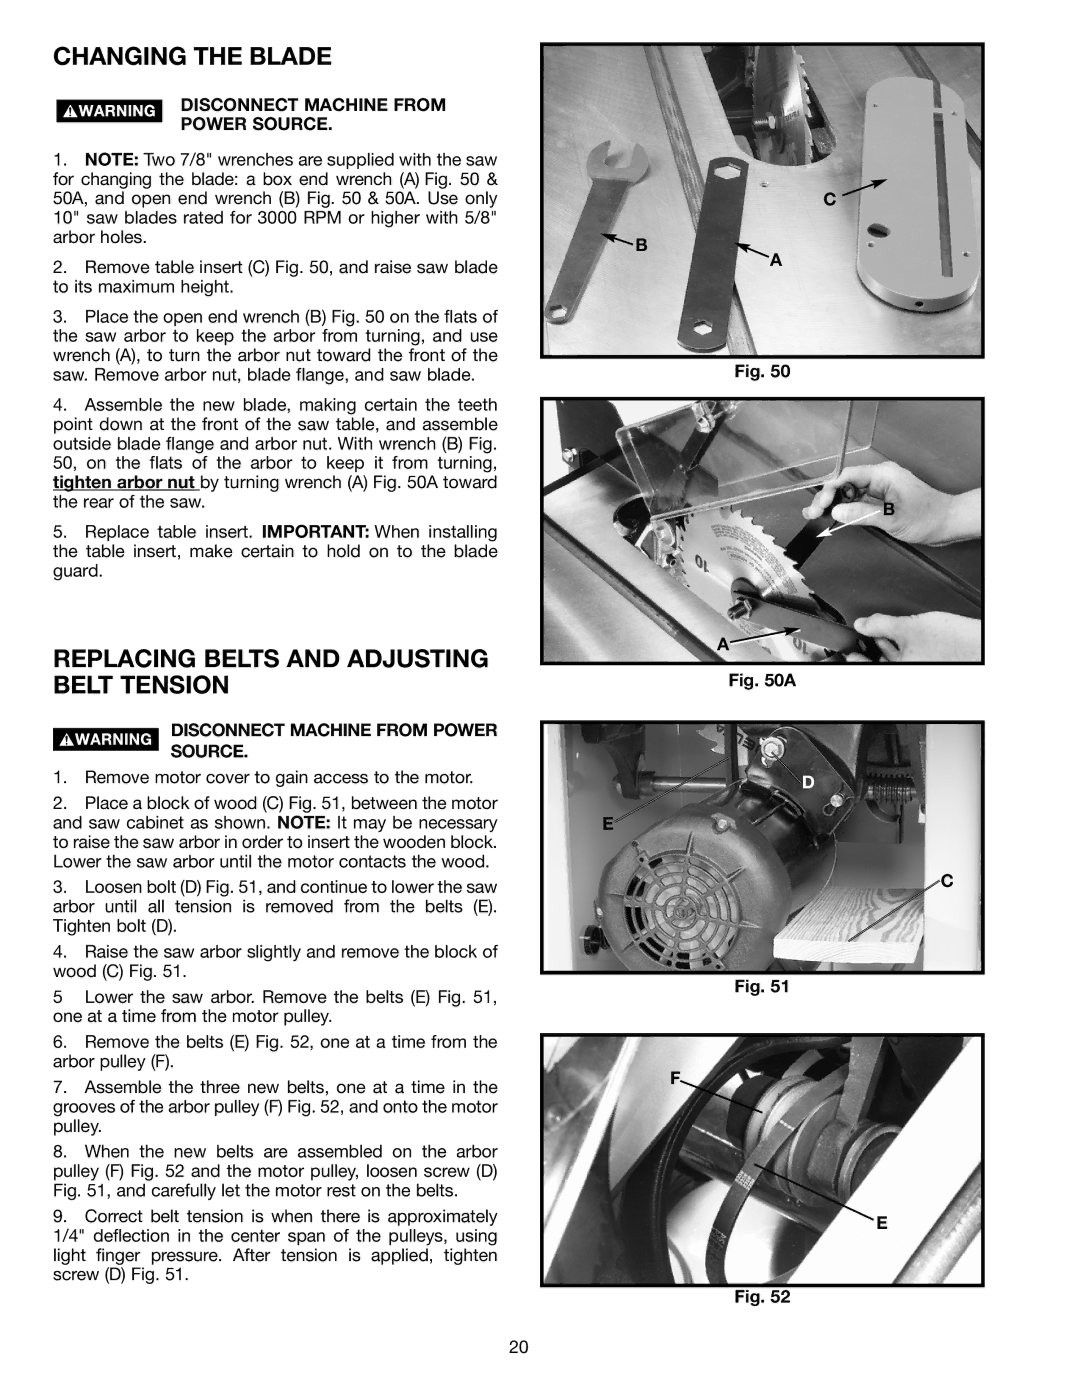
1.NOTE: Two 7/8" wrenches are supplied with the saw for changing the blade: a box end wrench (A) Fig. 50 & 50A, and open end wrench (B) Fig. 50 & 50A. Use only 10" saw blades rated for 3000 RPM or higher with 5/8" arbor holes.
2.Remove table insert (C) Fig. 50, and raise saw blade to its maximum height.
3.Place the open end wrench (B) Fig. 50 on the flats of the saw arbor to keep the arbor from turning, and use wrench (A), to turn the arbor nut toward the front of the saw. Remove arbor nut, blade flange, and saw blade.
4.Assemble the new blade, making certain the teeth point down at the front of the saw table, and assemble outside blade flange and arbor nut. With wrench (B) Fig. 50, on the flats of the arbor to keep it from turning, tighten arbor nut by turning wrench (A) Fig. 50A toward the rear of the saw.
5.Replace table insert. IMPORTANT: When installing the table insert, make certain to hold on to the blade guard.
REPLACING BELTS AND ADJUSTING BELT TENSION
DISCONNECT MACHINE FROM POWER
SOURCE.
1.Remove motor cover to gain access to the motor.
2.Place a block of wood (C) Fig. 51, between the motor and saw cabinet as shown. NOTE: It may be necessary to raise the saw arbor in order to insert the wooden block. Lower the saw arbor until the motor contacts the wood.
3.Loosen bolt (D) Fig. 51, and continue to lower the saw arbor until all tension is removed from the belts (E). Tighten bolt (D).
4.Raise the saw arbor slightly and remove the block of wood (C) Fig. 51.
5Lower the saw arbor. Remove the belts (E) Fig. 51, one at a time from the motor pulley.
6.Remove the belts (E) Fig. 52, one at a time from the arbor pulley (F).
7.Assemble the three new belts, one at a time in the grooves of the arbor pulley (F) Fig. 52, and onto the motor pulley.
8.When the new belts are assembled on the arbor pulley (F) Fig. 52 and the motor pulley, loosen screw (D) Fig. 51, and carefully let the motor rest on the belts.
9.Correct belt tension is when there is approximately 1/4" deflection in the center span of the pulleys, using light finger pressure. After tension is applied, tighten screw (D) Fig. 51.
C
![]() B
B
A
Fig. 50
B
A![]()
Fig. 50A
![]() D
D
E
C
Fig. 51
F
E
Fig. 52
20