UNPACKING
Remove any protective materials and coatings from all of the parts and the tool. The protective coatings can be removed by spraying
If any parts are missing, do not attempt to plug in the power cord and turn “ON” the machine. The machine should only be turned “ON” after all the parts have been obtained and installed correctly.
ASSEMBLY
FENCE ASSEMBLY
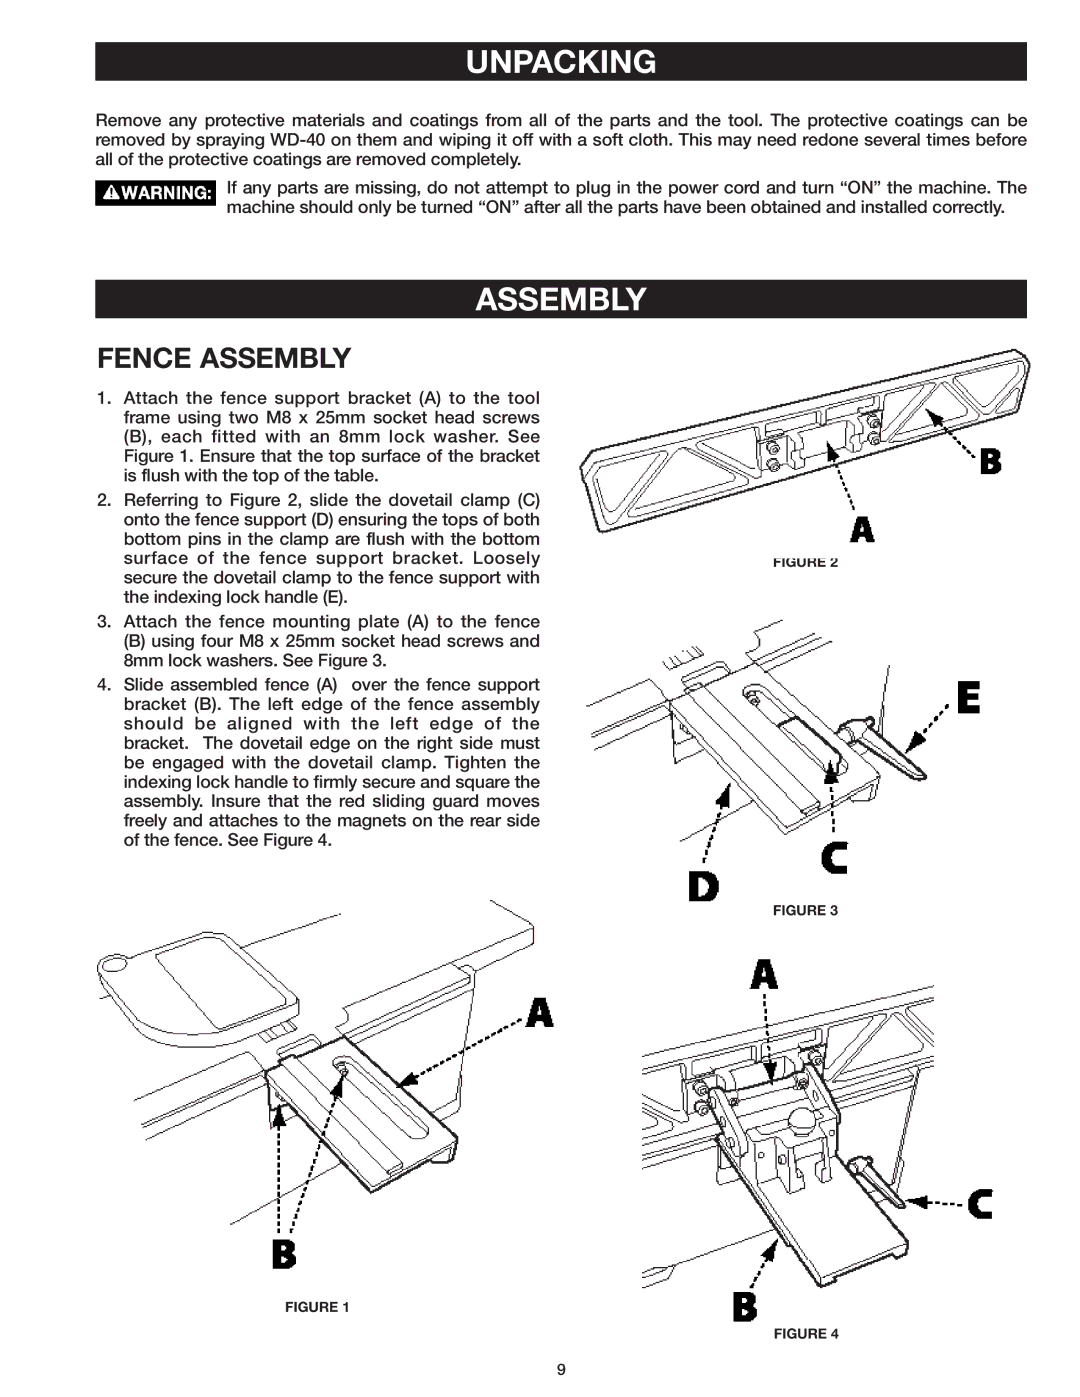
1.Attach the fence support bracket (A) to the tool frame using two M8 x 25mm socket head screws (B), each fitted with an 8mm lock washer. See Figure 1. Ensure that the top surface of the bracket is flush with the top of the table.
2.Referring to Figure 2, slide the dovetail clamp (C) onto the fence support (D) ensuring the tops of both bottom pins in the clamp are flush with the bottom surface of the fence support bracket. Loosely secure the dovetail clamp to the fence support with the indexing lock handle (E).
3.Attach the fence mounting plate (A) to the fence
(B) using four M8 x 25mm socket head screws and 8mm lock washers. See Figure 3.
4.Slide assembled fence (A) over the fence support bracket (B). The left edge of the fence assembly should be aligned with the left edge of the bracket. The dovetail edge on the right side must be engaged with the dovetail clamp. Tighten the indexing lock handle to firmly secure and square the assembly. Insure that the red sliding guard moves freely and attaches to the magnets on the rear side of the fence. See Figure 4.
FIGURE 2
FIGURE 3
FIGURE 1
FIGURE 4
9