UNPACKING AND CLEANING
Carefully unpack the machine and all loose items from the shipping container(s). Remove the protective coating from all unpainted surfaces. This coating may be removed with a soft cloth moistened with kerosene (do not use acetone, gasoline or lacquer thinner for this purpose). After cleaning, cover the unpainted surfaces with a good quality household floor paste wax.
ASSEMBLY
ASSEMBLY TOOLS REQUIRED
* Phillips head screwdriver (not supplied)
ASSEMBLY TIME ESTIMATE - 15 to 30 minutes
For your own safety, do not connect the machine to the power source until the machine is completely assembled and you read and understand the entire instruction manual.
A
B
A
Fig. 2 |
Fig. 3 |
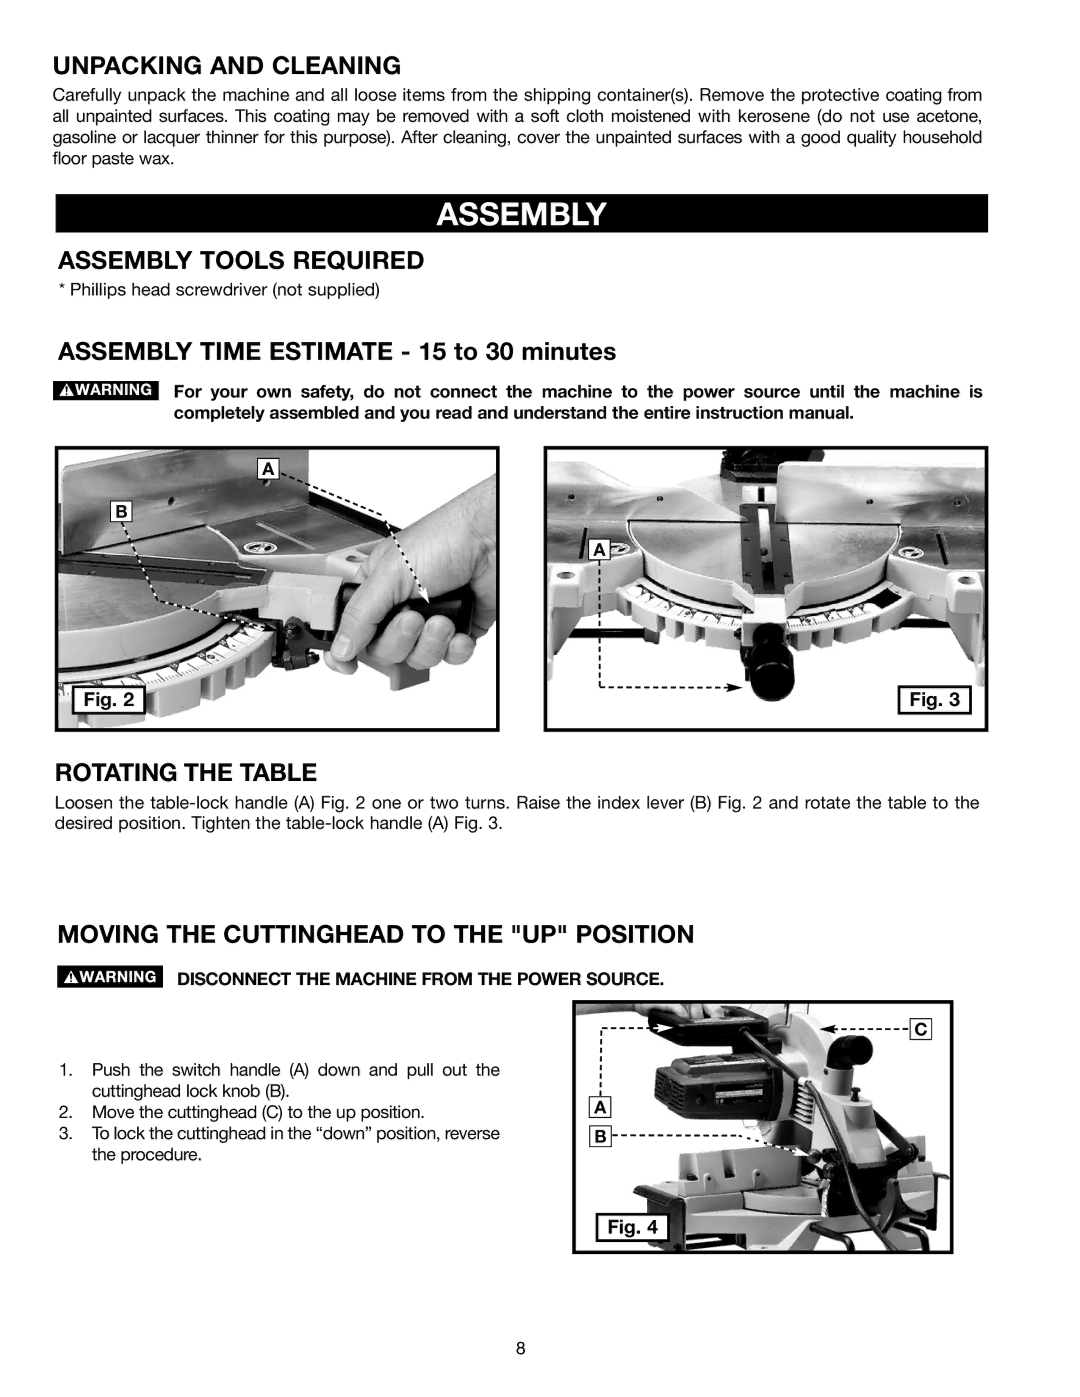
ROTATING THE TABLE
Loosen the
MOVING THE CUTTINGHEAD TO THE "UP" POSITION
DISCONNECT THE MACHINE FROM THE POWER SOURCE.
1.Push the switch handle (A) down and pull out the cuttinghead lock knob (B).
2.Move the cuttinghead (C) to the up position.
3.To lock the cuttinghead in the “down” position, reverse the procedure.
![]()
![]()
![]() C
C
A
B ![]()
![]()
Fig. 4 |
8