TROUBLESHOOTING
For assistance with your machine, visit our website at www.deltamachinery.com for a list of service centers or call the DELTA Machinery help line at
MAINTENANCE
CHANGING THE BLADE
Use only
Do not use
Use only 10″ diameter saw blades that are rated for 5000 RPM or higher and have 5/8″ diameter arbor holes.
Disconnect the machine from the power source.
A |
![]()
![]()
![]() B
B
Fig. 44 |
B
F
G
T
E
E
T
H
Fig. 45 |
C
Fig. 46 |
E
D
Fig. 47 |
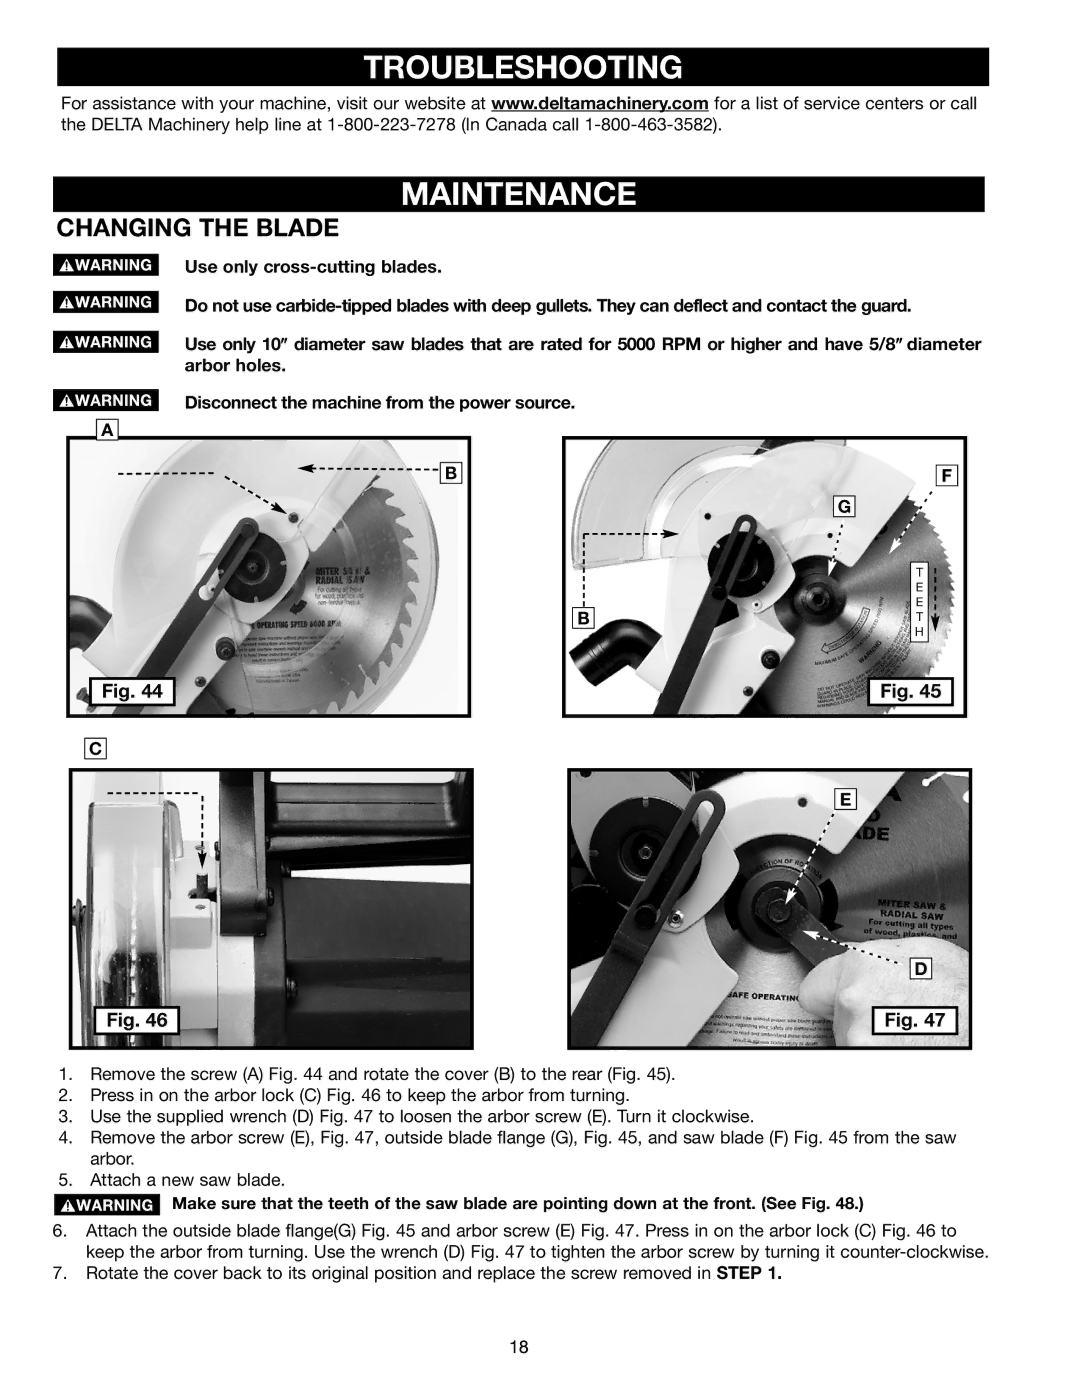
1.Remove the screw (A) Fig. 44 and rotate the cover (B) to the rear (Fig. 45).
2.Press in on the arbor lock (C) Fig. 46 to keep the arbor from turning.
3.Use the supplied wrench (D) Fig. 47 to loosen the arbor screw (E). Turn it clockwise.
4.Remove the arbor screw (E), Fig. 47, outside blade flange (G), Fig. 45, and saw blade (F) Fig. 45 from the saw arbor.
5.Attach a new saw blade.
Make sure that the teeth of the saw blade are pointing down at the front. (See Fig. 48.)
6.Attach the outside blade flange(G) Fig. 45 and arbor screw (E) Fig. 47. Press in on the arbor lock (C) Fig. 46 to keep the arbor from turning. Use the wrench (D) Fig. 47 to tighten the arbor screw by turning it
7.Rotate the cover back to its original position and replace the screw removed in STEP 1.
18