
DN-A7100 specifications
The Denon DN-A7100 is a versatile, high-performance audio amplifier designed for various professional and home audio applications. Known for its robust build quality and impressive technical specifications, it serves as an ideal solution for those seeking to enhance their sound experience.One of the standout features of the DN-A7100 is its power output. Delivering up to 150 watts per channel into 8 ohms and 200 watts into 4 ohms, it ensures dynamic and clear audio performance, capable of driving a wide range of speakers. The amplifier utilizes a Class D design, which not only provides high efficiency but also minimizes heat generation. This characteristic makes it suitable for extended usage without risking thermal overload.
The DN-A7100 integrates advanced digital signal processing (DSP) technology that allows for a rich array of sound tailoring options. Users can take advantage of various EQ settings and audio presets to customize the sound to their preferences or the acoustics of their environment. This flexibility is particularly valuable in live sound situations or in home theater setups where room dynamics significantly affect audio quality.
Connectivity is another strong point of the DN-A7100. It features multiple inputs, including balanced XLR, RCA, and digital inputs, facilitating easy integration with different sound sources. Additionally, the amplifier supports both stereo and bridged mode operation, allowing for versatile application in various configurations.
Furthermore, the DN-A7100 incorporates built-in protection circuits that safeguard against overloading, overheating, and short circuits. These safety features ensure that the amplifier operates reliably over time, preserving both its functionality and the integrity of connected audio equipment.
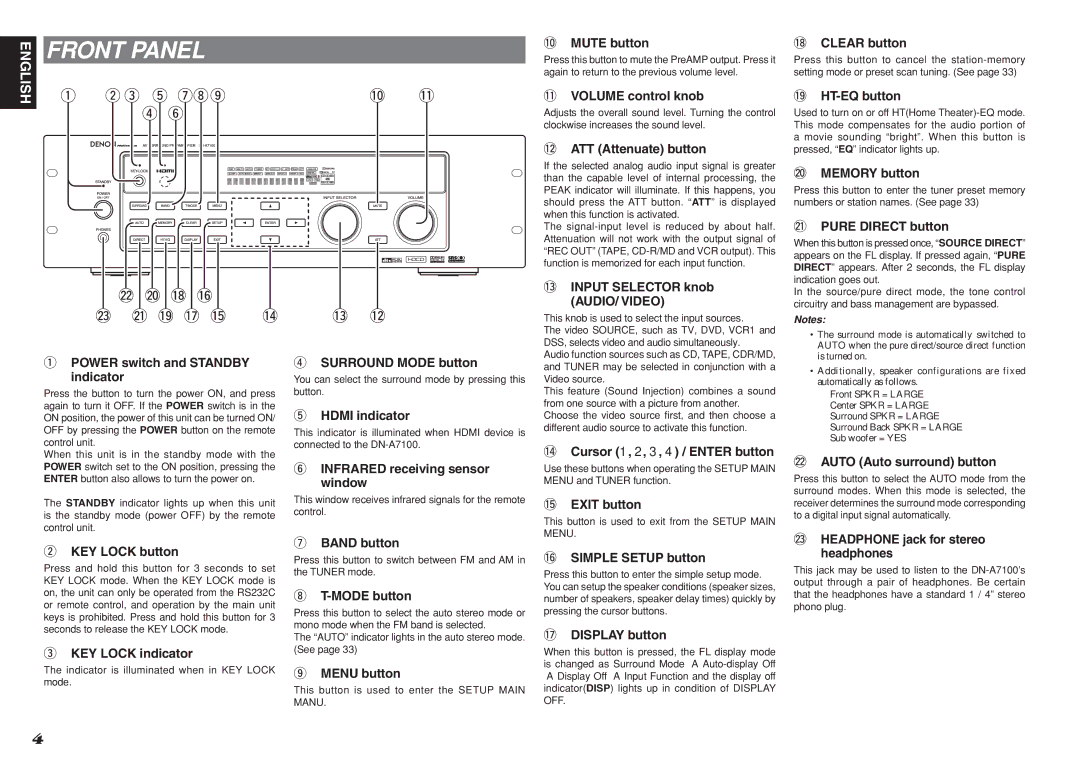
An intuitive front panel further enhances user experience, featuring a clear LCD display that provides easy access to settings and functions. The unit also supports remote control operation, allowing for flexible adjustments without needing to be physically present at the unit.
In summary, the Denon DN-A7100 is a powerful audio amplifier that excels in performance and adaptability. With its robust power output, advanced DSP capabilities, numerous connectivity options, and user-friendly features, it is an excellent choice for both audio professionals and home enthusiasts looking to elevate their audio experience. Whether in a professional sound environment or a home theater setup, the DN-A7100 delivers exceptional sound quality and reliable performance.