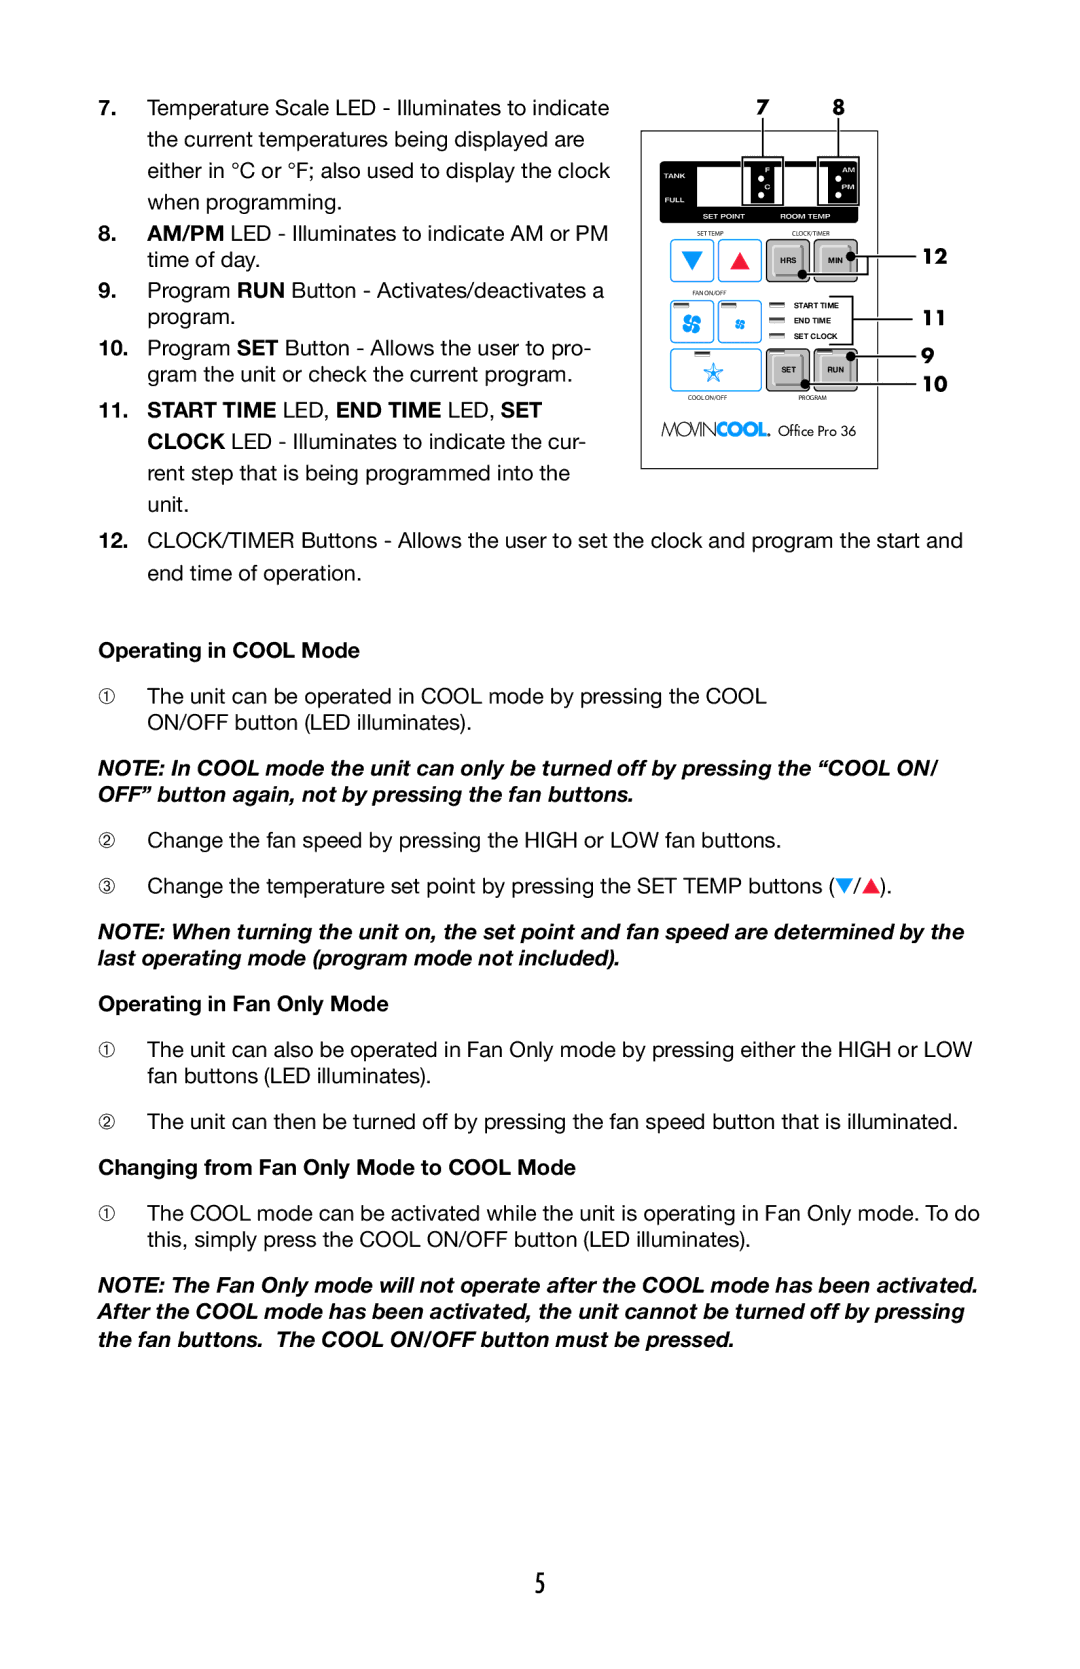
7.Temperature Scale LED - Illu minates to indicate the current temperatures being displayed are either in °C or °F; also used to display the clock when programming.
8.AM/PM LED - Illuminates to indicate AM or PM time of day.
9.Program RUN Button - Activates/deactivates a program.
10.Program SET Button - Allows the user to pro- gram the unit or check the current program.
78
SET TEMP | CLOCK/TIMER |
| |
| HRS | MIN | 12 |
FAN ON/OFF |
|
|
|
| START TIME | 11 | |
| END TIME | ||
| SET CLOCK |
| |
| SET | RUN | 9 |
| 10 | ||
COOL ON/OFF |
| PROGRAM | |
|
| ||
11.START TIME LED, END TIME LED, SET CLOCK LED - Illuminates to indicate the cur- rent step that is being programmed into the unit.
Office Pro 36
12.CLOCK/TIMER Buttons - Allows the user to set the clock and program the start and end time of operation.
Operating in COOL Mode
➀The unit can be operated in COOL mode by pressing the COOL ON/OFF button (LED illuminates).
NOTE: In COOL mode the unit can only be turned off by pressing the “COOL ON/ OFF” button again, not by pressing the fan buttons.
➁Change the fan speed by pressing the HIGH or LOW fan buttons.
➂Change the temperature set point by pressing the SET TEMP buttons (▼/▲).
NOTE: When turning the unit on, the set point and fan speed are determined by the last operating mode (program mode not included).
Operating in Fan Only Mode
➀The unit can also be operated in Fan Only mode by pressing either the HIGH or LOW fan buttons (LED illuminates).
➁The unit can then be turned off by pressing the fan speed button that is illuminated.
Changing from Fan Only Mode to COOL Mode
➀The COOL mode can be activated while the unit is operating in Fan Only mode. To do this, simply press the COOL O N/O FF button (LED illuminates).
NOTE: The Fan Only mode will not operate after the COOL mode has been activated. After the COOL mode has been activated, the unit cannot be turned off by pressing the fan buttons. The COOL ON/OFF button must be pressed.
5
