16
INSTALLATION
Installing Logs (Cont.)
INSTALLATION
Continued
6.Locate holes on the bottom of crossover log (#6). Slide these holes onto the right pins located in middle log (#2) and front log (#1). See Figure 30 for CCL3924PTA/NTA or CCL3930PTB/ NTB. See Figure 29, page 15, for CCL3018PA/NA or CCL3018PTA/NTA.
7.For CCL3930PTB/NTB only: Locate holes on the bottom of crossover log (#7). Slide onto the pins located in crossover log (#6) and middle log (#2). See Figure 31.
8.Add lava rock around base of heater if desired. Do not place any lava rock on logs or burner.
Crossover
Log (#6)
6
![]() Pins
Pins
Middle
Log (#2)
Front Log (#1)
Figure 30 - Installing Crossover Log #6 (CCL3930PTB/NTB Shown)
Holes | Crossover | |
Log (#7) | ||
|
7
Crossover
![]() Log (#6)
Log (#6)
Middle
Log (#2)
Pins
Figure 31 - Installing Crossover Log #7 (Model CCL3930PTB/ NTB Only)
Single Burner Seasonal Oak Models
CRL2718P/N, CRL2718P/N
![]() WARNING: Failure to position the parts in accor- dance with these diagrams or failure to use only parts specifically approved with this heater may result in property damage or personal injury.
WARNING: Failure to position the parts in accor- dance with these diagrams or failure to use only parts specifically approved with this heater may result in property damage or personal injury.
The Seasonal Oak Log Set is a reversible log set. This means that the two bottom logs may be turned to face either direction. The top log, however, must remain in the same position. Do not modify logs. Only use logs supplied with heater.
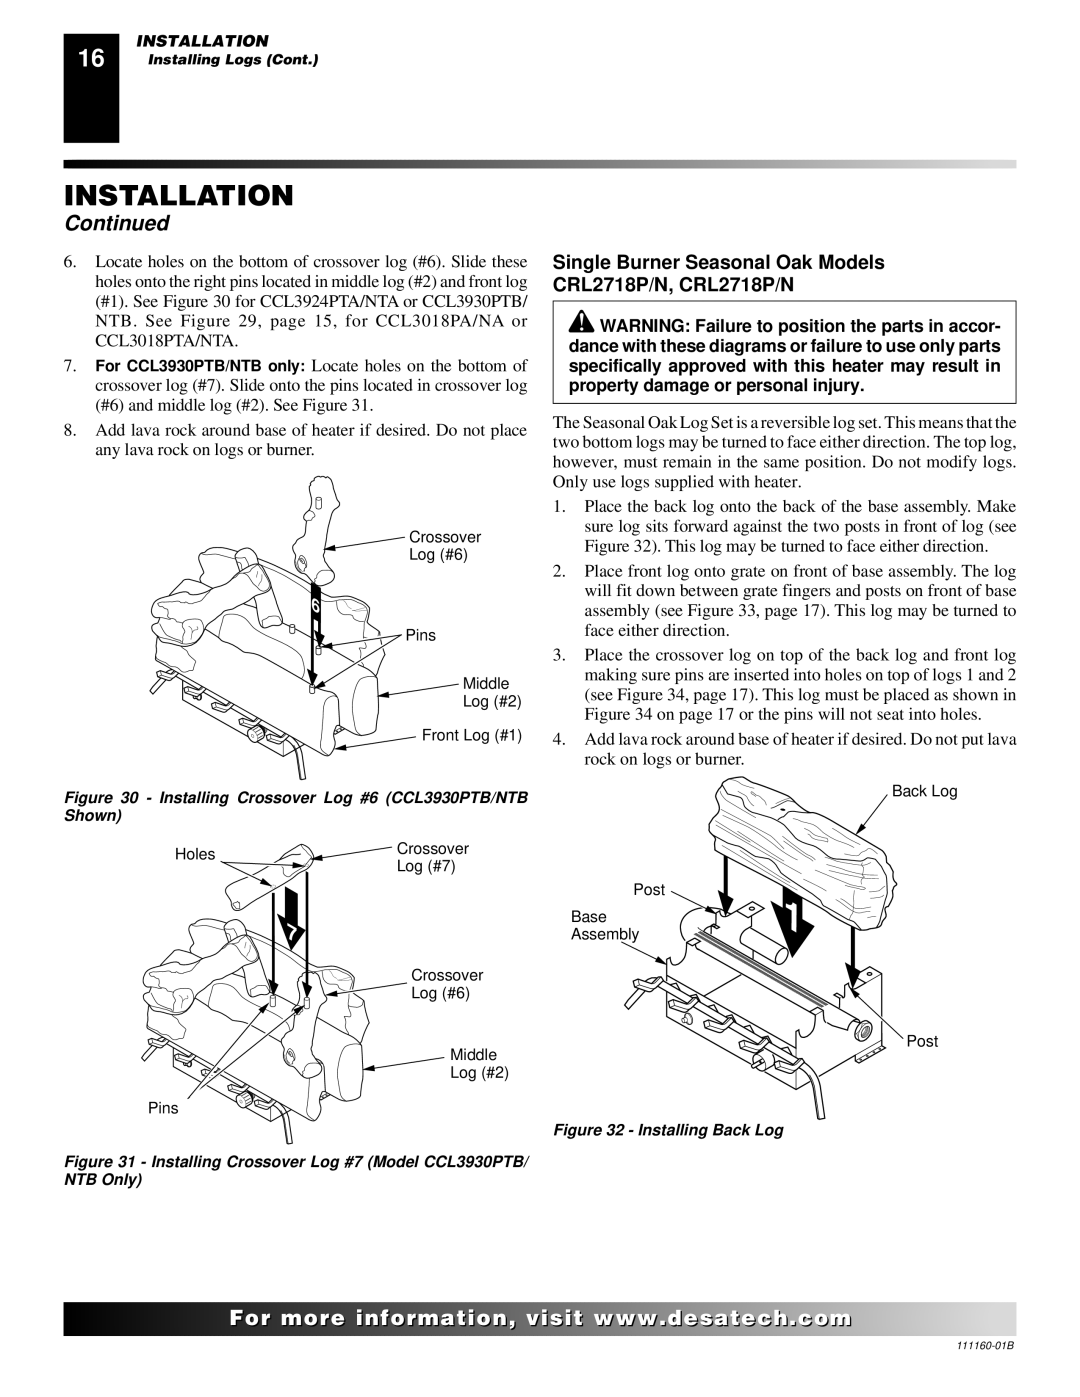
1.Place the back log onto the back of the base assembly. Make sure log sits forward against the two posts in front of log (see Figure 32). This log may be turned to face either direction.
2.Place front log onto grate on front of base assembly. The log will fit down between grate fingers and posts on front of base assembly (see Figure 33, page 17). This log may be turned to face either direction.
3.Place the crossover log on top of the back log and front log making sure pins are inserted into holes on top of logs 1 and 2 (see Figure 34, page 17). This log must be placed as shown in Figure 34 on page 17 or the pins will not seat into holes.
4.Add lava rock around base of heater if desired. Do not put lava rock on logs or burner.
Back Log
Post
Base
Assembly
Post
Figure 32 - Installing Back Log
![]()
![]()
![]()
![]()
![]() For
For![]()
![]()
![]()
![]()
![]()
![]()
![]()
![]()
![]()
![]()
![]()
![]()
![]() .
.![]()
![]()
![]()
![]() .com
.com![]()
![]()
![]()
![]()
![]()