22
INSTALLATION
Installing Logs (Cont.)
Installing Battery Into Remote
Installing Screen
INSTALLATION
Continued
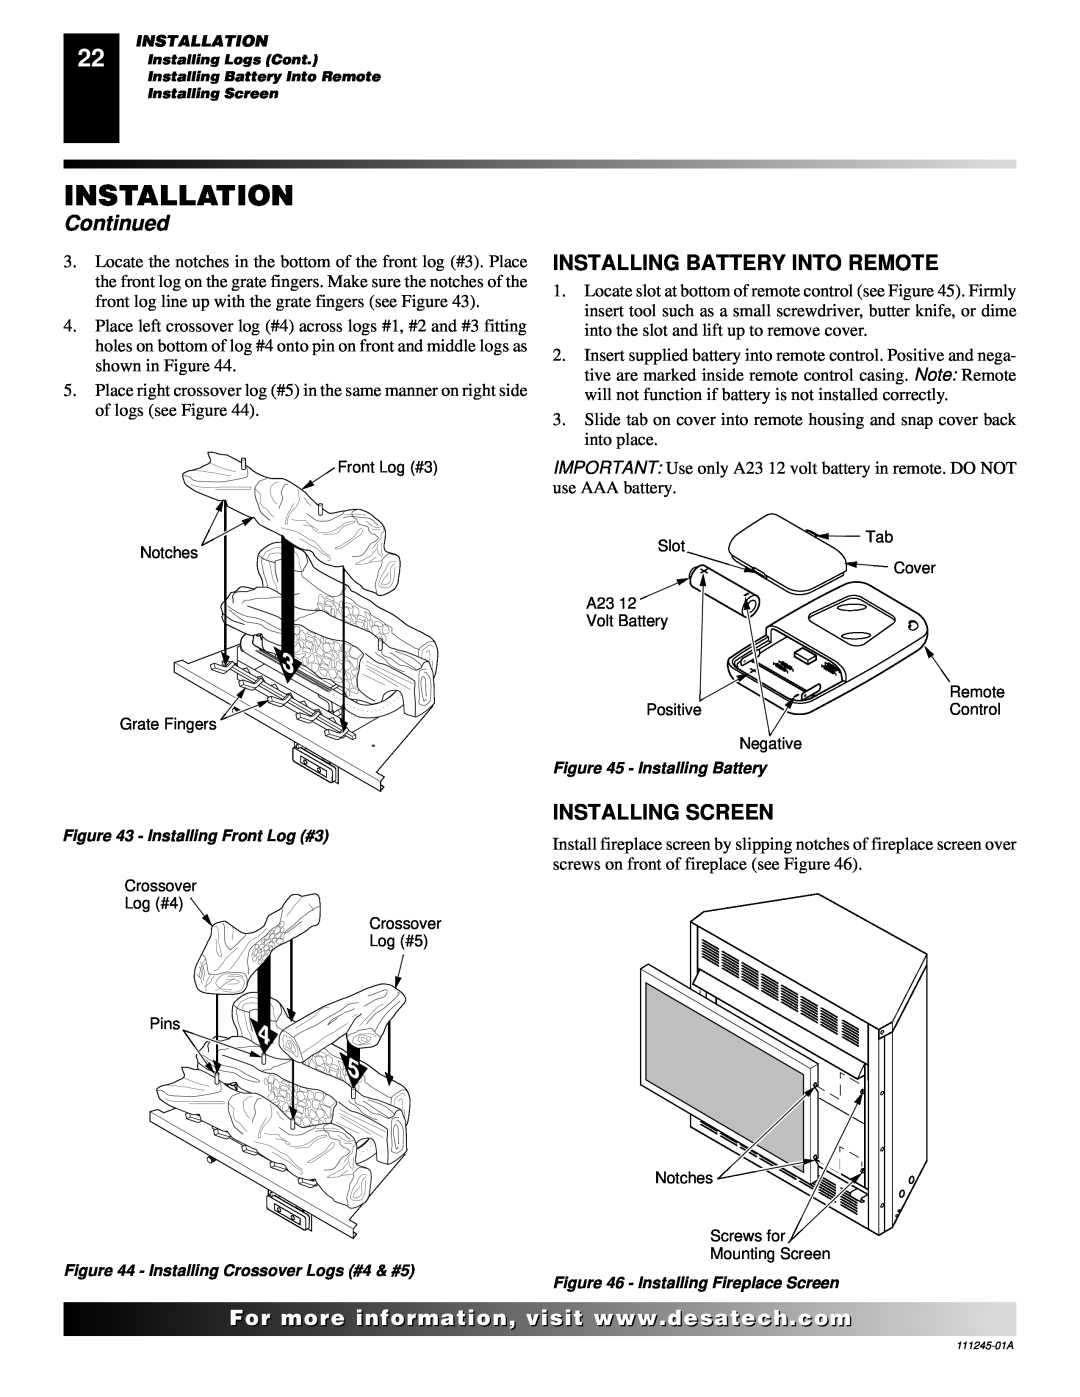
3.Locate the notches in the bottom of the front log (#3). Place the front log on the grate fingers. Make sure the notches of the front log line up with the grate fingers (see Figure 43).
4.Place left crossover log (#4) across logs #1, #2 and #3 fitting holes on bottom of log #4 onto pin on front and middle logs as shown in Figure 44.
5.Place right crossover log (#5) in the same manner on right side of logs (see Figure 44).
Front Log (#3)
INSTALLING BATTERY INTO REMOTE
1.Locate slot at bottom of remote control (see Figure 45). Firmly insert tool such as a small screwdriver, butter knife, or dime into the slot and lift up to remove cover.
2.Insert supplied battery into remote control. Positive and nega- tive are marked inside remote control casing. Note: Remote will not function if battery is not installed correctly.
3.Slide tab on cover into remote housing and snap cover back into place.
IMPORTANT: Use only A23 12 volt battery in remote. DO NOT use AAA battery.
Notches
Slot
A23 12 Volt Battery
![]() Tab
Tab
![]() Cover
Cover
Grate Fingers
| Remote |
Positive | Control |
Negative |
|
Figure 45 - Installing Battery |
|
Figure 43 - Installing Front Log (#3)
INSTALLING SCREEN
Install fireplace screen by slipping notches of fireplace screen over screws on front of fireplace (see Figure 46).
Crossover Log (#4) ![]()
Pins
Crossover Log (#5)
Notches ![]()
![]()
![]()
Screws for
Mounting Screen
Figure 44 - Installing Crossover Logs (#4 & #5)
Figure 46 - Installing Fireplace Screen
![]()
![]()
![]()
![]()
![]() For
For![]()
![]()
![]()
![]()
![]()
![]()
![]()
![]()
![]()
![]()
![]()
![]()
![]() .
.![]()
![]()
![]()
![]() .com
.com![]()
![]()
![]()
![]()
![]()