
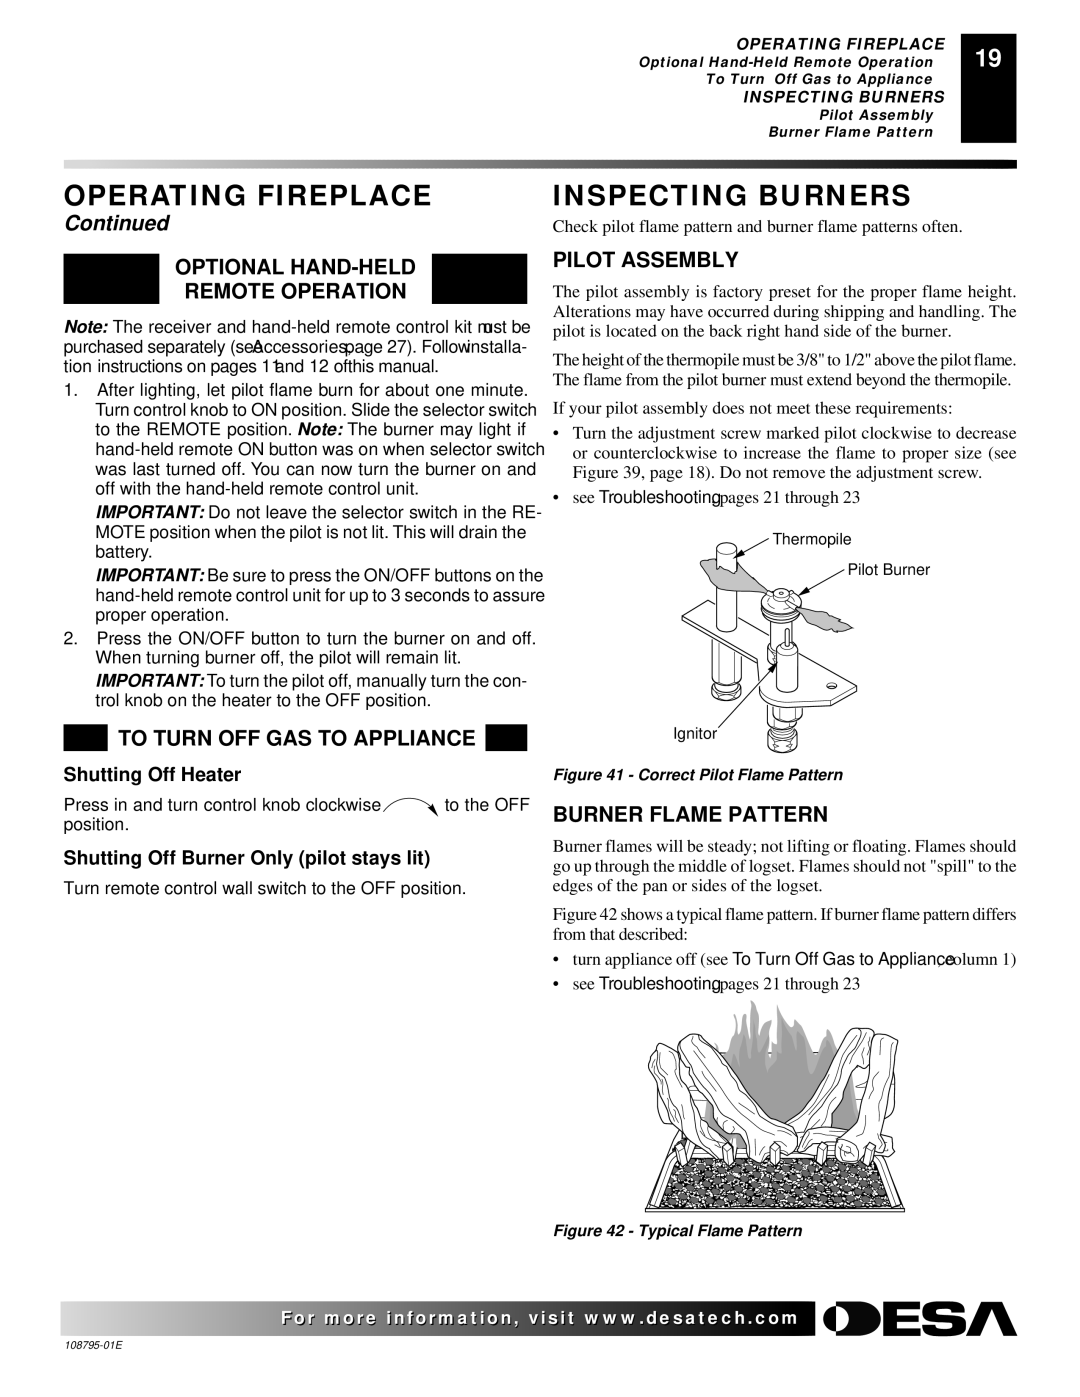
M36, VM42 specifications
Desa VM42 and M36 are two innovative products that have emerged from advanced engineering and technology, combining efficiency and performance in their respective fields. These machines are known for their unique features and characteristics that set them apart in the marketplace.Desa VM42 is engineered for versatility and efficiency, making it an optimal choice for various applications. Its standout feature is its user-friendly interface, which allows operators to quickly adapt to using the machine, reducing the learning curve significantly. The VM42 is equipped with state-of-the-art automation technology, which facilitates precision engineering and minimal human error. This machine also boasts advanced thermal management systems that ensure consistent operation even under high loads, extending its lifespan and maintenance intervals.
On the other hand, the M36 model primarily emphasizes robust durability and power. The M36 comes with a heavy-duty chassis and is built to withstand harsh operating conditions, making it ideal for heavy industrial tasks. Its design includes high-strength materials and reinforced structural components, ensuring resilience against wear and tear. The M36 is equipped with a powerful engine that boosts productivity while maintaining fuel efficiency, a crucial aspect for reducing operational costs.
Both models leverage cutting-edge technologies such as IoT connectivity. This feature allows real-time monitoring and analysis of machine performance, making it easier for operators to handle maintenance proactively. Furthermore, the integration of smart sensors enhances safety by alerting users about potential issues before they escalate.
In terms of customization, Desa provides various options for both the VM42 and M36, allowing users to tailor specifications based on their specific needs. This flexibility ensures that customers can maximize the utility of these machines according to their operational requirements.
Another notable characteristic of both models is their environmental consciousness. Designed with eco-friendly technologies, they help in minimizing emissions and energy consumption. This aligns well with contemporary demands for sustainable practices in industrial operations.
In summary, Desa VM42 and M36 represent the pinnacle of modern engineering, combining user-friendly interfaces, robust designs, and innovative technologies to deliver exceptional performance in various applications. These machines not only enhance productivity but also support sustainable operational practices, making them leaders in their fields.