VENTING INSTALLATION INSTRUCTIONS
Installation Planning (Cont.)
9
VENTING INSTALLATION INSTRUCTIONS
Continued
![]() WARNING: Do not recess vent termination into any wall. This will cause a fire hazard.
WARNING: Do not recess vent termination into any wall. This will cause a fire hazard.
6.Noncombustible Exterior Wall: Position the horizontal vent cap in the center of the 8 1/2" round hole and attach to the exte- rior wall with four wood screws provided. Before attaching the vent cap to exterior wall, run a bead of
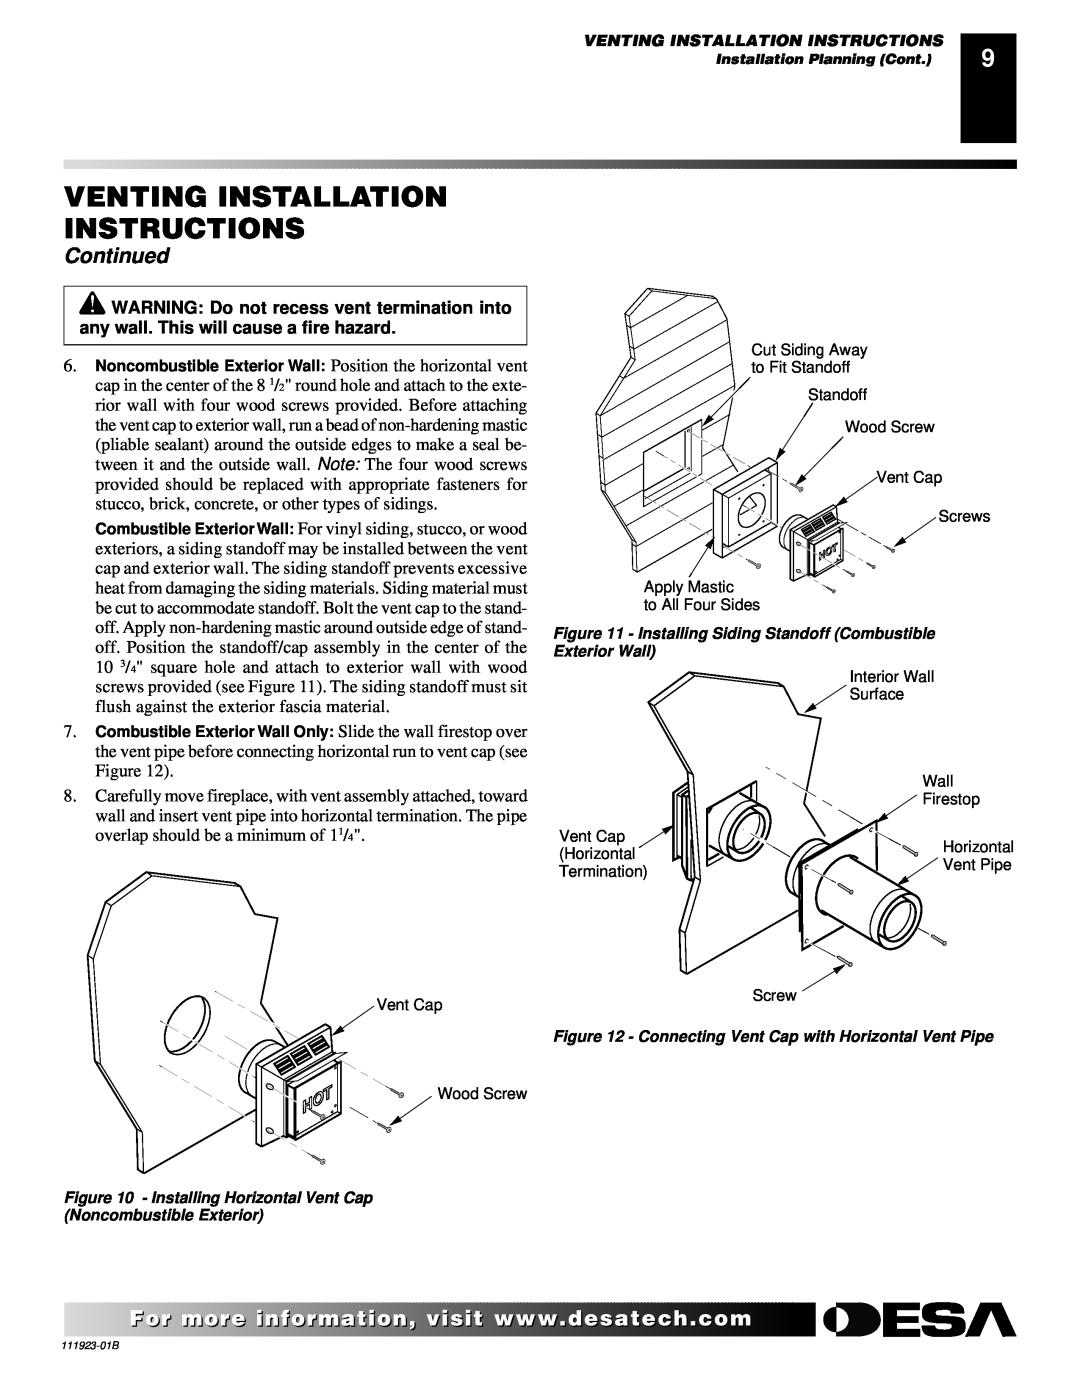
Combustible Exterior Wall: For vinyl siding, stucco, or wood exteriors, a siding standoff may be installed between the vent cap and exterior wall. The siding standoff prevents excessive heat from damaging the siding materials. Siding material must be cut to accommodate standoff. Bolt the vent cap to the stand- off. Apply
7.Combustible Exterior Wall Only: Slide the wall firestop over the vent pipe before connecting horizontal run to vent cap (see Figure 12).
8.Carefully move fireplace, with vent assembly attached, toward wall and insert vent pipe into horizontal termination. The pipe overlap should be a minimum of 11/4".
Vent Cap
Wood Screw
Figure 10 - Installing Horizontal Vent Cap
(Noncombustible Exterior)
Cut Siding Away to Fit Standoff
Standoff
Wood Screw
![]() Vent Cap
Vent Cap
Screws
Apply Mastic
to All Four Sides
Figure 11 - Installing Siding Standoff (Combustible Exterior Wall)
Interior Wall
![]() Surface
Surface
Wall
![]() Firestop
Firestop
Vent Cap | Horizontal | |
(Horizontal | ||
Vent Pipe | ||
Termination) | ||
|
Screw
Figure 12 - Connecting Vent Cap with Horizontal Vent Pipe
![]() For more
For more![]()
![]()
![]() visit www.
visit www.![]()
![]()
![]() .com
.com![]()
![]()
![]()
![]()
![]()
![]()