FINISHING YOUR FIREBOX
CABINET DOOR INSTALLATION
Brushed brass glass doors have been provided with this firebox. A set includes the front glass panel assembly. They come in different styles, check with your local distributor for availability and options.
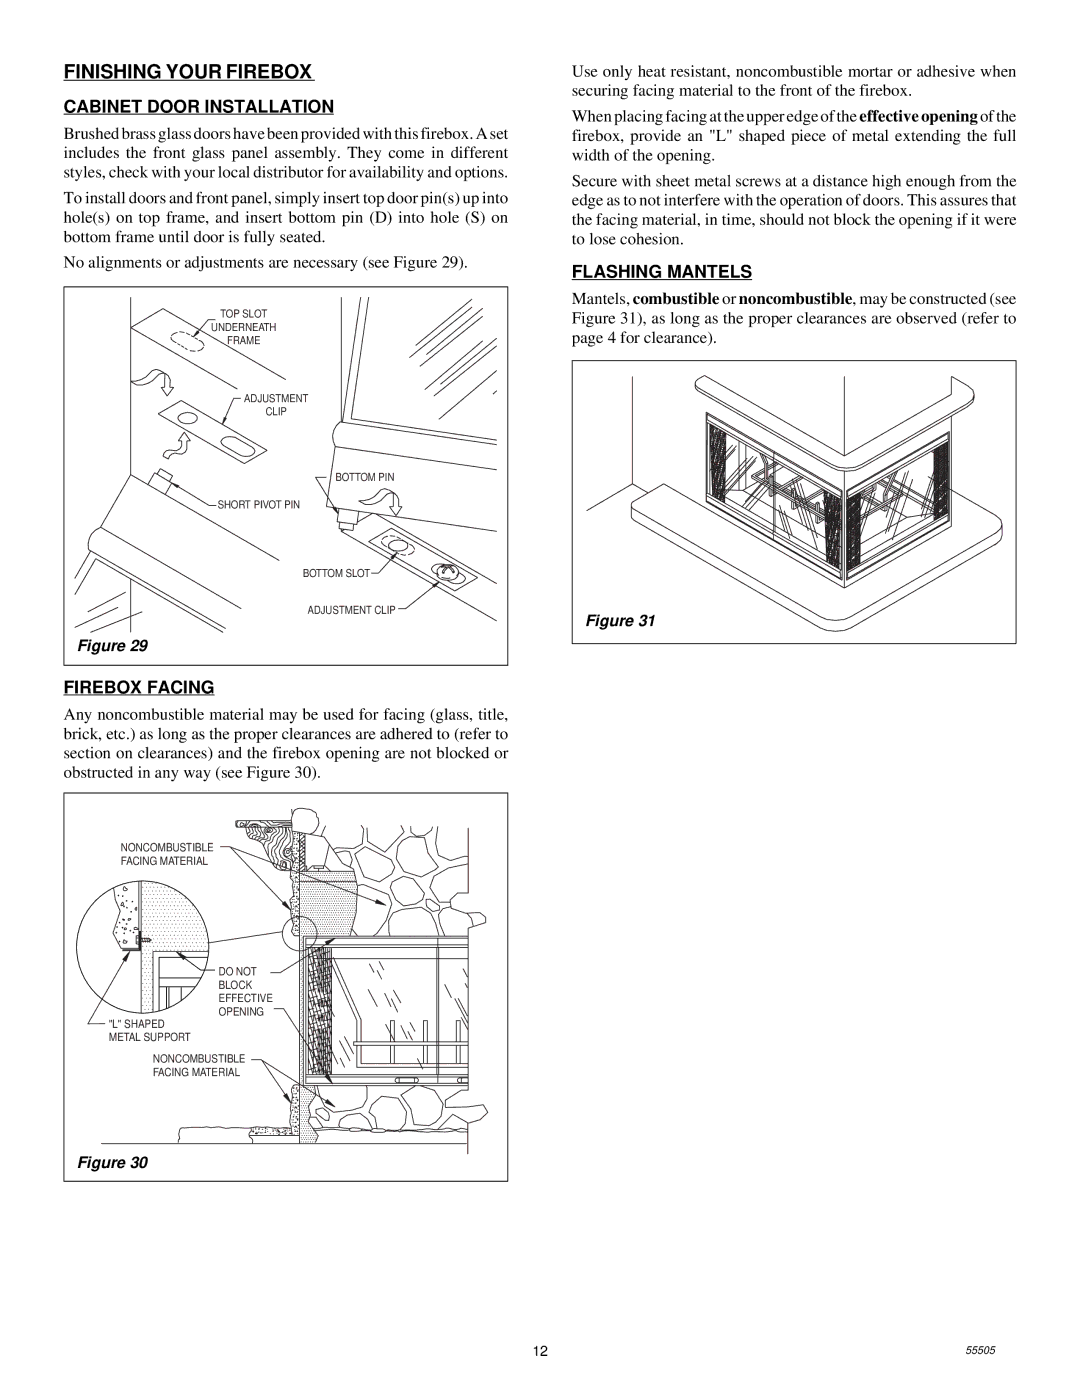
To install doors and front panel, simply insert top door pin(s) up into hole(s) on top frame, and insert bottom pin (D) into hole (S) on bottom frame until door is fully seated.
No alignments or adjustments are necessary (see Figure 29).
TOP SLOT |
UNDERNEATH |
FRAME |
ADJUSTMENT |
CLIP |
BOTTOM PIN |
SHORT PIVOT PIN |
BOTTOM SLOT |
ADJUSTMENT CLIP |
Figure 29 |
FIREBOX FACING
Any noncombustible material may be used for facing (glass, title, brick, etc.) as long as the proper clearances are adhered to (refer to section on clearances) and the firebox opening are not blocked or obstructed in any way (see Figure 30).
NONCOMBUSTIBLE |
FACING MATERIAL |
DO NOT |
BLOCK |
EFFECTIVE |
OPENING |
"L" SHAPED |
METAL SUPPORT |
NONCOMBUSTIBLE |
FACING MATERIAL |
Figure 30 |
Use only heat resistant, noncombustible mortar or adhesive when securing facing material to the front of the firebox.
When placing facing at the upper edge of the effective opening of the firebox, provide an "L" shaped piece of metal extending the full width of the opening.
Secure with sheet metal screws at a distance high enough from the edge as to not interfere with the operation of doors. This assures that the facing material, in time, should not block the opening if it were to lose cohesion.
FLASHING MANTELS
Mantels, combustible or noncombustible, may be constructed (see Figure 31), as long as the proper clearances are observed (refer to page 4 for clearance).
Figure 31 |
12 | 55505 |
