
 2
2 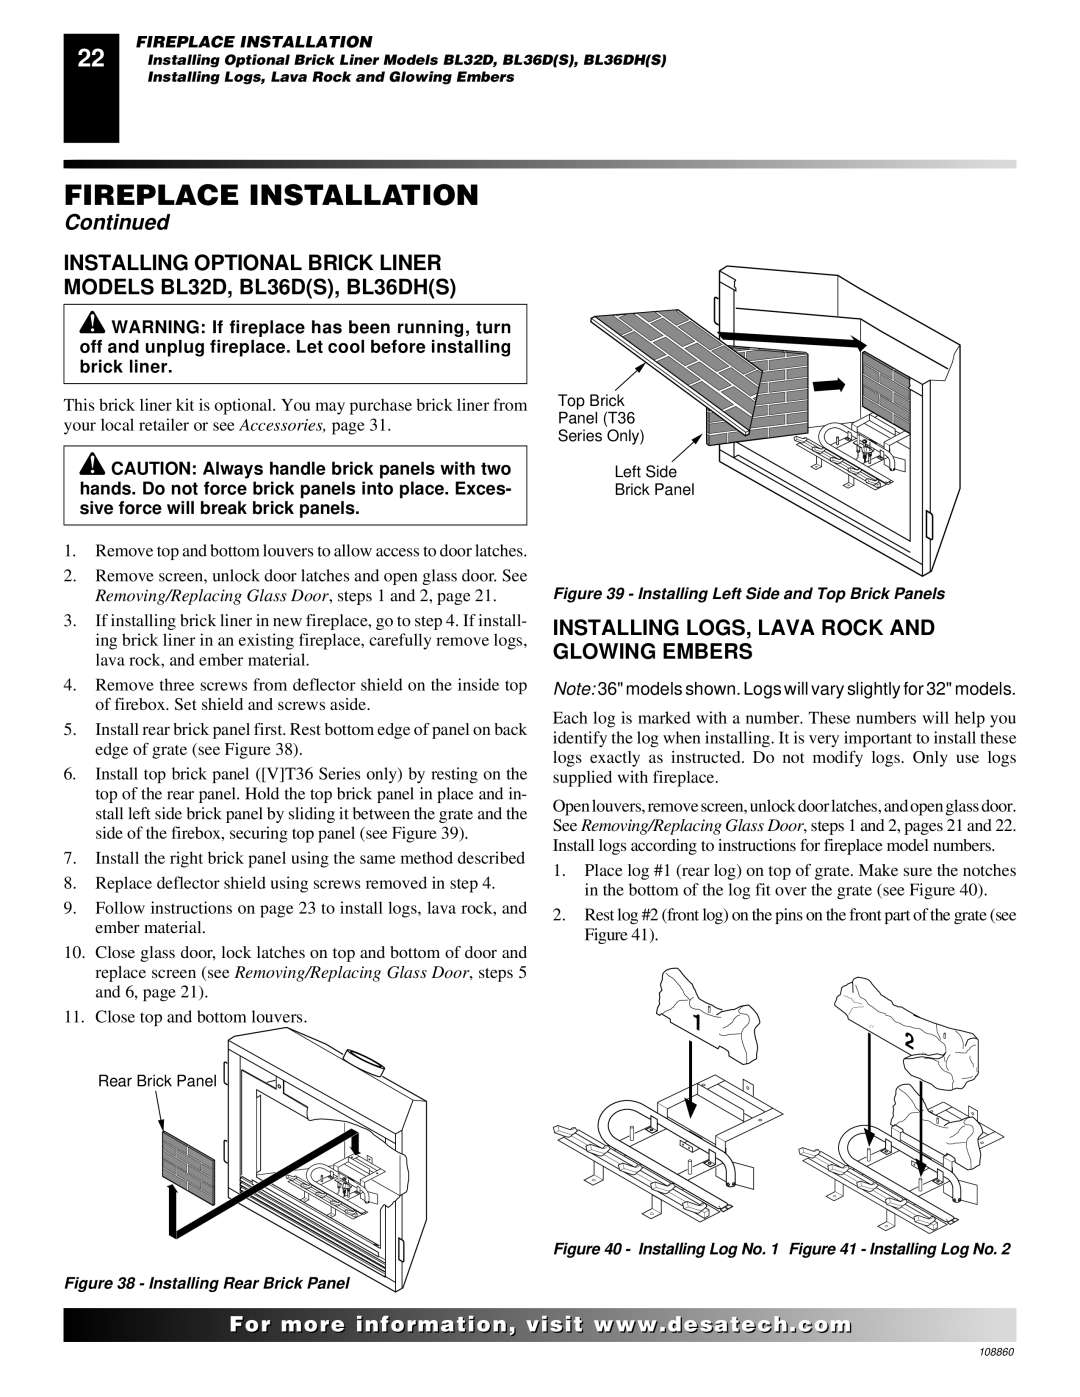
(V)T32EP, V)T32EN, (V)T36EP SERIES, (V)T36EN SERIES specifications
The Desa (V)T36EP Series, (V)T32EP, (V)T36EN Series, and (V)T32EN represent a significant advancement in heating technology, designed to deliver efficient warmth and comfort in various environments. These models are notable for their innovations, user-friendly features, and durability, making them a popular choice among consumers seeking effective heating solutions.One of the main features of the Desa (V)T36EP and (V)T32EP models is their energy efficiency. Engineered with advanced combustion systems, these units optimize fuel usage, translating to lower energy bills while maintaining superior heating performance. The energy efficiency ratings of these models are impressive, making them not only environmentally friendly but also cost-effective in the long run.
The (V)T36EN and (V)T32EN series offer similar energy-efficient heating solutions without compromising on output capacity. Both series employ a robust design that ensures consistent performance even in colder climates. The built-in thermostat and multiple heat settings allow users to customize their heating experience, ensuring maximum comfort geared to individual preferences.
Technologically, the Desa models boast a range of innovative features. The automatic shut-off function promotes safety by turning the unit off when it reaches an unsafe temperature or if it tips over. This feature is crucial for families with children and pets, providing peace of mind. Additionally, the user-friendly controls make adjusting settings straightforward, further enhancing the user experience.
Durability is another key characteristic of the Desa (V)T36EP, (V)T32EP, (V)T36EN, and (V)T32EN series. Constructed from high-quality materials, these units are designed to withstand the rigors of daily use. The stylish yet practical design allows them to blend seamlessly with various decors while providing reliable heating.
Furthermore, the models in this series are designed for ease of maintenance. The accessible filters and components make routine cleaning simple, ensuring the units operate efficiently over their lifespan.
In conclusion, the Desa (V)T36EP SERIES, (V)T32EP, (V)T36EN SERIES, and (V)T32EN models represent a perfect blend of efficiency, safety, and durability, catering to modern heating needs. Their advanced features and technologies provide an excellent solution for consumers looking for long-lasting and reliable heating options in any living space.